ttk Spinbox
In Tkinter, the Spinbox widget provides a convenient way for users to select a value from a predefined range. However, the regular Tkinter Spinbox has some limitations in terms of appearance. This is where ttk Spinbox comes in.
Just like the regular Tkinter Spinbox, ttk Spinbox also allows users to select a value from a range by clicking on up and down arrows or by typing directly into the widget. However, it offers a more modern and consistent appearance compared to the Tkinter Spinbox because it inherits the theme of the operating system.
Creating Your First ttk Spinbox
Now, we’re going to create a basic Tkinter application with a ttk Spinbox that lets users select a number from 1 to 100.
Example:
import tkinter as tk
from tkinter import ttk
def on_spinbox_change():
# Get the selected value from the spinbox
selected_value = spinbox.get()
# Update the label to display the selected value
value_label.config(text="Selected value: " + selected_value)
root = tk.Tk()
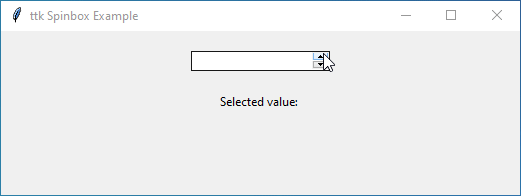
root.title("ttk Spinbox Example")
# Create a ttk Spinbox
spinbox = ttk.Spinbox(root, from_=1, to=100, command=on_spinbox_change)
spinbox.pack(pady=20)
# Label to display the selected value
value_label = tk.Label(root, text="Selected value: ")
value_label.pack()
root.mainloop()Output:
Familiar Options in ttk Spinbox
One of the coolest things about ttk Spinbox is that it still supports all the options you’re familiar with from the regular Spinbox. Let’s take a quick look at some of these options:
from_ and to
These options set the range of values available in the ttk Spinbox. from_ determines the starting value, while to sets the end value. For instance, from_=1 and to=10 would create a Spinbox with values from 1 to 10.
Example:
import tkinter as tk
from tkinter import ttk

root = tk.Tk()
root.title("ttk Spinbox: Setting Limits Example")

# Creating a ttk Spinbox with limits from 1 to 10
spinbox = ttk.Spinbox(root, from_=1, to=5)
spinbox.pack(pady=20)

root.mainloop()
Output:
command
The command option lets you specify a function to run whenever the Spinbox value changes. It’s handy for updating other parts of the GUI based on the selected value.
Example:
import tkinter as tk
from tkinter import ttk
def on_spinbox_change():
selected_value = spinbox.get()
value_label.config(text="Selected value: " + selected_value)
# Add your custom command here
if int(selected_value) % 2 == 0:
value_label.config(fg="green")
else:
value_label.config(fg="red")
root = tk.Tk()
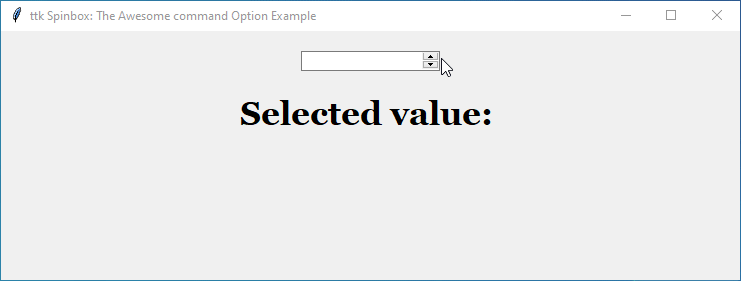
root.title("ttk Spinbox: The Awesome command Option Example")
# Creating a ttk Spinbox with command option
spinbox = ttk.Spinbox(root, from_=1, to=10, command=on_spinbox_change)
spinbox.pack(pady=20)
# Label to display the selected value
value_label = tk.Label(root, text="Selected value: ", font="georgia 25 bold")
value_label.pack()
root.mainloop()Output:
increment
This option controls how much the value changes when users click the Spinbox arrows. By default, it’s 1, but you can adjust it to suit your needs.
Example:
import tkinter as tk
from tkinter import ttk

def on_spinbox_change():
    selected_slices = spinbox.get()
    value_label.config(text=f"You've selected {selected_slices} slices of pizza!")

root = tk.Tk()
root.title("Pizza Slices Selector")

# Creating a ttk Spinbox for selecting pizza slices
spinbox = ttk.Spinbox(root, from_=2, to=20, increment=2, command=on_spinbox_change)
spinbox.pack(pady=20)

# Label to display the selected number of pizza slices
value_label = tk.Label(root, text="", font="georgia 20 bold")
value_label.pack()

root.mainloop()
Output:
format
With the format option, you can control how the values are displayed. It allows you to customize aspects like decimal places or adding prefixes/suffixes to the values.
Example:
import tkinter as tk
from tkinter import ttk

def on_spinbox_change():
    try:
        # Get the selected hour and minute from the Spinboxes
        selected_hour = int(hour_spinbox.get())
        selected_minute = int(minute_spinbox.get())
        # Check if the selected time is valid
        if 0 <= selected_hour <= 23 and 0 <= selected_minute <= 59:
            # Update the label to display the selected time in HH:MM format
            time_label.config(text="Selected time: {:02d}:{:02d}".format(selected_hour, selected_minute))
        else:
            # Display an error message if the time is invalid
            raise ValueError("Invalid time")
    except ValueError as e:
        # Display an error message if there's a value error
        time_label.config(text="Invalid time")

root = tk.Tk()
root.title("ttk Spinbox: Making Time Look Fancy")

# Creating a ttk Spinbox for hours with format
hour_spinbox = ttk.Spinbox(root, from_=0, to=23, format='%02.0f', command=on_spinbox_change)
hour_spinbox.pack(pady=10, padx=5, side=tk.LEFT)

# Separator between hours and minutes
separator_label = tk.Label(root, text=":")
separator_label.pack(pady=10, side=tk.LEFT)

# Creating a ttk Spinbox for minutes with format
minute_spinbox = ttk.Spinbox(root, from_=0, to=59, format='%02.0f', command=on_spinbox_change)
minute_spinbox.pack(pady=10, padx=5, side=tk.LEFT)

# Label to display the selected time
time_label = tk.Label(root, text="Selected time: ")
time_label.pack(pady=20)

root.mainloop()
Output:

values
Instead of a range, you can provide a list of specific values using the values option. This restricts the selection to only those values in the list.
Example:
import tkinter as tk
from tkinter import ttk
def on_spinbox_change():
selected_value = spinbox.get()
if selected_value == "😊":
emoji_label.config(text="😊 Smiling Face")
elif selected_value == "🍎":
emoji_label.config(text="🍎 Red Apple")
elif selected_value == "🍌":
emoji_label.config(text="🍌 Banana")
elif selected_value == "🍊":
emoji_label.config(text="🍊 Tangerine")
elif selected_value == "🍓":
emoji_label.config(text="🍓 Strawberry")
else:
emoji_label.config(text="")
root = tk.Tk()
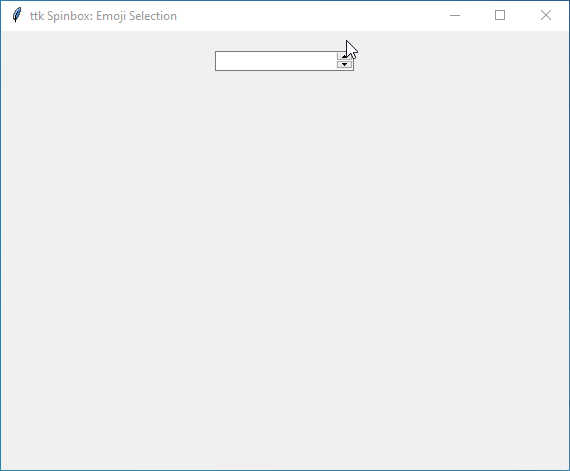
root.title("ttk Spinbox: Emoji Selection")
# Create a list of emoji options
emojis = ("😊", "🍎", "🍌", "🍊", "🍓")
# Creating a ttk Spinbox with emoji options
spinbox = ttk.Spinbox(root, values=emojis, command=on_spinbox_change)
spinbox.pack(pady=20)
# Label to display the selected emoji description
emoji_label = tk.Label(root, font=("Segoe UI Emoji", 25))
emoji_label.pack(pady=10)
root.mainloop()Output:
wrap
The wrap option decides if the Spinbox should wrap around when reaching the minimum or maximum value. If set to True, it seamlessly goes from the minimum to the maximum value and vice versa.
Example:
import tkinter as tk
from tkinter import ttk
root = tk.Tk()
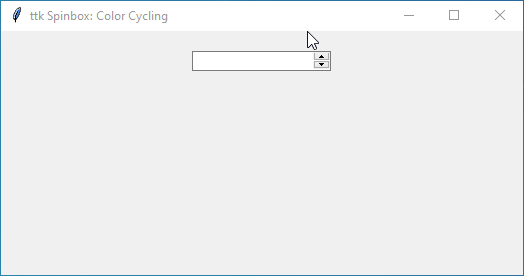
root.title("ttk Spinbox: Color Cycling")
# Create a list of color options
colors = ("red", "green", "blue", "yellow", "purple")
# Function to handle Spinbox value change
def on_spinbox_change():
selected_value = spinbox.get()
color_label.config(bg=selected_value)
# Creating a ttk Spinbox with color options and wrap enabled
spinbox = ttk.Spinbox(root, values=colors, wrap=True, command=on_spinbox_change)
spinbox.pack(pady=20)
# Label to display the selected color
color_label = tk.Label(root, width=20, height=5)
color_label.pack(pady=10)
root.mainloop()Output:
In addition to the familiar options discussed earlier, ttk Spinbox also supports several other standard options:
cursorstatestyletakefocusxscrollcommand
If you’re curious to learn more about these options and their usage, refer to the Tkinter Standard Options and ttk and ttk style.
Set and Get Commands with ttk Spinbox
In Tkinter, you can easily manage the value of a ttk Spinbox widget using the set() and get() methods. Let’s explore these methods.
The set() method lets you specify a value to be displayed in the Spinbox. You can use this to initialize the Spinbox with a particular value or update it dynamically based on user interactions or application logic.
Here’s how it works:
spinbox.set(50) # Set the Spinbox value to 50
By using the get() method, you can retrieve the current value of the Spinbox. This is useful for fetching the selected value and using it for further processing, such as performing calculations.
current_value = spinbox.get() # Retrieve the current Spinbox value
By combining the set() and get() methods, you can create dynamic applications. Check out this simple example :
Example:
import tkinter as tk
from tkinter import ttk
def set_spinbox_value():
spinbox.set(50) # Set the Spinbox value to 50
current_value = spinbox.get() # Retrieve the current Spinbox value
value_label.config(text="Current value: " + str(current_value)) # Update the label with the current value
root = tk.Tk()
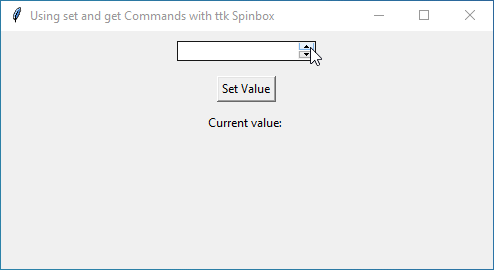
root.title("Using set and get Commands with ttk Spinbox")
# Create a ttk Spinbox widget
spinbox = ttk.Spinbox(root, from_=0, to=100)
spinbox.pack(pady=10)
# Create a button to set the Spinbox value
set_button = tk.Button(root, text="Set Value", command=set_spinbox_value)
set_button.pack(pady=5)
# Create a label to display the current value
value_label = tk.Label(root, text="Current value: ")
value_label.pack(pady=5)
root.mainloop()Output:
Styling Your ttk Spinbox
By default, ttk Spinboxes adopt the system theme, but with ttk styles, you can tweak their appearance to match your application’s design preferences.
To style ttk Spinboxes, you’ll need to create and configure ttk styles using the ttk.Style() class. You’ll also use the class name 'TSpinbox' to target all the ttk Spinboxes when defining style options.
Now, let’s say you only want to style certain ttk Spinboxes, leaving others unchanged. You can achieve this by creating custom class names. Here’s how:
Create a custom class name:
from tkinter import ttk

# Create a ttk Style object
style = ttk.Style()

# Configure a new style class for the Spinbox
style.configure("newstylename.TSpinbox", options...)
Apply the custom class name to specific ttk Spinboxes:
spinbox = ttk.Spinbox(root, from_=0, to=10, style="newstylename.TSpinbox")
By following these steps, you can customize the appearance of specific ttk Spinboxes without affecting others.
Here’s a creative example that shows you the different styles of ttk Spinboxes:
Example:
import tkinter as tk
from tkinter import ttk
def create_spinbox_with_style(parent, style_name, text_values, **kwargs):
# Create a ttk Style instance
style = ttk.Style()
# Configure the ttk Spinbox style with provided options
style.configure(style_name + ".TSpinbox", **kwargs)
# Create ttk Spinbox with the specified style and text values
spinbox = ttk.Spinbox(parent, style=style_name + ".TSpinbox", values=text_values, font=("Helvetica", 20))
return spinbox
# Initialize the root window
root = tk.Tk()
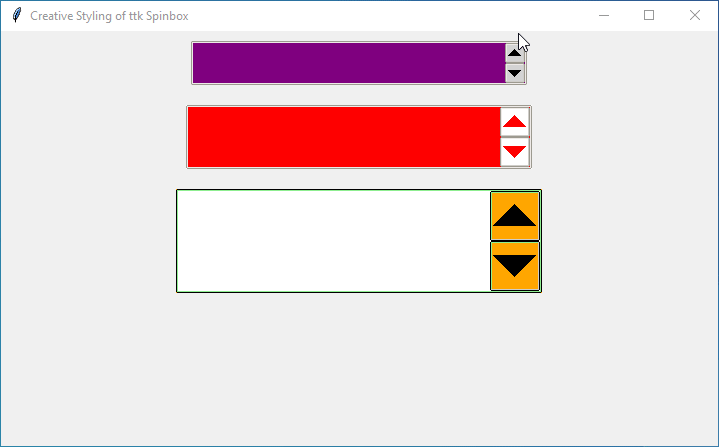
root.title("Creative Styling of ttk Spinbox")
# Define different text values for each Spinbox
text_values1 = ("Small", "Medium", "Large")
text_values2 = ("One", "Two", "Three")
text_values3 = ("Red", "Green", "Blue")
# Apply different themes to the root window
style = ttk.Style()
style.theme_use("clam") # You can change the theme to 'alt', 'default', 'classic', or 'vista'
# Create and pack ttk Spinboxes with different styles
spinbox1 = create_spinbox_with_style(root, "Style1",
text_values1,
foreground="white",
background="lightgrey",
insertwidth=20,
arrowsize=20,
fieldbackground="purple")
spinbox1.pack(pady=10)
spinbox2 = create_spinbox_with_style(root, "Style2",
text_values2,
foreground="yellow",
background="white",
arrowcolor="red",
insertcolor="white",
insertwidth=25,
selectbackground="red",
arrowsize=30,
fieldbackground="red")
spinbox2.pack(pady=10)
spinbox3 = create_spinbox_with_style(root, "Style3",
text_values3,
foreground="purple",
background="orange",
bordercolor="black",
lightcolor="lightgreen",
arrowsize=50)
spinbox3.pack(pady=10)
# Start the Tkinter event loop
root.mainloop()Output:
Style Options of ttk Spinbox
Below, you’ll find a table listing the style configuration options that will help you design your ttk Spinbox.
But remember that all options do not apply to all themes.
| Style Option | Description |
|---|---|
arrowcolor | Color of the arrow buttons |
arrowsize | Size of the arrow buttons |
bordercolor | Color of the border |
darkcolor | Color of the darker shading |
fieldbackground | Background color of the entry field |
foreground | Text color |
insertcolor | Color of the insertion cursor |
insertwidth | Width of the insertion cursor |
lightcolor | Color of the lighter shading |
padding | Padding around the text and arrow buttons |
selectbackground | Background color when text is selected |
selectforeground | Text color when text is selected |
Validation in ttk Spinbox
Validation in ttk Spinbox is an effective feature that allows you to ensure that user input meets certain criteria before it is accepted. The validate and validatecommand options help you with ttk Spinbox validation.
The validate option determines when validation occurs, and the validatecommand specifies the validation function to execute. By default, the validate option is set to "none", indicate no validation. You can set it to "key", "focus", "focusout", or "all" to trigger validation during keypress, focus change, or both, respectively.
Example:
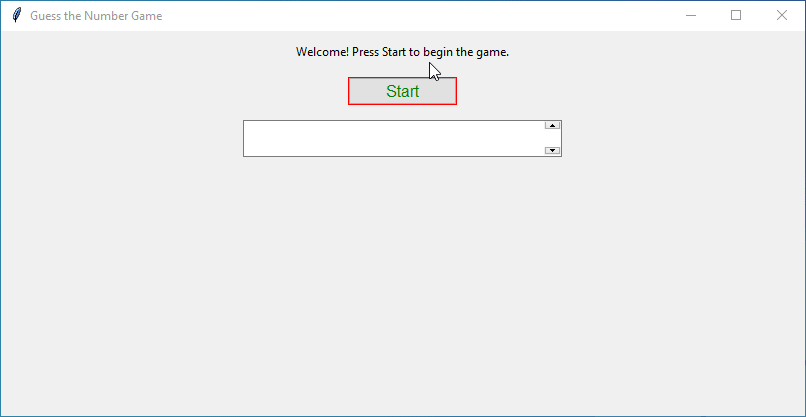
In this example, we’ll demonstrate how to implement validation in a ttk Spinbox for a “Guess the Number” game.
import tkinter as tk
from tkinter import ttk
import random

# Function to validate user's guess input
def validate_guess(new_value):
    try:
        # Convert the new input value to an integer
        guess = int(new_value)
        # Check if the guess is within the valid range (1 to 100)
        if 1 <= guess <= 100:
            # Compare the guess with the secret number
            if guess == secret_number:
                # Display a congratulatory message if the guess is correct
                result_label.config(text="Congratulations! You guessed the number!")
            elif guess < secret_number:
                # Provide feedback if the guess is too low
                result_label.config(text="Too low! Try a higher number.")
            else:
                # Provide feedback if the guess is too high
                result_label.config(text="Too high! Try a lower number.")
            # Return True to indicate valid input
            return True
        else:
            # Return False if the guess is outside the valid range
            return False
    except ValueError:
        # Return False if the input cannot be converted to an integer
        return False

# Function to generate a new secret number
def generate_secret_number():
    global secret_number
    # Generate a random number between 1 and 100
    secret_number = random.randint(1, 100)
    # Update the result label to indicate a new game
    result_label.config(text="New game started! Guess a number between 1 and 100.")

# Create the main Tkinter window
root = tk.Tk()
root.title("Guess the Number Game")

# Create a custom ttk style for Spinbox and Button
style = ttk.Style()
style.configure("Custom.TSpinbox", foreground="red") # Custom style for Spinbox
style.configure("Custom.TButton", foreground="green", background="red", font=("Helvetica", 12)) # Custom style for Button

# Create a label for displaying game results
result_label = tk.Label(root, text="Welcome! Press Start to begin the game.")
result_label.pack(pady=10)

# Create a button to start the game
start_button = ttk.Button(root, text="Start", style="Custom.TButton", command=generate_secret_number)
start_button.pack(pady=5)

# Create a ttk Spinbox for guessing numbers
# - 'validate' option is set to 'focusout' to trigger validation when Spinbox loses focus
# - 'validatecommand' specifies the function to perform validation
guess_spinbox = ttk.Spinbox(root, from_=1, to=100, font=("Helvetica", 20), validate="focusout", validatecommand=(root.register(validate_guess), '%P'), style="Custom.TSpinbox")
guess_spinbox.pack(pady=10)

# Start the Tkinter event loop
root.mainloop()
Output:
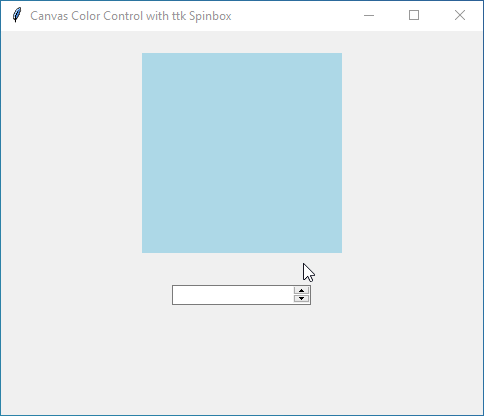
ttk Spinbox Virtual Events
The ttk Spinbox, features two important virtual events: '<<Increment>>' and '<<Decrement>>'.
The '<<Increment>>' event fires when the Spinbox value increases, either by clicking the up arrow or pressing the up arrow key, while '<<Decrement>>' when the Spinbox value decreases, either by clicking the down arrow or pressing the down arrow key. These events act as signals, notifying your program whenever the user adjusts the value in the Spinbox.
To take advantage of these events, you can link them to custom event handlers using the bind() method.
Here’s a simple example showcasing how to use these events:
Example:
import tkinter as tk
from tkinter import ttk

# Function to handle the <<Increment>> event
def handle_increment(event):
    canvas.config(bg="lightblue")  # Change canvas background color to light blue

# Function to handle the <<Decrement>> event
def handle_decrement(event):
    canvas.config(bg="lightpink")  # Change canvas background color to light pink

# Create the main Tkinter window
root = tk.Tk()
root.title("Canvas Color Control with ttk Spinbox")

# Create a canvas widget
canvas = tk.Canvas(root, width=200, height=200, bg="lightblue")
canvas.pack(padx=20, pady=20)

# Create a ttk Spinbox widget
spinbox = ttk.Spinbox(root, from_=0, to=100)
spinbox.pack(pady=10)

# Bind the handle_increment function to the <<Increment>> event
spinbox.bind("<<Increment>>", handle_increment)

# Bind the handle_decrement function to the <<Decrement>> event
spinbox.bind("<<Decrement>>", handle_decrement)

# Start the Tkinter event loop
root.mainloop()
Output:
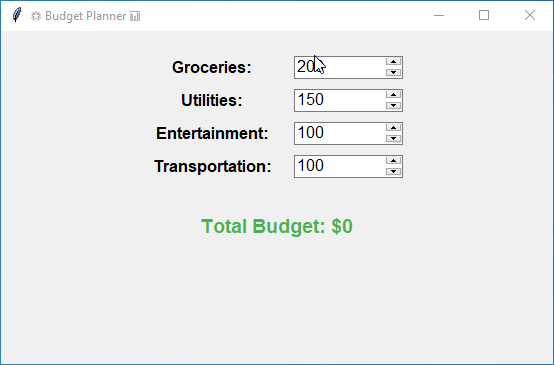
Create Your Beautiful Budget Planner with ttk Spinbox!
Let’s create a creative example of a “Budget Planner” application using ttk Spinbox. In this application, users can allocate their monthly budget to different categories such as groceries, utilities, entertainment, etc., using Spinboxes. As they adjust the values in the Spinboxes, the total budget dynamically updates.
Example:
import tkinter as tk
from tkinter import ttk

# Function to update the total budget
def update_total():
    # Calculate the total budget by summing up values from Spinboxes
    total = sum([int(spinbox_vars[category].get()) for category in categories])
    # Update the total budget label with the calculated total
    total_label.config(text="Total Budget: $" + str(total))

# Create the main Tkinter window
root = tk.Tk()
root.title("🌟 Budget Planner 📊")  # Set window title

# Define categories and initial budget allocations
categories = ["Groceries", "Utilities", "Entertainment", "Transportation"]
initial_budgets = {"Groceries": 200, "Utilities": 150, "Entertainment": 100, "Transportation": 100}

# Create a stylish frame for the Spinboxes
frame = ttk.Frame(root, padding="20")
frame.pack()

# Create Spinboxes for each category with a unique color scheme
spinbox_vars = {}
for category in categories:
    # Create a label for the category
    label = ttk.Label(frame, text=category + ":", font=("Helvetica", 12, "bold"))
    label.grid(row=categories.index(category), column=0, padx=10, pady=5)

    # Initialize a StringVar to hold Spinbox value
    spinbox_vars[category] = tk.StringVar(value=str(initial_budgets[category]))
    # Create Spinbox widget and link it to update_total function
    spinbox = ttk.Spinbox(frame, from_=0, to=1000, textvariable=spinbox_vars[category], command=update_total, width=10, font=("Helvetica", 12))
    spinbox.grid(row=categories.index(category), column=1, padx=10, pady=5)

# Create a stylish label to display the total budget
total_label = ttk.Label(root, text="Total Budget: $0", font=("Helvetica", 14, "bold"), foreground="#4CAF50")  # Green color
total_label.pack(pady=10)

# Add a fancy background color
root.configure(bg="#F0F0F0")

# Start the Tkinter event loop
root.mainloop()
Output: