
ttk Scale in Tkinter
Welcome to this fun tutorial about ttk Scale in Tkinter! Here, we’ll learn all about the cool slider widget called ttk Scale and how to use it like a pro. By the end, you’ll know how to create, style, and use ttk scales in your Tkinter projects.
So, what’s ttk Scale and how is it different from the regular Tkinter Scale?
Well, think of ttk Scale as a fancy slider that lets you choose a number from a range. It’s like a handy tool for picking values or adjusting settings in your Tkinter apps. The neat thing is that, ttk Scale is an upgraded version of the basic Tkinter Scale. It looks nicer and fits better with modern GUIs.
Create Your First ttk Scale
Alright, now it’s time to make our very first ttk scale!
from tkinter import *
from tkinter import ttk

root = Tk()
root.title("My Awesome Scale")

# Create a ttk Scale widget
scale = ttk.Scale(root, from_=0, to=100, length=300)
scale.pack()

root.mainloop()
In this example, we’ve created a basic Tkinter window with a ttk Scale widget. The from_ option sets the starting value, and the to option sets the ending value of the scale. The length option determines the length of the scale. When you run this code, you’ll see a sleek scale that you can slide from 0 to 100.
Output:
Customizing Your ttk Scale
To make your Scale work just the way you want, you can adjust some cool options.
First up, from_ and to let you set the range of values you can slide between. It’s like picking where your slider starts and ends.
Next, there’s length, which decides how long your slider will be. Whether you want it long or short, you’re in control!
Example:
from tkinter import *
from tkinter import ttk
root = Tk()
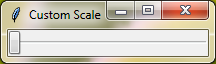
root.title("Custom Scale")
# Create a ttk Scale widget with a custom range and length
scale = ttk.Scale(root, from_=50, to=200, length=200)
scale.pack()
root.mainloop()Output:
Next up, we have variable
Then, there’s the command option. This allows you to specify a function that gets called whenever the slider is moved. So, you can make things happen in your program whenever the user adjusts the scale. It’s a great way to add interactivity to your Tkinter app!
Example:
from tkinter import *
from tkinter import ttk

def update_label(value):
    label.config(text=f"Value: {value}")

root = Tk()
root.title("Interactive Scale")

# Create a variable to link with the ttk Scale
scale_var = DoubleVar()
scale_var.set(50)

# Create a ttk Scale widget with variable and command options
scale = ttk.Scale(root, from_=0, to=100, length=300, variable=scale_var, command=update_label)
scale.pack()

label = tk.Label(root, text="Value: 50")
label.pack()

root.mainloop()
Output:
Additional Standard Options Available for Use:
cursorstyleorienttakefocus
For a deeper understanding of these options, explore the Tkinter Standard Options.
Example:
from tkinter import *
from tkinter import ttk

root=Tk()
root.grid_anchor(anchor='center')

# -----------------------------------------------------------------

def func1(val):
    var1value=var1.get()
    label=ttk.Label(root,text=f'{var1value}',background='yellow',foreground='red',padding=10,font="Arial 20 bold")
    label.grid(row=0,column=1)

def func2(val):
    var2value=var2.get()
    label=ttk.Label(root,text=f'{var2value}',background='green',foreground='white',padding=10,font="Arial 20 bold")
    label.grid(row=1,column=1)

# -----------------------------------------------------------------
# Horizontal ttk Scale
var1=IntVar()
ttkscale1=ttk.Scale(root,from_=10,to=100,length=200,orient='horizontal',variable=var1,command=func1)
ttkscale1.grid(row=0,column=0)

# Vertical ttk Scale
var2=IntVar()
ttkscale2=ttk.Scale(root,from_=10,to=100,length=200,orient='vertical',variable=var2,command=func2)
ttkscale2.grid(row=1,column=0)

root.mainloop()
Output :
Styling ttk Scale
When you’re working with ttk Scale widgets in Tkinter, sometimes you want them to look a bit more stylish or match the theme of your application. Luckily, with ttk Style, you can tweak the appearance of your sliders to better suit your design preferences.
Let’s explore how to style your ttk Scale widgets.
In Tkinter’s ttk module, there are specific class names you’ll use to target ttk Scale widgets. These class names allow you to customize various aspects of the widget’s appearance.
The two main style names for this widget are:
'Horizontal.TScale''Vertical.TScale'
If you want to know more about ttk style, see ttk and ttk Style.
Once you’ve chosen the appropriate class name based on the orientation of your Scale, you can start applying your desired styles. Use the style.configure()
Here’s a simple example that shows how you can apply styles to both horizontal and vertical scales:
Example:
from tkinter import *
from tkinter import ttk

root=Tk()
root.grid_anchor(anchor='center')

style=ttk.Style()

style.theme_use('clam')

style.configure('Horizontal.TScale', background='blue', troughcolor='lightgreen', troughrelief='groove')
style.configure('Vertical.TScale', background='red', troughcolor='yellow', troughrelief='sunken')

# Horizontal ttk Scale with some style
ttkscale1=ttk.Scale(root, from_=10, to=100, length=200, orient='horizontal')
ttkscale1.grid(row=0, column=0)

# Vertical ttk Scale with some style
ttkscale2=ttk.Scale(root, from_=10, to=100, length=200, orient='vertical')
ttkscale2.grid(row=1, column=0)

root.mainloop()
Output:
Styling Options
background | Specifies the background color of the ttk Scale widget. |
troughcolor | Defines the color of the trough (the area behind the slider). |
troughrelief | Determines the relief style of the trough. |
darkcolor | Sets the color of the dark parts of the slider (e.g., shadows). |
lightcolor | Specifies the color of the light parts of the slider (e.g., highlights). |
It’s important to note that not all options may be applicable to every theme in Tkinter.
Tailored Styling for Specific Scale
Do you want to apply a specific style to a particular scale in Tkinter? You can easily achieve this by creating custom class names and then customizing their appearance.
To create a custom style for a specific scale, you’ll first need to define a unique class name for it. This class name will allow you to target that specific widget for styling. For example, you can create class names like 'design1.Horizontal.TScale''design2.Vertical.TScale'
Once you’ve defined your custom class names, you can customize their appearance using the same options we discussed earlier.
Now, let’s see how we can use these custom class names.
Example:
from tkinter import *
from tkinter import ttk

root=Tk()
root.grid_anchor(anchor='center')

style=ttk.Style()

# We will use clam theme so you can see the effect of all options
style.theme_use("clam")

style.configure('design1.Horizontal.TScale',background='orange',troughcolor='red',troughrelief='raised',darkcolor='blue',lightcolor='green')
style.configure('design2.Vertical.TScale',background='lightgreen',troughcolor='skyblue',troughrelief='raised',darkcolor='yellow',lightcolor='orange')

# -----------------------------------------------------------------

def func1(val):
    var1value=var1.get()
    label=ttk.Label(root,text=f'{var1value}',background='red',foreground='white',padding=10,font="Arial 20 bold")
    label.grid(row=1,column=1)

def func2(val):
    var2value=var2.get()
    label=ttk.Label(root,text=f'{var2value}',background='black',foreground='white',padding=10,font="Arial 20 bold")
    label.grid(row=3,column=1)

# -----------------------------------------------------------------
# Horizontal ttk Scale with some style
var1=IntVar()
ttkscale1=ttk.Scale(root,from_=10,to=100,length=200,variable=var1,command=func1, orient='horizontal',style='design1.Horizontal.TScale')
ttkscale1.grid(row=1,column=0)

# Vertical ttk Scale with some style
var2=IntVar()
ttkscale2=ttk.Scale(root,from_=10,to=100,length=200,variable=var2,command=func2, orient='vertical',style='design2.Vertical.TScale')
ttkscale2.grid(row=3,column=0)

root.mainloop()
Output :
Binding Events to Your Slider
Let’s make our scale interactive! By binding events to your scale, you can make it respond to the user’s every move, creating a more engaging user experience.
To do this, we’ll use the bind() method. This method allows you to associate a callback function with a specific event, such as when the scale value changes.
Example:
from tkinter import *
from tkinter import ttk

def on_scale_change(event):
    value = scale_var.get()
    if value < 25:
        scale.configure(style="LowValue.Horizontal.TScale")
    elif value > 75:
        scale.configure(style="HighValue.Horizontal.TScale")
    else:
        scale.configure(style="MidValue.Horizontal.TScale")

root = Tk()
root.title("Interactive Styled Scale")

# Create a variable to link with the ttk Scale
scale_var = DoubleVar()
scale_var.set(50)

# Create a ttk Scale widget with variable
scale = ttk.Scale(root, from_=0, to=100, length=300, variable=scale_var)
scale.pack()

# Create custom styles for different scale values
style = ttk.Style()

style.theme_use("clam")

style.configure("LowValue.Horizontal.TScale", troughcolor="blue", lightcolor="lightblue")
style.configure("MidValue.Horizontal.TScale", troughcolor="gray", lightcolor="white")
style.configure("HighValue.Horizontal.TScale", troughcolor="red", lightcolor="pink")

# Bind the event to the ttk Scale
scale.bind("<ButtonRelease-1>", on_scale_change)

root.mainloop()
In this example, we’ve created three custom styles: "LowValue.Horizontal.TScale" for values below 25, "MidValue.Horizontal.TScale" for values between 25 and 75, and "HighValue.Horizontal.TScale" for values above 75.
The on_scale_change() function changes the style of the scale based on its value. When you run this code, you’ll see the scale change colors based on its position!
Output:

ttk Labeled Scale
Let’s chat about the ttk Labeled Scale widget in Tkinter. It’s a useful tool for picking values with a clear label to show what you’re choosing.
Just like the regular ttk Scale, you can set the range of values with from_ and to options. Plus, you can link it to a variable using the variable option to keep track of what value is selected.
And one more thing, you can choose if you want the label above or below the scale by using the compound option. It’s up to you how you want it to look!
Here’s how you can make one in Tkinter:
Example:
from tkinter import *
from tkinter import ttk

root=Tk()
root.grid_anchor(anchor='center')

var=IntVar()

ttkscale=ttk.LabeledScale(root,from_=10,to=100,variable=var,compound='bottom')
ttkscale.grid(row=4,column=0,pady=20)

root.mainloop()
Output:
Showcasing Different Looks of ttk Scale
Now, let’s have some fun exploring how ttk Scale and Labeled Scale widgets look with different themes. We’ll try out a few popular themes such as “clam”, “alt”, “default”, and “classic”.
Example:
from tkinter import *
from tkinter import ttk
root=Tk()
root.grid_anchor(anchor='center')

style=ttk.Style()

# -------------------------------------------------
# Function to change the theme
def changetheme():
    themeval=themevar.get()
    style.theme_use(themeval)
    style.configure('design.Horizontal.TScale',background='orange',troughcolor='red',troughrelief='raised',darkcolor='blue',lightcolor='green')

themevar=StringVar()
themevar.set("vista")

# Radiobuttons to choose theme
btn1=ttk.Radiobutton(root,text='winnative theme',value="winnative",command=changetheme,variable=themevar,style='Toolbutton')
btn2=ttk.Radiobutton(root,text='clam theme',value="clam",command=changetheme,variable=themevar,style='Toolbutton')
btn3=ttk.Radiobutton(root,text='alt theme',value="alt",command=changetheme,variable=themevar,style='Toolbutton')
btn4=ttk.Radiobutton(root,text='classic theme',value="classic",command=changetheme,variable=themevar,style='Toolbutton')
btn5=ttk.Radiobutton(root,text='vista theme',value="vista",command=changetheme,variable=themevar,style='Toolbutton')
btn6=ttk.Radiobutton(root,text='xpnative theme',value="xpnative",command=changetheme,variable=themevar,style='Toolbutton')

btn1.grid(row=0,column=2)
btn2.grid(row=1,column=2)
btn3.grid(row=2,column=2)
btn4.grid(row=3,column=2)
btn5.grid(row=0,column=3)
btn6.grid(row=1,column=3)

changetheme()

# -------------------------------------------------
# ttk scales
ttkscale1=ttk.Scale(root,from_=10,to=100,length=200)
ttkscale1.grid(row=0,column=0, pady=20)

ttkscale2=ttk.Scale(root,from_=10,to=100,length=200, style='design.Horizontal.TScale')
ttkscale2.grid(row=1,column=0, pady=20)

ttkscale3=ttk.LabeledScale(root,from_=10,to=100)
ttkscale3.grid(row=2,column=0,pady=20)

root.mainloop()
Output :
Conclusion
Great job! You’ve learned all about ttk Scale in Tkinter! Now you can create cool sliders, change how they look, make them respond when users move them, and even add labels. Keep practicing, and soon you’ll be making awesome GUIs that everyone will love. Have fun coding with your new ttk Scale skills!


thanks for this source code !