ttk Labelframe
The ttk Labelframe is a themed widget provided by the tkinter.ttk module and it has a more modern look compared to the standard Labelframe.
If you don’t know about the label frame and how it is different from the simple frame. Then understand this, frames and label frames both serve as containers for other widgets, allowing you to organize your GUI elements. But a label frame has an extra feature: it can show a label or title at the top, which helps users understand what’s inside.
In this tutorial, we’ll walk you through how to use ttk Labelframe and how to style it using the ttk style. We’ll also show you how to make it interactive by binding the events with it.
Creating Your First ttk Labelframe
Let’s create your first ttk Labelframe! It’s quite simple.
Example:
# Preparing the main application window
root = Tk()
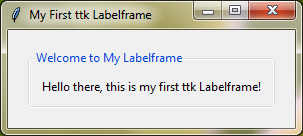
root.title("My First ttk Labelframe")
# Creating the ttk labelframe
labelframe = ttk.Labelframe(root, text="Welcome to My Labelframe")
labelframe.pack(padx=20, pady=20)
# Adding some content within the labelframe
label = ttk.Label(labelframe, text="Hello there, this is my first ttk Labelframe!")
label.pack(padx=10, pady=10)
# Starting the application
root.mainloop()Output:
Customize ttk Labelframe
When you’re using ttk Labelframes in Tkinter, there are a few options you’ll often use to customize their appearance and behavior.
height | We can set the height of the labelframe to adjust its vertical size. |
width | Changes the horizontal size of the ttk Labelframe. |
text | Adds a title or label to the top of the Labelframe, indicating its purpose or contents. |
labelanchor | Determines the position of the label within the Labelframe (e.g., top, bottom, left, right). |
labelwidget | Instead of just text, you can use other things like pictures or buttons as the label for your Labelframe. |
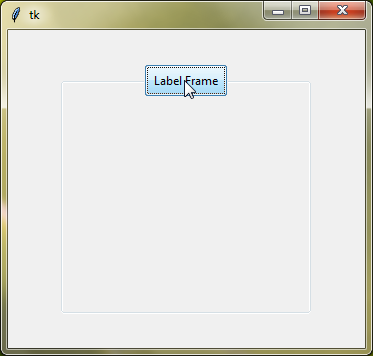
Let’s see these options in action:
Example:
from tkinter import *
from tkinter import ttk

root=Tk()
root.grid_anchor(anchor='center')

buttonlabel=ttk.Button(root, text='Label Frame', padding=5)
labelframe=ttk.Labelframe(root, height=250, width=250, text="Label text", labelwidget=buttonlabel, relief='sunken', labelanchor='n')
labelframe.grid(row=0,column=0)

root.mainloop()
Output:
Styling Ttk Labelframe
Now, let’s explore how we can style the ttk Labelframes using ttk.Style(). To do this, we will use the "TLabelframe" class name which is a predefined class name provided by Tkinter to assist in styling ttk Labelframes. By using this class name in ttk.Style().configure(), you can easily apply styles specifically to ttk Labelframes.
And if you want to style the label or title of ttk Labelframe, you can use the "TLabelframe.Label" class name.
Example:
from tkinter import *
from tkinter import ttk
root = Tk()
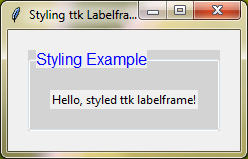
root.title("Styling ttk Labelframe")
# Creating a style object
style = ttk.Style()
# Configuring the default TLabelframe style
style.configure("TLabelframe", background="lightgray", padding=10)
style.configure("TLabelframe.Label", foreground="blue", font=("Helvetica", 12))
# Creating a ttk labelframe using the default style
labelframe = ttk.Labelframe(root, text="Styling Example")
labelframe.pack(padx=20, pady=20)
# Adding a label widget inside the labelframe
label = ttk.Label(labelframe, text="Hello, styled ttk labelframe!")
label.pack(padx=10, pady=10)
# Starting the application
root.mainloop()Output:
If you want to know more about ttk style, see ttk and ttk style.
Style Configuration Options for TLabelframe
| Option | Description |
|---|---|
padding | Adds space around the content inside the Labelframe. |
background | Sets the background color of the Labelframe. |
labeloutside | Choose whether the label appears inside or outside the Labelframe. |
labelmargins | Adjusts the space around the label inside the Labelframe. |
lightcolor | Decide the light color for the Labelframe border. |
darkcolor | Decide the dark color for the Labelframe border. |
Style Configuration Options for TLabelframe.Label
| Option | Description |
|---|---|
foreground | Sets the color of the label text. |
background | Sets the background color behind the label text. |
font | Decide the style and size of the label text. |
Style Specific ttk Labelframes
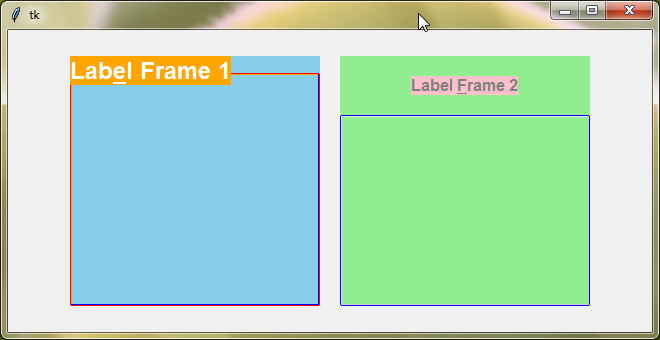
If you wish to style only certain ttk Labelframes within your GUI application, you can create custom class names and apply unique styles to them. You can do this by adding a unique identifier before the ".TLabelframe" class name. For example:
style.configure('design1.TLabelframe',background='skyblue',padding=10,bordercolor='red',labeloutside=0,darkcolor="blue",lightcolor="orange")
style.configure('design1.TLabelframe.Label',background='orange',font='arial 18 bold',foreground='white')

style.configure('design2.TLabelframe',background='lightgreen',bordercolor='blue',labeloutside=1,labelmargins=20)
style.configure('design2.TLabelframe.Label',background='pink',font='arial 12 bold',foreground='grey')
Now, when you create the ttk Labelframes you want to style differently, just tell them to use the custom styles by specifying these custom class names to the style parameter.
Example:
from tkinter import *
from tkinter import ttk

root=Tk()
root.grid_anchor(anchor='center')

style = ttk.Style()

style.theme_use('clam')

style.configure('design1.TLabelframe',background='skyblue',padding=10,bordercolor='red',labeloutside=0,darkcolor="blue",lightcolor="orange")
style.configure('design1.TLabelframe.Label',background='orange',font='arial 18 bold',foreground='white')

style.configure('design2.TLabelframe',background='lightgreen',bordercolor='blue',labeloutside=1,labelmargins=20)
style.configure('design2.TLabelframe.Label',background='pink',font='arial 12 bold',foreground='grey')

labelframe1 = ttk.Labelframe(root, height=250, width=250, text="Label Frame 1", underline=3, labelanchor='nw', style='design1.TLabelframe')
labelframe1.grid(row=0,column=0, padx=10)

labelframe2 = ttk.Labelframe(root, height=250, width=250, text="Label Frame 2", underline=6, labelanchor='n', style='design2.TLabelframe')
labelframe2.grid(row=0,column=1, padx=10)

root.mainloop()
Output:
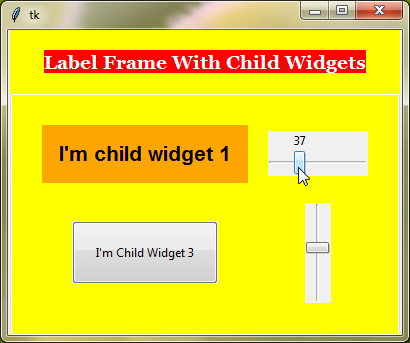
Ttk Labelframes with Child Widgets
Now, let’s take a closer look at how ttk Labelframes will look with the child widgets. You can place various types of widgets, such as buttons, labels, entry fields, and more, inside a ttk Labelframe.
Example:
from tkinter import *
from tkinter import ttk

root=Tk()
root.grid_anchor(anchor='center')

style = ttk.Style()

style.configure('design.TLabelframe', background='yellow', padding=10, labeloutside=1, labelmargins=20)
style.configure('design.TLabelframe.Label', background='red', font='georgia 14 bold',foreground='white')

labelframe = ttk.Labelframe(root, height=400, width=400, text="Label Frame With Child Widgets", labelanchor='n', style='design.TLabelframe', padding=20)
labelframe.grid(row=0, column=0)
labelframe.grid_anchor(anchor='center')

childwidget1=ttk.Label(labelframe, text="I'm child widget 1", background='orange', font="arial 16 bold", padding=15)
childwidget1.grid(row=0, column=0, padx=10, pady=10)

childwidget2=ttk.LabeledScale(labelframe, from_=10, to=100)
childwidget2.grid(row=0, column=1, padx=10, pady=10)

childwidget3=ttk.Button(labelframe, text="I'm Child Widget 3", padding=20)
childwidget3.grid(row=1, column=0, padx=10, pady=10)

childwidget4=ttk.Scale(labelframe, from_=10, to=100, orient="vertical", value=50)
childwidget4.grid(row=1, column=1, padx=10, pady=10)

root.mainloop()
Output:
Ttk Labelframes with Different Themes
Ttk Labelframes, like other ttk widgets in Tkinter, can take on various appearances based on the theme applied to the application. Let’s take a look at how Ttk Labelframes can look different with different themes:
Example:
from tkinter import *
from tkinter import ttk
root=Tk()
root.grid_anchor(anchor='center')

style = ttk.Style()
def changetheme():
    themeval=themevar.get()
    style.theme_use(themeval)

    style.configure('design.TLabelframe', background='skyblue', padding=10, bordercolor='red', borderwidth=10, relief='groove', labeloutside=0, darkcolor="blue", lightcolor="orange")
    style.configure('design.TLabelframe.Label', background='orange', font='arial 18 bold', foreground='white')

themevar=StringVar()
themevar.set("vista")

btn1=Radiobutton(root,text='winnative theme',value="winnative",command=changetheme,variable=themevar)
btn2=Radiobutton(root,text='clam theme',value="clam",command=changetheme,variable=themevar)
btn3=Radiobutton(root,text='alt theme',value="alt",command=changetheme,variable=themevar)
btn4=Radiobutton(root,text='classic theme',value="classic",command=changetheme,variable=themevar)
btn5=Radiobutton(root,text='vista theme',value="vista",command=changetheme,variable=themevar)
btn6=Radiobutton(root,text='xpnative theme',value="xpnative",command=changetheme,variable=themevar)

btn1.grid(row=0,column=2)
btn2.grid(row=1,column=2)
btn3.grid(row=2,column=2)
btn4.grid(row=2,column=3)
btn5.grid(row=0,column=3)
btn6.grid(row=1,column=3)

changetheme()

labelframe1=ttk.Labelframe(root, height=250, width=250, text="Label Frame 1", underline=1, borderwidth=20, relief='sunken', labelanchor='n')
labelframe1.grid(row=0, column=0, pady=5)

buttonlabel=ttk.Button(root, text='Label Frame 2', padding=10)
labelframe2=ttk.Labelframe(root, height=250, width=250, text="Label text", labelwidget=buttonlabel, borderwidth=20, relief='raised', labelanchor='n')
labelframe2.grid(row=1, column=0, pady=5)

labelframe3=ttk.Labelframe(root, height=250, width=250, text="Label Frame 3", underline=4, labelanchor='nw', style='design.TLabelframe')
labelframe3.grid(row=2, column=0, pady=5)

root.mainloop()
Output:
Interactive ttk Labelframe
You can make your ttk Labelframes interactive by binding events to them. This means you can define actions that occur when certain events, like mouse clicks or keyboard inputs, happen within the Labelframes.
Example:
from tkinter import *
from tkinter import ttk

root = Tk()
root.title("Binding Events with TTK Labelframe")

def on_labelframe_click(event):
    label = ttk.Label(labelframe, text="Hello, I am new styled ttk labelframe!")
    label.pack(padx=10, pady=10)

labelframe = ttk.Labelframe(root, text="Clickable Labelframe")
labelframe.pack(padx=20, pady=20)
labelframe.bind("<Button-1>", on_labelframe_click)

# Adding a label widget inside the labelframe
label = ttk.Label(labelframe, text="Hello, styled ttk labelframe!")
label.pack(padx=10, pady=10)

# Starting the application
root.mainloop()
Output:
Now, every time your user clicks the ttk Labelframe, it will trigger the on_labelframe_click() function and display more child labels inside the ttk Labelframe.