Python Tkinter Scrollbars
Scrollbars are useful tools in graphical interfaces that allow users to navigate through content that doesn’t fit entirely within a window or frame. In Tkinter, they are commonly used with widgets like text boxes, list boxes, and canvas to handle large amounts of data.
In this tutorial, we will cover the basics of scrollbars in Tkinter and how to set them up in your Python GUI applications.
Creating Your First Scrollbar
Let’s get started on creating our first scrollbar!
Step 1: Import Tkinter
First up, we need to make sure we have Tkinter set up. Here’s how we import it:
import tkinter as tk
Here, we’re importing the
tkinter module and giving it the alias tk for convenience.Step 2: Create a Tkinter Window
Now, let’s make the main window where all the action will happen:
# Create the main window
root = tk.Tk()
root.title("Scrolling Magic!")
We create the main window using
tk.Tk(), and set its title to “Scrolling Magic!”.Step 3: Create a Text Widget
Next, we’ll make a text widget to try out our scrollbar:
# Create a text widget
text_widget = tk.Text(root)
text_widget.pack(side="left", fill="both", expand=True)
We make a text widget with
tk.Text(root). This widget will hold the text we want to scroll through. Then we use pack() to put it in the main window (root). The fill="both" and expand=True make sure the text widget fills the whole window and adjusts as the window size changes.Step 4: Create a Scrollbar
Now it’s time to create our Scrollbar widget. We’ll create a vertical scrollbar like this:
# Create a vertical scrollbar
scrollbar = tk.Scrollbar(root, orient="vertical", command=text_widget.yview)
scrollbar.pack(side="right", fill="y")
We create a vertical scrollbar with
tk.Scrollbar(root, orient="vertical"). The command=text_widget.yview tells the scrollbar to control the vertical view of the text_widget. Then we use pack() to put the scrollbar on the right side of the window. The fill="y" makes sure the scrollbar stretches up and down to fill the space.Step 5: Associate Scrollbar with Text Widget
Let’s make sure our scrollbar knows about our text widget. We’ll link them together like this:
text_widget.config(yscrollcommand=scrollbar.set)
We connect the scrollbar to the text widget using the
yscrollcommand option of the text widget’s config() method. This tells the text widget to use the scrollbar’s set() method to update its vertical view when we move the scrollbar.Step 6: Enjoy Scrolling!
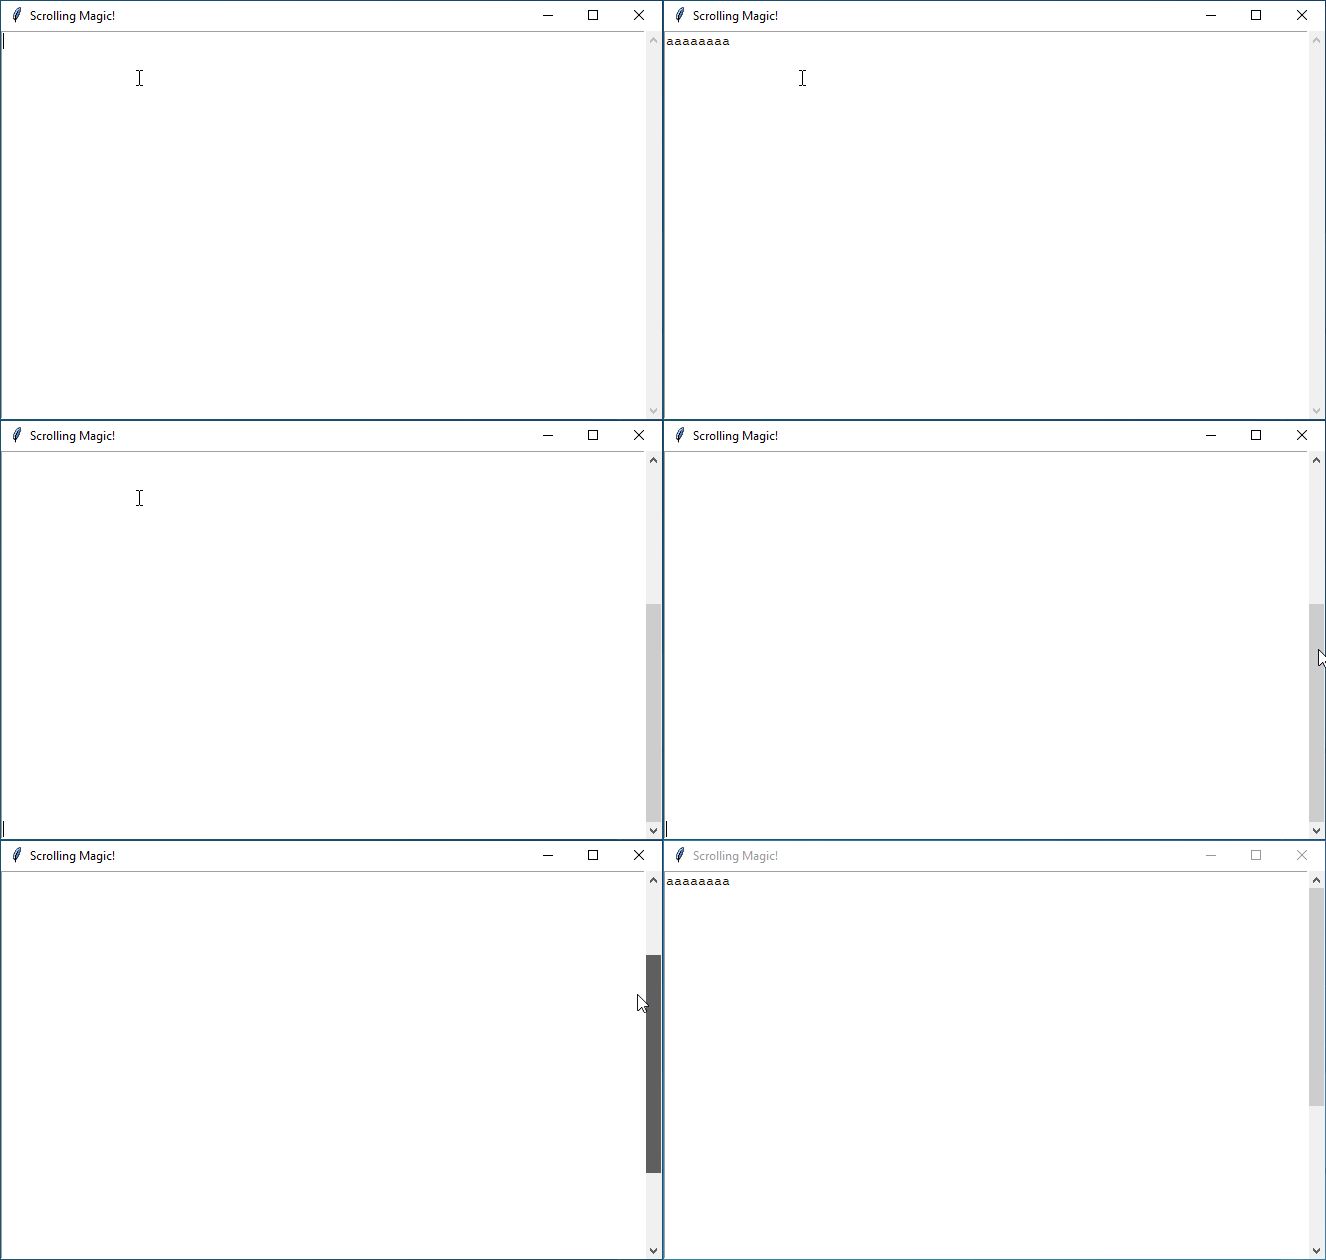
And that’s it! Run your code, and you’ll see a window with a text widget and a scrollbar. Now, when you have lots of text in the widget, you can use the scrollbar to scroll up and down and see all your content!
Complete Code:
import tkinter as tk

# Create the main window
root = tk.Tk()
root.title("Scrolling Magic!")

# Create a text widget with some dummy text
text_widget = tk.Text(root)
text_widget.pack(side="left", fill="both", expand=True)

# Create a vertical scrollbar
scrollbar = tk.Scrollbar(root, orient="vertical", command=text_widget.yview)
scrollbar.pack(side="right", fill="y")

# Link scrollbar to the text widget
text_widget.config(yscrollcommand=scrollbar.set)

# Run the application
root.mainloop()
Output:
Implementing Horizontal Scrollbars
Now, let’s add a horizontal scrollbar to our Tkinter Program.
Creating a horizontal scrollbar is quite similar to what we did for the vertical one. The main difference is that we’ll use the
orient="horizontal" parameter when creating the scrollbar.# Create a horizontal scrollbar horizontal_scrollbar = tk.Scrollbar(root, orient="horizontal", command=text_widget.xview)
Here, we’re making a horizontal scrollbar and linking it to our text widget’s horizontal view (
xview) instead of the vertical one.To link the horizontal scrollbar to the text widget, we use the
xscrollcommand configuration option.# Link horizontal scrollbar to the text widget text_widget.config(xscrollcommand=horizontal_scrollbar.set)
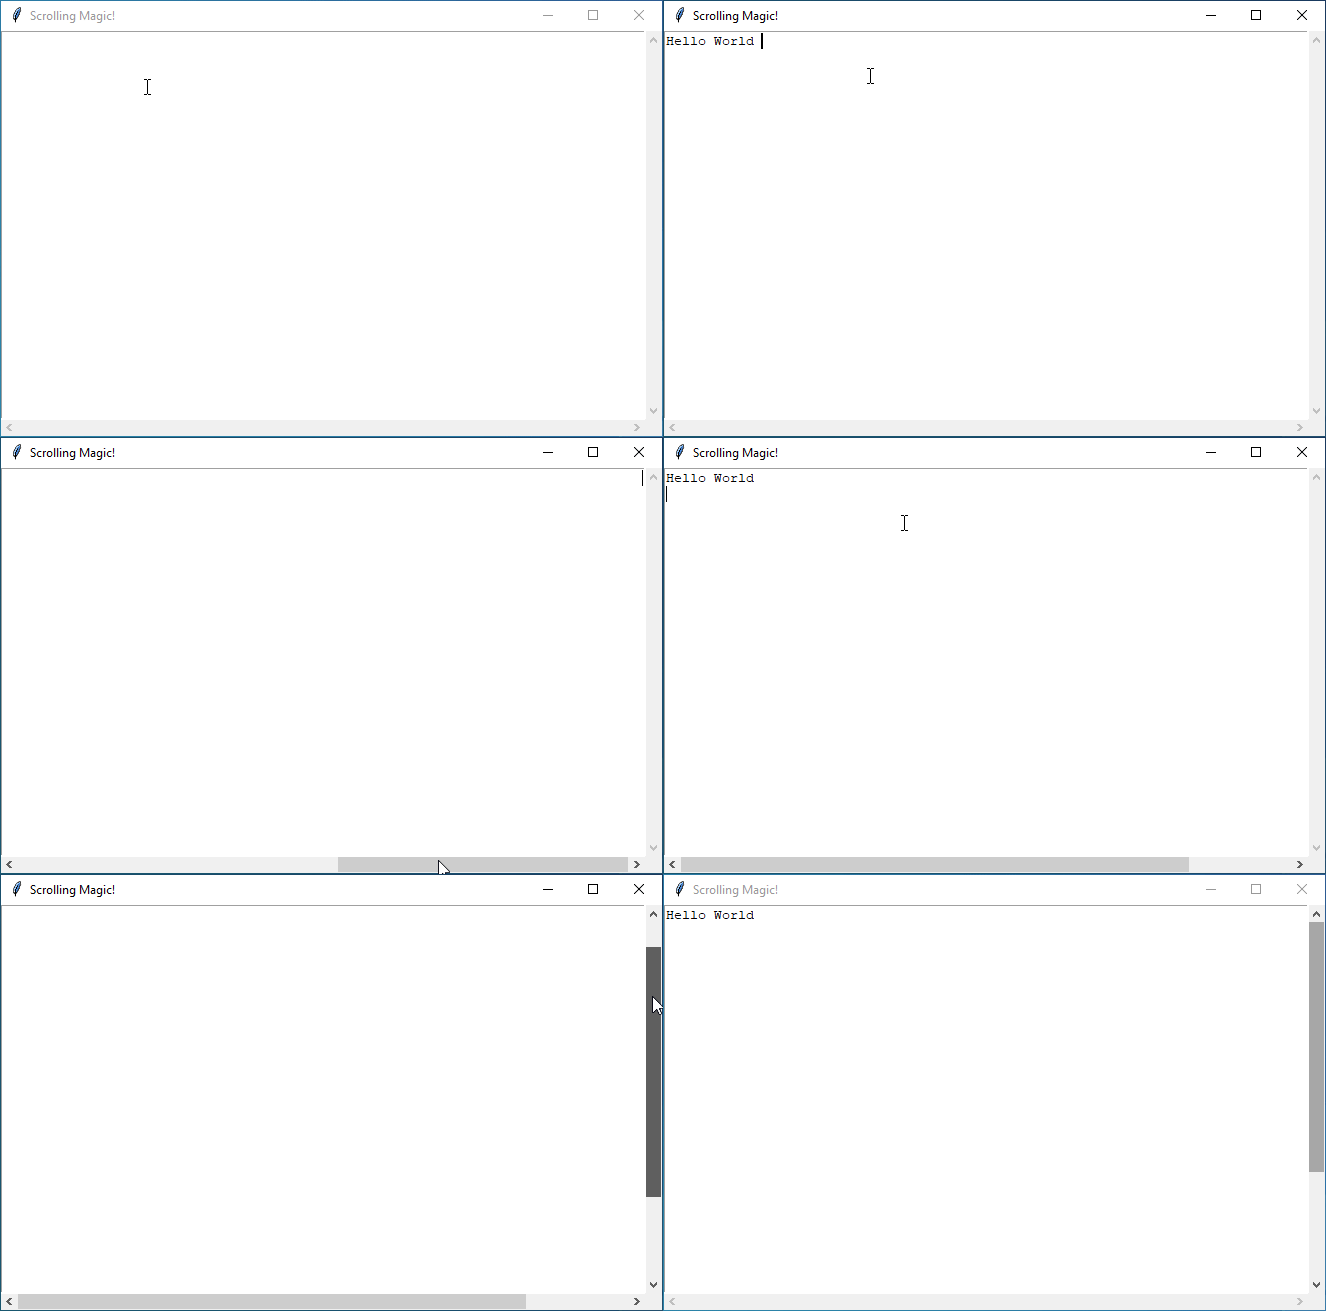
Here’s the complete code with the implementation of both vertical and horizontal scrollbars.
Complete Code:
import tkinter as tk
# Create the main window
root = tk.Tk()
root.title("Scrolling Magic!")
# Create a text widget with some dummy text
text_widget = tk.Text(root, wrap="none")
text_widget.grid(row=0, column=0, sticky="nsew")
# Create a vertical scrollbar
vertical_scrollbar = tk.Scrollbar(root, orient="vertical", command=text_widget.yview)
vertical_scrollbar.grid(row=0, column=1, sticky="ns")
# Create a horizontal scrollbar
horizontal_scrollbar = tk.Scrollbar(root, orient="horizontal", command=text_widget.xview)
horizontal_scrollbar.grid(row=1, column=0, sticky="ew")
# Link vertical scrollbar to the text widget
text_widget.config(yscrollcommand=vertical_scrollbar.set)
# Link horizontal scrollbar to the text widget
text_widget.config(xscrollcommand=horizontal_scrollbar.set)
# Configure grid weights to make the text widget expandable
root.grid_rowconfigure(0, weight=1)
root.grid_columnconfigure(0, weight=1)
# Run the application
root.mainloop()Output:
Other Standard Options
- cursor
cursor - width
width
If you want to know more about these above options, see Tkinter Standard Options.
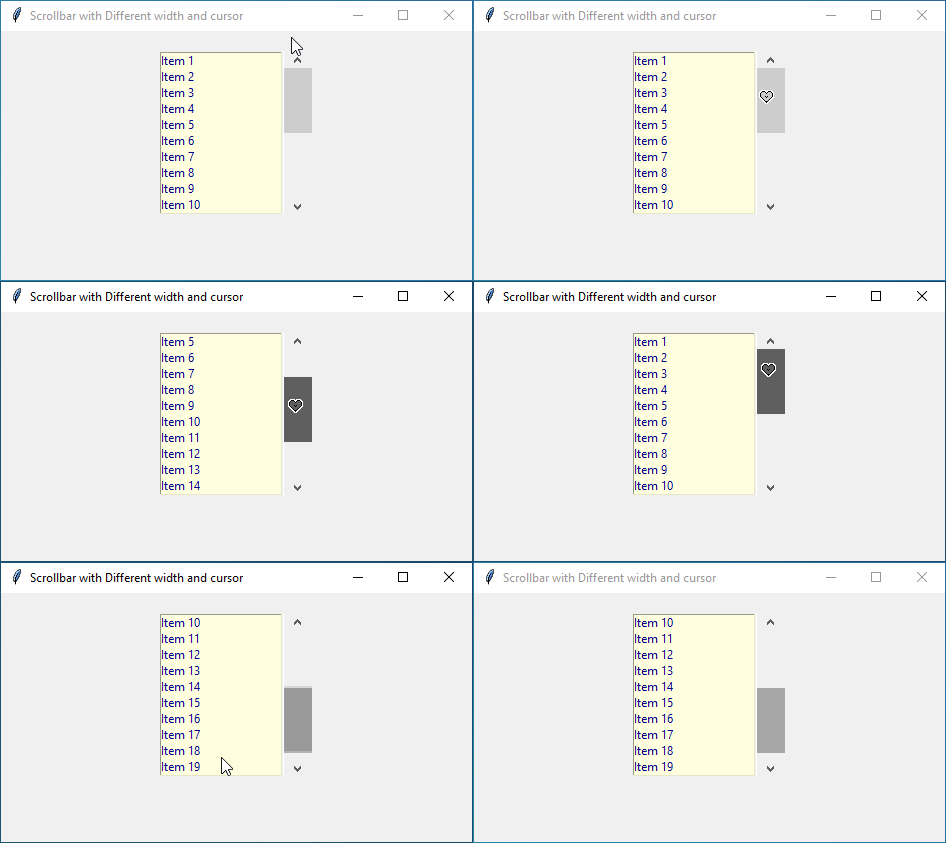
Example:
import tkinter as tk

# Create the main window
root = tk.Tk()
root.title("Scrollbar with Different width and cursor")

# Create a Frame to hold the scrollbar
frame = tk.Frame(root)
frame.pack(padx=20, pady=20)

# Create a vertical scrollbar with custom options
vertical_scrollbar = tk.Scrollbar(frame, orient="vertical", width=30, cursor="heart")
vertical_scrollbar.pack(side="right", fill="y")

# Create a Listbox to demonstrate the scrollbar
listbox = tk.Listbox(frame, yscrollcommand=vertical_scrollbar.set, bg="lightyellow", fg="darkblue")
for i in range(1, 21):
    listbox.insert(tk.END, f"Item {i}")
listbox.pack(side="left", fill="both", expand=True)

# Link the Listbox to the scrollbar
vertical_scrollbar.config(command=listbox.yview)

# Run the application
root.mainloop()
Output:
Handling Interactions
Now that we’ve learned how to set up Scrollbar, let’s talk about how we can make it more interactive.
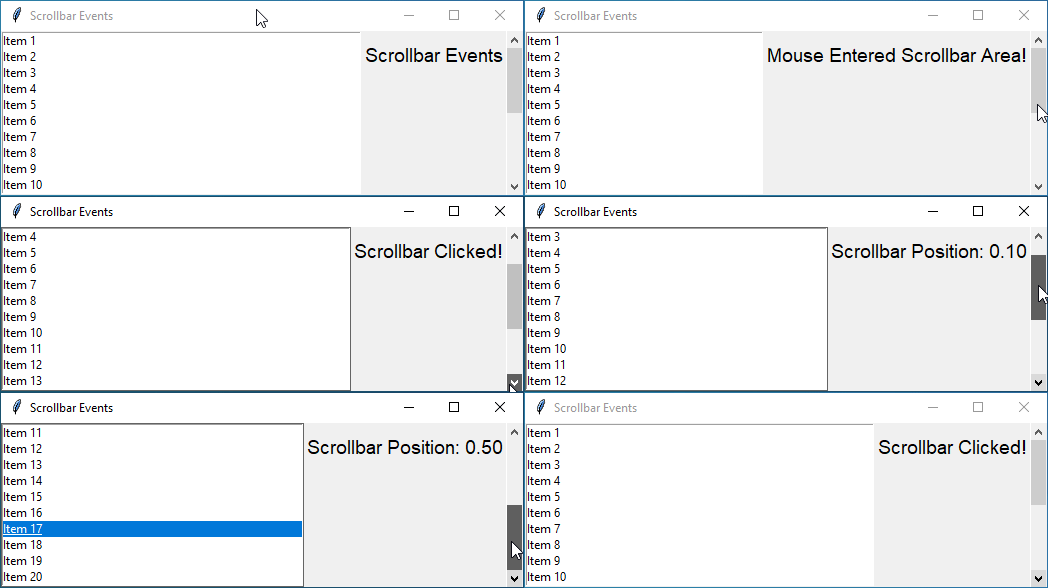
In Tkinter, we can bind functions to scrollbar events, allowing us to trigger specific actions when users interact with the scrollbar. These interactions could include scrolling, clicking, or other gestures.
Here’s a complete example that shows how to bind different events to a vertical scrollbar in Tkinter:
Example:
import tkinter as tk

# Function to handle scrollbar movement
def on_scroll(*args):
    # Get the scrollbar position and update the label
    position = vertical_scrollbar.get()[0]
    scroll_label.config(text=f"Scrollbar Position: {position:.2f}")

# Function to handle scrollbar click
def on_click(*args):
    # Update the label when the scrollbar is clicked
    scroll_label.config(text="Scrollbar Clicked!")

# Function to handle mouse entering scrollbar area
def on_hover_enter(*args):
    # Update the label when the mouse enters the scrollbar area
    scroll_label.config(text="Mouse Entered Scrollbar Area!")

# Function to handle mouse leaving scrollbar area
def on_hover_leave(*args):
    # Update the label when the mouse leaves the scrollbar area
    scroll_label.config(text="Mouse Left Scrollbar Area!")

# Create the main window
root = tk.Tk()
root.title("Scrollbar Events")

# Create a Listbox
listbox = tk.Listbox(root)
for i in range(1, 21):
    listbox.insert(tk.END, f"Item {i}")
listbox.pack(side="left", fill="both", expand=1)

# Create a vertical scrollbar
vertical_scrollbar = tk.Scrollbar(root, orient="vertical", command=listbox.yview)
vertical_scrollbar.pack(side="right", fill="y")

# Attach scrollbar to Listbox
listbox.config(yscrollcommand=vertical_scrollbar.set)

# Create a label to display scrollbar events
scroll_label = tk.Label(root, text="Scrollbar Events", font=("Arial", 14))
scroll_label.pack(pady=10)

# Bind scrollbar events
vertical_scrollbar.bind("<B1-Motion>", lambda event: on_scroll(event, vertical_scrollbar))
vertical_scrollbar.bind("<Button-1>", lambda event: on_click(event, vertical_scrollbar))
vertical_scrollbar.bind("<Enter>", lambda event: on_hover_enter(event, vertical_scrollbar))
vertical_scrollbar.bind("<Leave>", lambda event: on_hover_leave(event, vertical_scrollbar))

# Run the application
root.mainloop()
Output:
ttk Scrollbar: Styling and Customization
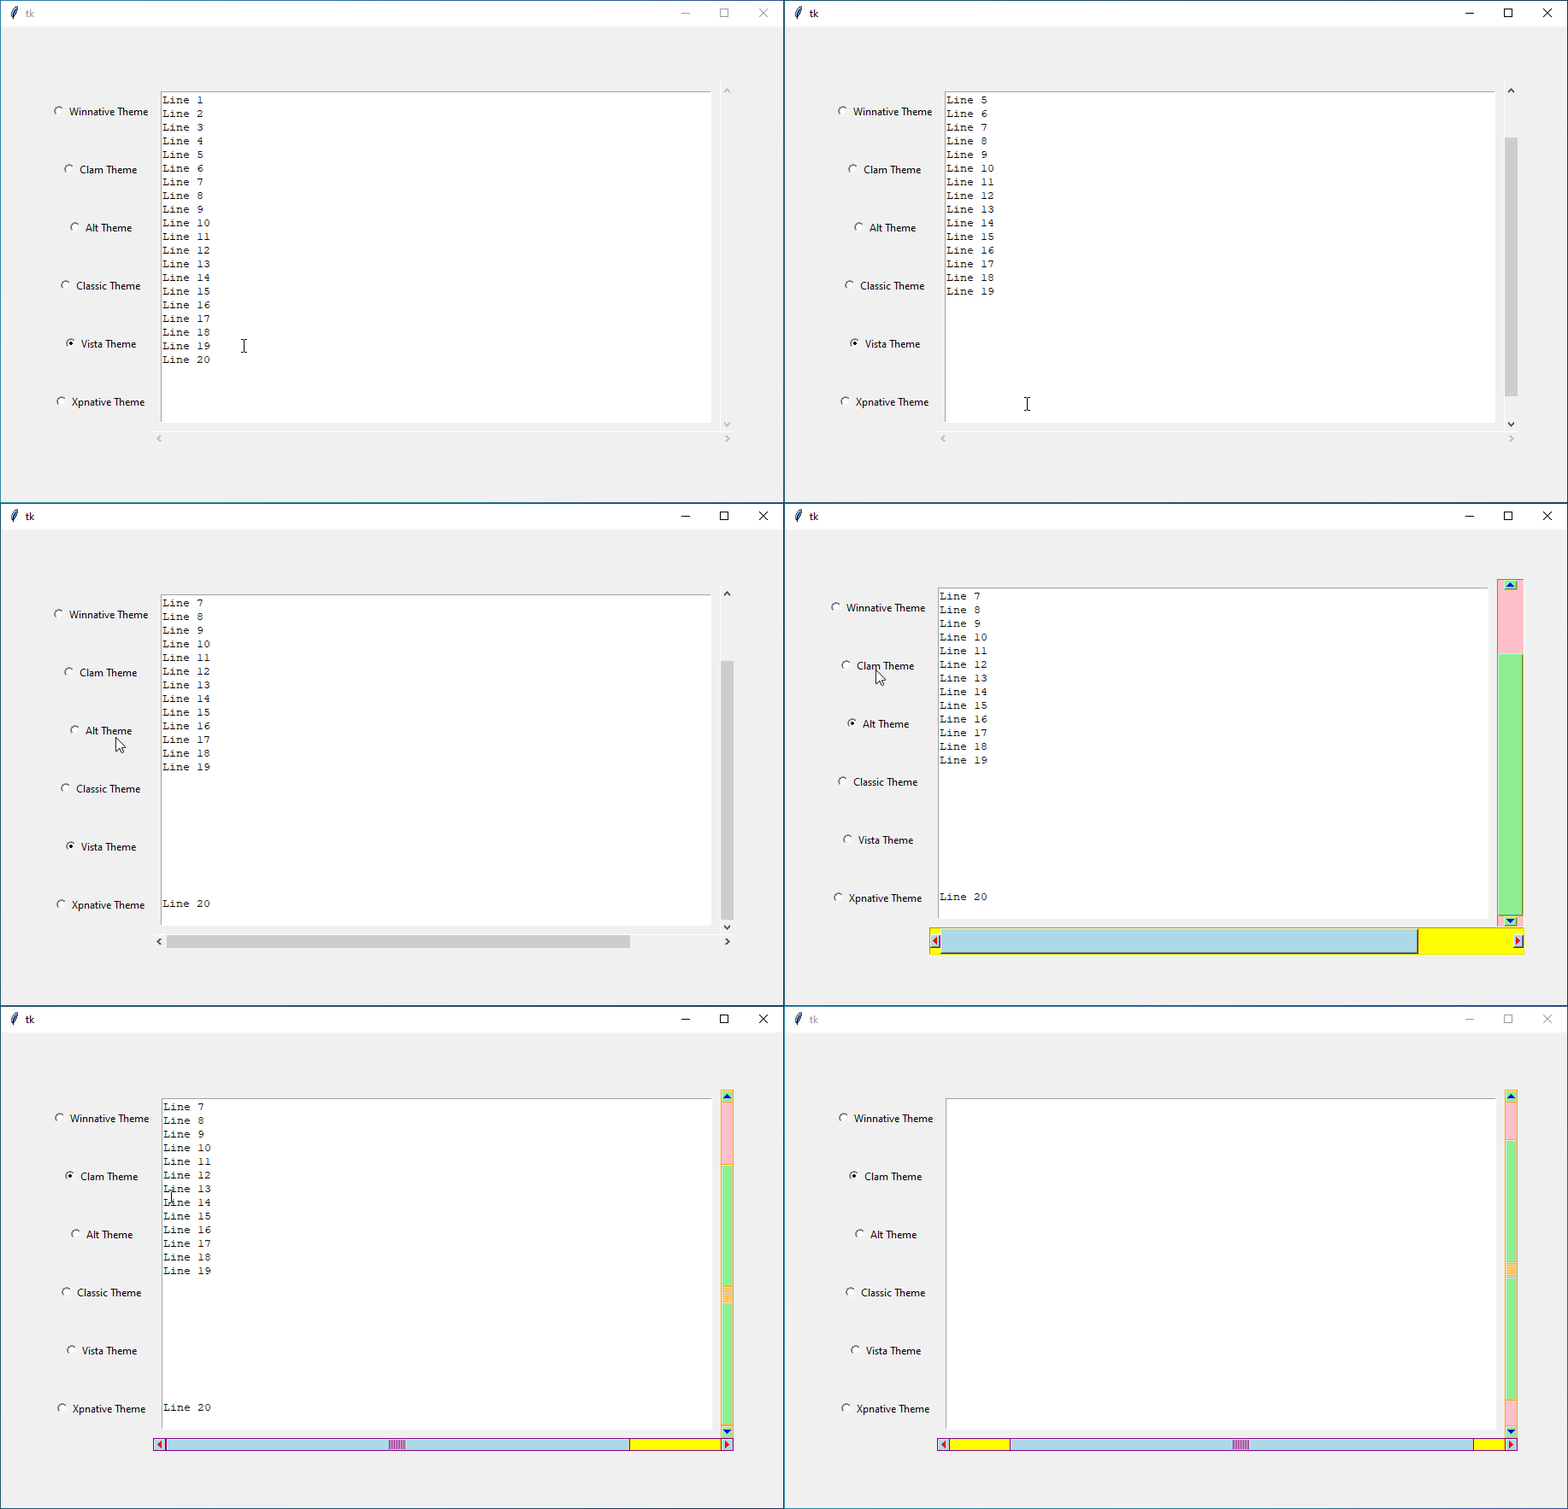
The ttk Scrollbar is an enhanced version of the standard Tkinter scrollbar, providing more styling and customization options.
To style the ttk Scrollbar, we will use
ttk.Style() along with the class names associated with it, such as 'TScrollbar', 'Vertical.TScrollbar', and 'Horizontal.TScrollbar'. These class names help us target specific types of scrollbars for styling.For example, if we want to style a vertical scrollbar, we use the class name
'Vertical.TScrollbar'. Similarly, for horizontal scrollbars, we use 'Horizontal.TScrollbar'.If you have multiple scrollbars and you want to style only some of them differently, you can make up your custom class names.
For example, let’s say your name is John and you want to style a vertical scrollbar. You can create a custom class name like this:
# Style a custom vertical scrollbar
style.configure("John.Vertical.TScrollbar", background="red", foreground="white")
Then, you can use this custom class name when creating your scrollbar:
# Create a custom vertical scrollbar
vertical_scrollbar = ttk.Scrollbar(root, orient="vertical", style="John.Vertical.TScrollbar")
Here’s a complete practical example that shows how to style ttk Scrollbars in Tkinter.
Example:
from tkinter import *
from tkinter import ttk

# Create the main window
root = Tk()
root.grid_anchor(anchor='center')

# Create a ttk Style object
style = ttk.Style()

# Function to change the theme
def changetheme():
    themeval = themevar.get()
    print(themeval)
    # Apply the new theme
    style.theme_use(themeval)
    # Configure the style for vertical scrollbar
    style.configure("YourName.Vertical.TScrollbar",
                arrowcolor="blue",       # Color of the scrollbar arrows
                arrowsize=15,           # Size of the scrollbar arrows
                background="lightgreen", # Background color of the scrollbar
                bordercolor="orange",   # Color of the scrollbar border
                gripcount=10,           # Number of lines on the thumb
                troughcolor="pink",     # Color of the scrollbar trough
                width=30                # Width of the scrollbar
                )
    # Configure the style for horizontal scrollbar
    style.configure("YourName.Horizontal.TScrollbar",
                arrowcolor="red",       # Color of the scrollbar arrows
                arrowsize=15,           # Size of the scrollbar arrows
                background="lightblue", # Background color of the scrollbar
                bordercolor="purple",   # Color of the scrollbar border
                gripcount=10,           # Number of lines on the thumb
                troughcolor="yellow",   # Color of the scrollbar trough
                width=30                # Width of the scrollbar
                )

# Global variable associated with the radiobuttons to change the theme
themevar = StringVar()
themevar.set("vista")

# Radiobuttons to change the theme
themes = ["winnative", "clam", "alt", "classic", "vista", "xpnative"]
for i, theme in enumerate(themes):
    Radiobutton(root, text=f"{theme.capitalize()} Theme", value=theme, variable=themevar, command=changetheme).grid(row=i, column=0)

# Create a Text widget
text_widget = Text(root, wrap=NONE)
text_widget.grid(row=0, column=1, rowspan=6, padx=10, pady=10, sticky=(N, S, E, W))

# Insert some text into the Text widget
for i in range(1, 21):
    text_widget.insert(END, f"Line {i}\n")

# Create a Vertical Scrollbar
vertical_scrollbar = ttk.Scrollbar(root, orient=VERTICAL, command=text_widget.yview, style="YourName.Vertical.TScrollbar")
vertical_scrollbar.grid(row=0, column=2, rowspan=6, sticky=(N, S))

# Configure Text widget to use the Vertical Scrollbar
text_widget.config(yscrollcommand=vertical_scrollbar.set)

# Create a Horizontal Scrollbar
horizontal_scrollbar = ttk.Scrollbar(root, orient=HORIZONTAL, command=text_widget.xview, style="YourName.Horizontal.TScrollbar")
horizontal_scrollbar.grid(row=6, column=1, columnspan=2, sticky=(W, E))

# Configure Text widget to use the Horizontal Scrollbar
text_widget.config(xscrollcommand=horizontal_scrollbar.set)

# Run the application
root.mainloop()
Output:
Style Configuration Options
arrowcolor arrowcolor | Color of the arrow buttons on the scrollbar. |
arrowsize arrowsize | Size of the arrow buttons. |
background background | Background color of the scrollbar. |
bordercolor bordercolor | Color of the border around the scrollbar. |
gripcount gripcount | Customize the number of lines on the thumb (the draggable part) of your scrollbar. |
troughcolor troughcolor | Color of the trough (the background area) of the scrollbar. |
width width | Width of the scrollbar. |
