Tkinter Entry Widget
In GUI development, capturing user input is a fundamental aspect of creating interactive applications. The Tkinter library provides you with a versatile widget known as the Entry widget, which plays a crucial role in facilitating user input.
The Tkinter Entry widget serves as a user-friendly input field where users can enter text or numeric values. It appears as a simple rectangular box on the GUI interface, inviting users to type in information such as names, addresses, passwords, and more. Think of it as the digital equivalent of a blank form field waiting to be filled out.
Tkinter Entry widgets have a classic appearance, but if you aim for a modern look, explore the Ttk Entry Simplified: Styling, Validation, and Interaction for contemporary input boxes after this tutorial.
In this tutorial, we’ll explore the Tkinter Entry widget and discover everything about it.
Creating Your First Tkinter Entry
Now, we’ll create a basic GUI application with an Entry widget. The user will be able to enter their name into the Entry field, and upon clicking a button, a welcome message will be displayed on a separate label.
Example:
from tkinter import *

def display_message():
    name = entry.get()
    message_label.configure(text=f"Welcome, {name}!")

# Create the main window
window = Tk()
window.title("Welcome App")

# Create an Entry widget
entry = Entry(window, width=30)
entry.pack()

# Create a button to display the welcome message
button = Button(window, text="Submit", command=display_message)
button.pack()

# Create a label to display the welcome message
message_label = Label(window, text="")
message_label.pack()

# Start the main event loop
window.mainloop()
Output:

Mastering Indexes in Tkinter Entry
Understanding how to work with indexes within Entry widgets is essential for manipulating and accessing the content efficiently. Let’s explore the different types of indexes of Tkinter Entry.
Number Index
The number index refers to the position of a character within the Entry widget, starting from 0 for the first character. This index is used to access, modify, or delete individual characters within the Entry.
Example:
from tkinter import *

root = Tk()
root.grid_anchor(anchor='center')

entry = Entry(root, font="arial 18 bold", width=20)
entry.insert(0, "Hello, World!")
entry.grid()

label1 = Label(root, font="georgia 18 bold", text=entry.get()[4])
label1.grid()

label2 = Label(root, font="georgia 18 bold", text=entry.get()[2:8])
label2.grid()

root.mainloop()
Output:

sel.first and sel.last
The 'sel.first' and 'sel.last' indexes represent the start and end positions of a selected portion of text within the Entry widget. These indexes are particularly useful for performing operations on selected text, such as copying, cutting, or applying formatting.
Example:
from tkinter import *

root = Tk()
root.grid_anchor(anchor='center')

def get_selected_text():
    text_content = entry.get()[entry.index('sel.first')]
    label = Label(root, font="georgia 18 bold", text=text_content)
    label.grid()

entry = Entry(root, font="arial 18 bold", width=20)
entry.insert(0, "Hello, World!")
entry.grid()

btn = Button(root, text="Get First Character Of Selected Text", font="arial 12 bold", command=get_selected_text)
btn.grid(pady=10)

root.mainloop()
Output:

insert and end Index
The 'insert' index indicates the current insertion point or cursor position within the Entry widget. It represents the location where new characters will be inserted when the user types input.
The 'end' index represents the position just after the last character in the Entry widget. It is commonly used to append new text or set the insertion point to the end of the existing text.
Example:
from tkinter import *

root = Tk()
root.grid_anchor(anchor='center')

entry = Entry(root, font="arial 18 bold", width=40)
entry.insert(0, "Hello, World!")
entry.grid()

btn1 = Button(root, text="Insert Text At Cursor Position", font="arial 12 bold", command=lambda : entry.insert('insert', '-hey-'))
btn1.grid(pady=10)

btn2 = Button(root, text="Insert Text At End Position", font="arial 12 bold", command=lambda : entry.insert('end', ' universe'))
btn2.grid()

root.mainloop()
Output:

Customize Your Tkinter Entry with Style
You can take your Entry widget to the next level by customizing its appearance and behavior. So now, let’s explore some mainly used customization options of the Entry widget.
width and state
The width option allows you to specify the width of the Entry widget in characters.
The state option controls the state of the Entry widget, determining whether it is active, disabled, or read-only. By setting the state to "normal", the widget allows user input. Setting it to "disabled" prevents user interaction, while "readonly" allows users to select the content but not edit it.
Example:
from tkinter import *

root = Tk()
root.grid_anchor(anchor='center')

text_var = StringVar()
text_var.set("Hello World!")

# Normal Entry Widget
entry1 = Entry(root, width=20, font="georgia 14 bold", textvariable=text_var, state="normal")
entry1.grid()

# Read-only Entry Widget
entry2 = Entry(root, width=30, font="georgia 14 bold", textvariable=text_var, state="readonly")
entry2.grid()

# Disabled Entry Widget
entry3 = Entry(root, width=40, font="georgia 14 bold", textvariable=text_var, state="disabled")
entry3.grid()

root.mainloop()
Output:

disabledbackground, disabledforeground and readonlybackground
When the Entry widget is disabled, you can customize its background and foreground colors using the disabledbackground and disabledforeground options, respectively. This helps visually distinguish disabled widgets from active ones, providing clarity to users.
Similarly, when the Entry widget is set to read-only mode, you can customize its background color using the readonlybackground option. This allows you to differentiate read-only widgets from editable ones while maintaining consistency in your application’s design.
Example:
from tkinter import *

root = Tk()
root.grid_anchor(anchor='center')

text_var = StringVar()
text_var.set("Hello World!")

# Read-only Entry Widget
entry1 = Entry(root, width=15, font="georgia 20 bold", textvariable=text_var, state="readonly", readonlybackground="yellow")
entry1.grid()

# Disabled Entry Widget
entry2 = Entry(root, width=15, font="georgia 20 bold", textvariable=text_var, state="disabled", disabledbackground="orange", disabledforeground="blue")
entry2.grid()

root.mainloop()
Output:

Let’s explore a few more standard options available for the Entry widget
backgroundborderwidthcursorfontforegroundhighlightbackgroundhighlightcolorhighlightthicknessinsertbackgroundinsertborderwidthinsertofftimeinsertontimeinsertwidthjustifyreliefselectbackgroundselectborderwidthselectforegroundtakefocustextvariablexscrollcommand
If you’re curious to learn more about the options mentioned above, take a look at the Tkinter Standard Options.
Tkinter Entry in Different Styles
With a bit of creativity and customization, you can transform the appearance of Entry widgets to suit the style and aesthetics of your Tkinter application.
Let’s explore some different designs of Tkinter Entry.
Example:
from tkinter import *

root = Tk()
root.grid_anchor(anchor='center')

entry1 = Entry(root, width=15, font='georgia 25 bold', bg='red', fg='white')
entry1.grid(row=0, column=0, padx=5, pady=5)

entry2 = Entry(root, width=15, font='times 30 bold', bg='yellow', fg='green')
entry2.grid(row=0, column=1, padx=5, pady=5)

entry3 = Entry(root, width=15, font='arial 25 bold', selectbackground='red', selectborderwidth=8, selectforeground='yellow')
entry3.grid(row=1, column=0, padx=5, pady=5)

entry4 = Entry(root, width=15, font='georgia 25 bold', insertbackground='green', insertborderwidth=5, insertwidth=20)
entry4.grid(row=1, column=1, padx=5, pady=5)

entry5 = Entry(root, width=15, font='times 30 bold', highlightthickness=8, highlightbackground='red', highlightcolor='green')
entry5.grid(row=2, column=0, padx=5, pady=5)

entry6 = Entry(root, width=15, font='times 30 bold', highlightthickness=8, highlightbackground='orange', highlightcolor='blue')
entry6.grid(row=2, column=1, padx=5, pady=5)

root.mainloop()
Output:

Securing User Input: Password Entry
In Tkinter applications, ensuring the security of user input, especially when dealing with sensitive information like passwords, is paramount. To make your input box secure, you can use show option.
The show option in Tkinter’s Entry widget allows you to specify a character to display instead of the actual input characters. This feature is particularly useful for creating password entry fields, where the characters entered by the user are replaced with asterisks or other placeholder characters to prevent them from being visible.
Here’s an example that shows you how it’s done:
Example:
from tkinter import *

# Function to retrieve password from entry widget and display it
def show_password():
    password = password_entry.get()  # Get password from entry widget
    label = Label(root, text=f"Entered Password: {password}", font="georgia 16 bold")  # Create label to display password
    label.pack()  # Display label with entered password

root = Tk()

# Create entry widget for password input, set show option to "*" to mask input
password_entry = Entry(root, show="*", font="georgia 16 bold")
password_entry.pack()  # Display password entry widget

# Create submit button to trigger show_password function
submit_button = Button(root, text="Submit", command=show_password, font="georgia 16 bold")
submit_button.pack(pady=5)  # Display submit button with some vertical padding

root.mainloop()
Output:

Creating Password Entry With Validation
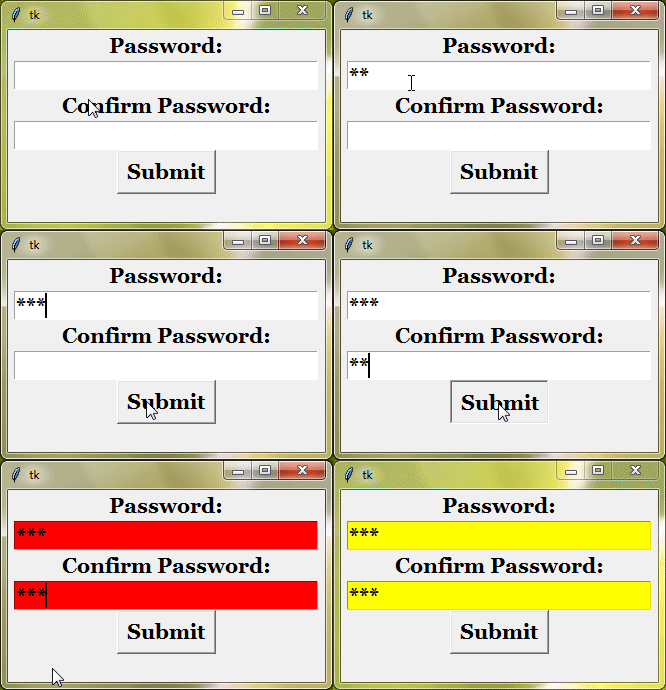
In more complex scenarios, you may want to create a password entry form that includes labels, additional widgets, and validation. Here’s an example that showcases a password entry form with a confirmation field and basic validation:
Example:
from tkinter import *

def submit_password():
    # Get password and confirm password from entry widgets
    password = password_entry.get()
    confirm_password = confirm_password_entry.get()

    # Check if passwords match
    if password == confirm_password:
        # If passwords match, set background color to yellow
        password_entry.config(bg="yellow")
        confirm_password_entry.config(bg="yellow")
    else:
        # If passwords don't match, set background color to red
        password_entry.config(bg="red")
        confirm_password_entry.config(bg="red")

root = Tk()

# Password Entry
password_label = Label(root, text="Password:", font="georgia 16 bold")
password_label.pack()
password_entry = Entry(root, show="*", font="georgia 16 bold")
password_entry.pack()

# Confirm Password Entry
confirm_password_label = Label(root, text="Confirm Password:", font="georgia 16 bold")
confirm_password_label.pack()
confirm_password_entry = Entry(root, show="*", font="georgia 16 bold")
confirm_password_entry.pack()

# Submit Button
submit_button = Button(root, text="Submit", command=submit_password, font="georgia 16 bold")
submit_button.pack()

root.mainloop()
Output:

Input Validation in Tkinter Entry
Input validation refers to the process of verifying whether user input meets specified criteria or constraints before accepting it. It helps enforce data integrity and prevents users from entering invalid or inappropriate data into the application.
Tkinter’s Entry widget provides you with several options that help you validate user input – validate, validatecommand, and invalidcommand.
Before exploring these options, first, see this simple example of input validation in Tkinter Entry.
Example:
from tkinter import *

# Function to validate entry input
def on_entry_validate():
    value = entry.get()
    # Check if input consists of digits and has length 4
    if value.isdigit() and len(value) == 4:
        result_label.config(text="Valid", fg="green")  # Display "Valid" in green
        return True  # Input is valid
    else:
        result_label.config(text="Invalid", fg="red")  # Display "Invalid" in red
        return False  # Input is invalid

root = Tk()
validate_cmd = root.register(on_entry_validate)  # Register validation function

entry = Entry(root, validate="focusout", validatecommand=validate_cmd, font="arial 18 bold")  # Create entry widget with validation
entry.pack()

result_label = Label(root, font="arial 14 bold")  # Create label for validation result
result_label.pack()

new_entry = Entry(root, font="arial 18 bold")  # Create another entry widget
new_entry.pack()

root.mainloop()
Output:

Do you wonder why we use this – root.register(on_entry_validate).
You typically don’t need to use register() if you only need to perform basic input validation tasks, such as ensuring that the input is a valid integer or float. But when you need to perform complex validation checks on user input, you will use a custom Python function as the validation command for an Entry widget, and then you’ll need register() to create a Tcl wrapper around the Python function.
This registration is necessary because Tkinter’s validation mechanisms, such as the validatecommand option of the Entry widget, expect a Tcl function.
Now let’s explore the validation options of Tkinter Entry.
validate and validatecommand
The validate option determines when validation should occur for the Entry widget. There are several modes you can choose from:
"none" | No validation. |
"key" | Check after each key press. |
"focus" | Validate when the widget loses focus (like when you click somewhere else). |
"focusin" | Validate when the widget gains focus (when you click on it). |
"focusout" | Validate when the widget loses focus (when you click away). |
"all" | Validation happens for all the above events. |
The validatecommand option specifies a callback function to be called for input validation. This function is invoked whenever validation is triggered according to the specified validation mode (validate option). It should return a boolean value: True if the input is valid, and False otherwise.
Example – 1: Accepting Only Even Numbers
from tkinter import *

def validate_input(new_text):
    valid = new_text.isdigit() and int(new_text) % 2 == 0
    entry.config(bg='green' if valid else 'red', fg='white')
    return valid

root = Tk()
validate_cmd = (root.register(validate_input), '%P')

entry = Entry(root, validate='key', validatecommand=validate_cmd, font='times 20 bold')
entry.pack()

root.mainloop()
Output:

Example – 2: Restricting Input Length
from tkinter import Tk, Entry

def validate_length(new_text):
    valid = len(new_text) <= 10
    entry.config(bg='green' if valid else 'red', fg='white')
    return valid

root = Tk()
validate_cmd = (root.register(validate_length), '%P')

entry = Entry(root, validate='key', validatecommand=validate_cmd, font='times 20 bold')
entry.pack()

root.mainloop()
Output:

Example – 3: Validating Floating-Point Numbers
from tkinter import Tk, Entry

def validate_float(new_text):
    try:
        float(new_text)
        entry.config(bg='green', fg='white')
        return True
    except ValueError:
        entry.config(bg='red', fg='white')
        return False

root = Tk()
validate_cmd = (root.register(validate_float), '%P')

entry = Entry(root, validate='key', validatecommand=validate_cmd, font='times 20 bold')
entry.pack()

root.mainloop()
Output:

invalidcommand
The invalidcommand option specifies a callback function to be called when the input fails validation. This function is invoked if the validatecommand function returns False, indicating invalid input. It allows you to handle invalid input gracefully, such as displaying an error message or resetting the Entry widget.
Example – 1: Email Validation
from tkinter import *

def validate_email():
    email = entry.get()
    if '@' not in email or '.' not in email:
        entry.config(bg='red', fg='white')
        entry.delete(0, 'end')
    else:
        entry.config(bg='white', fg='black')
    return True

root = Tk()
entry = Entry(root, font='times 20 bold', validate='focusout', validatecommand=validate_email, invalidcommand=validate_email)
entry.pack()
root.mainloop()
Output:

Example – 2: Phone Number Validation
from tkinter import *

def validate_phone():
    phone = entry.get()
    if not phone.isdigit() or len(phone) != 10:
        label.config(text='Phone No. is Incorrect', fg='red')
        entry.config(highlightbackground='red')
        entry.delete(0, 'end')
    else:
        entry.config(highlightbackground='green')
        label.config(text='Phone No. is Correct', fg='green')
    return True

root = Tk()

entry = Entry(root, font='georgia 20 bold', highlightthickness=2, validate='focusout', validatecommand=validate_phone, invalidcommand=validate_phone)
entry.pack()

label = Label(root, font='georgia 20 bold')
label.pack()

new_entry = Entry(root, font='georgia 20 bold')
new_entry.pack()

root.mainloop()
Output:

Example – 3: Password Strength Validation
from tkinter import *

def validate_password():
    password = entry.get()
    if len(password) < 6:
        label.config(text='Password is weak.', fg='red')
        entry.config(highlightbackground='red')
        entry.delete(0, 'end')
    else:
        entry.config(highlightbackground='green')
        label.config(text='Password is strong.', fg='green')
    return True

root = Tk()

entry = Entry(root, font='georgia 20 bold', highlightthickness=2, show='*', validate='focusout', validatecommand=validate_password, invalidcommand=validate_password)
entry.pack()

label = Label(root, font='georgia 20 bold')
label.pack()

new_entry = Entry(root, font='georgia 20 bold')
new_entry.pack()

root.mainloop()
Output:

Smart Input Handling with Percent Substitution
In Tkinter, the percent substitution feature in Entry widgets offers a clever way to manage user input dynamically. It lets you control how input is processed, allowing for tasks like filtering out unwanted characters or formatting input as it’s being typed.
It works by defining substitution patterns using special codes preceded by a percent (%) symbol. These codes specify actions or transformations to be applied to the input data.
Let’s explore these special codes:
%d | This one tells you what kind of action just happened. It’s super useful when you want to know if the user added new text or deleted something. It returns values: 1 for an insertion (adding new text) 0 for a deletion (removing text) |
Example:
from tkinter import Tk, Entry

def validate_character_count(action, value_if_allowed):
    if action == '1':  # Inserting a character
        if len(value_if_allowed) <= 10:  # Allowing a maximum of 10 characters
            return True
        else:
            return False
    return True

root = Tk()

entry = Entry(root, font='times 20 bold')
validate_command = (root.register(validate_character_count), '%d', '%P')
entry.config(validate='key', validatecommand=validate_command)
entry.pack()

root.mainloop()
Output:

%i | This code gives you the index (position) of the first character in the currently selected text, if any. If there’s no selection, it tells you where the cursor is. |
Example:
from tkinter import *

def validate_uppercase_before_cursor(action, value_if_allowed, index):
    cursor_index = int(index)
    if cursor_index > 0:
        characters_before_cursor = value_if_allowed[:cursor_index]
        if not characters_before_cursor.isupper():
            return False
    return True

root = Tk()

entry = Entry(root, font='times 20 bold')
validate_command = (root.register(validate_uppercase_before_cursor), '%d', '%P', '%i')
entry.config(validate='key', validatecommand=validate_command)
entry.pack()

root.mainloop()
Output:

%P | This one gives you the text inside the Entry widget after the user’s edit. You can use this when you want to work with the updated text after the user has made changes. |
Example:
from tkinter import *

def validate_numeric_input(value_if_allowed):
    if value_if_allowed.isdigit():
        return True
    return False

root = Tk()

entry = Entry(root, font='times 20 bold')
validate_command = (root.register(validate_numeric_input), '%P')
entry.config(validate='key', validatecommand=validate_command)
entry.pack()

root.mainloop()
Output:

%s | Similar to %P, but this one gives you the text before the user’s edit. Use it when you want to compare the current text with the previous version. |
Example:
from tkinter import *

def validate_no_spaces(value):
    if ' ' in value:
        return False
    return True

root = Tk()

entry = Entry(root, font='times 20 bold')
validate_command = (root.register(validate_no_spaces), '%s')
entry.config(validate='key', validatecommand=validate_command)
entry.pack()

root.mainloop()
Output:

%S | This code reveals the specific text that the user inserted or deleted. You can use this when you’re curious about what exactly changed. It’s great for tracking the particular text that the user manipulated. |
%v | This code gives you the current value of the Entry widget. |
%V | This one tells you the type of validation event that triggered the callback. It returns values such as “focus” (when the widget gains focus) or “key” (when a key is pressed within the widget). |
Essential Tkinter Entry Methods
The Tkinter Entry widget also provides a range of methods to manipulate the text within the widget dynamically. Now we will learn about these methods.
get()
The get() method retrieves the current contents of the Entry widget as a string, enabling you to process or validate the input as needed.
Example:
from tkinter import *
root=Tk()

entry = Entry(root, width=30, font='georgia 16 bold',)
entry.pack()

def get_value():
    entry_value = entry.get()
    label = Label(root, text=entry_value, font='georgia 16 bold',)
    label.pack()

get_value_btn = Button(root, text='Get Value', font='georgia 16 bold', command=get_value)
get_value_btn.pack(pady=10)

root.mainloop()
Output:

insert(index, string)
The insert() method allows you to programmatically add text to the widget, either at the current insertion point or at a specific position specified by the index.
Example:
from tkinter import *
root=Tk()

entry = Entry(root, width=30, font='georgia 16 bold',)
entry.pack()

insert_text_btn1 = Button(root, text='Insert Hello', font='georgia 16 bold', command=lambda:entry.insert(0, ' Hello '))
insert_text_btn1.pack(pady=5)

insert_text_btn2 = Button(root, text='Insert World', font='georgia 16 bold', command=lambda:entry.insert('end', ' World '))
insert_text_btn2.pack(pady=5)

root.mainloop()
Output:

delete(start, end=None)
The delete() method removes the characters between the specified start and end indices from the Entry widget. If only the start index is provided, the method deletes the character at that index. This method can also be used with special index values like 'sel.first', 'sel.last', 'end' and 'insert'.
Example:
from tkinter import *
root=Tk()

entry = Entry(root, width=30, background='yellow', font='times 16 bold')
entry.pack()

def delete_selected_text():
    entry.delete(first='sel.first', last='sel.last')

delete_selected_text_btn = Button(root, text='Delete Selected Text', font='times 16 bold', command=delete_selected_text)
delete_selected_text_btn.pack(pady=5)

root.mainloop()
Output:

icursor(index)
The icursor() method allows you to move the insertion cursor to a specific position within the Entry widget.
Example:
from tkinter import *
root=Tk()

entry=Entry(root, width=30, background='yellow', font='arial 20 bold', insertwidth=20, insertbackground='red')
entry.insert(0, "hello world")
entry.pack()

def set_cursor():
    entry.icursor(2)

set_cursor_btn=Button(root, text='Set Cursor To Third Character', font='arial 16 bold', command=set_cursor)
set_cursor_btn.pack(pady=5)

root.mainloop()
Output:

select_range(), select_adjust(), and select_clear()
The select_range(start, end) method selects a range of text within the Entry widget, starting from the specified start index and ending at the specified end index.
After selecting the text of the Entry widget, if you want to adjust the starting point of a text selection to a specific index, then use select_adjust() method for this.
And finally, the select_clear() method helps you to clear any text selection within the Entry widget and returns the widget to its default state.
Example:
from tkinter import *
root=Tk()

entry=Entry(root, width=30, background='yellow', font='georgia 24 bold')
entry.insert(0, 'hello world, how are you')
entry.pack()

def set_selection():
    entry.select_range(start=0, end='end')
    entry.select_adjust(index=6)

set_selection_btn=Button(root, text='Set Selection From First To Last But Then Adjust Starting Point To Index Number 7', font='georgia 16 bold', wraplength=300, command=set_selection, background='orange')
set_selection_btn.pack(pady=5)

clear_selection_btn=Button(root, text='Clear Selection', font='georgia 16 bold', command=lambda:entry.select_clear(), background='lightgreen')
clear_selection_btn.pack()

root.mainloop()
Output:

Event Bindings with Tkinter Entry
Event binding involves associating a function with a specific event, such as a key press or mouse click, in the Entry widget. When the event occurs, the associated function is executed, allowing you to respond to user input dynamically.
Example: Changing color on Double-Click
from tkinter import *

def on_entry_double_click(event):
        entry.config(bg="red")

root = Tk()
entry = Entry(root, font="arial 20 bold")
entry.bind("<Double-Button-1>", on_entry_double_click)
entry.insert(0, "hello world")
entry.pack()

root.mainloop()
Output:

Event Binding vs. validatecommand
Now, you might be thinking, how’s this different from validatecommand we talked about earlier? Well, validatecommand is more about checking and controlling input—like ensuring only valid data goes in. Event binding is about making your widget react to user actions—like clicking, typing, or hovering.
Both are tools in your kit to create an interactive and user-friendly experience. Use event binding when you want your widget to respond in real time to user gestures. Use validatecommand when you need to enforce specific rules on the data input.


