Tkinter Button
A Tkinter Button is a clickable thing you can add to your Tkinter application to make it more interactive. It’s like a virtual button users can press to do stuff in your app.
These Tkinter buttons have a more old-school vibe to them. But if you want something more modern and stylish, you should take a look at the ttk button.
In this tutorial, we will show you how to use Tkinter Buttons effectively in your projects. Plus, we’ll also guide you on how to customize their appearance to suit your application’s style.
Create Your First Tkinter Button
Let’s create your very first Tkinter button.
Example:
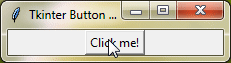
import tkinter as tk

#  Create the main app window
root = tk.Tk()
root.title("Tkinter Button Example")

#  Create a button
button = tk.Button(root, text="Click me!")

#  Pack the button to show it in the window
button.pack()

#  Start the Tkinter event party!
root.mainloop()
In this code, we’re creating a window with a button labeled "Click me!" Using the pack() method, we make sure the button appears on the window. Then, we use the mainloop() function to keep the window open so users can interact with the button.
Output:
Tkinter Button Options
Now, let’s talk about some mostly used options you need to know when making a button:
text | This is where you type the words you want to appear on the button. |
height | It decides how tall your button should be, measured in lines of text. |
width | Determines the width of the button, measured in characters. |
command | Here, you specify what action the button should take when clicked. |
overrelief | This defines how the button border looks when the mouse hovers over it. |
Here’s a simple example demonstrating these options:
Example:
import tkinter as tk

#  The thing we do when the button is clicked
def on_button_click():
    label.config(text="Button Clicked!")

#  Create the main app window
root = tk.Tk()
root.title("Tkinter Button Options Example")

#  Show the result in a label
label = tk.Label(root, text="")
label.pack()

#  Create a button with cool options
button = tk.Button(root, text="Click me!", height=2, width=20, command=on_button_click, overrelief="ridge")
button.pack()

#  Let the Tkinter fun begin!
root.mainloop()
Output:

Additional Options for Tkinter Button Widget:
activebackgroundactiveforegroundanchorbackgroundbitmapborderwidthcompoundcursordisabledforegroundfontforegroundimagejustifypadxpadyrelieftakefocustextvariableunderlinewraplength
For more detailed information about these options, refer to the Tkinter Standard Option.
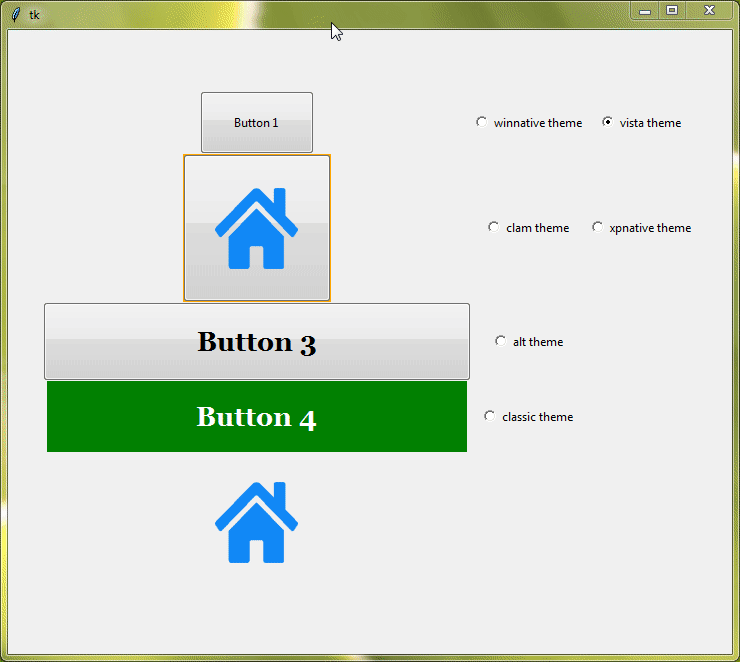
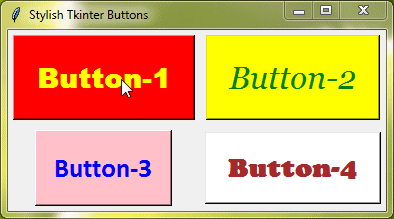
Example: Tkinter Buttons With Different Designs
# Import tkinter for GUI magic
from tkinter import *

# Create the main stage for our GUI
root = Tk()
root.title("Stylish Tkinter Buttons")

# Let's craft some fashionable buttons with pizzazz

# Button 1: The Fiery Red
button1 = Button(root, text="Button-1", background="red", foreground="yellow", font=("Arial Black", 20, "bold"), padx=10, pady=10)
button1.grid(row=0, column=0, padx=5, pady=5)

# Button 2: The Sunny Yellow
button2 = Button(root, text="Button-2", background="yellow", foreground="green", font=("georgia", 24, "italic"), padx=10, pady=10)
button2.grid(row=0, column=1, padx=5, pady=5)

# Button 3: The Pretty in Pink
button3 = Button(root, text="Button-3", background="pink", foreground="blue", font=("calibri", 20, "bold"), padx=10, pady=10, activebackground="green", activeforeground="red")
button3.grid(row=1, column=0, padx=5, pady=5)

# Button 4: The Classic White
button4 = Button(root, text="Button-4", background="white", foreground="brown", font=("Cooper Black", 20, "bold"), padx=10, pady=10, activebackground="red", activeforeground="yellow")
button4.grid(row=1, column=1, padx=5, pady=5)

# Let the Tkinter enchantment commence!
root.mainloop()Output:
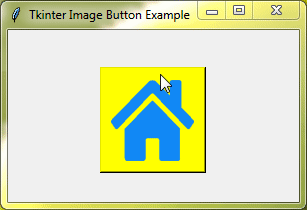
Adding Pictures to Tkinter Buttons
Let’s make your buttons more exciting by adding pictures to them!
To do this, first, you have to create a PhotoImage() object by providing the file path of the image you want to use. After that, you can attach the image to the button by using the image parameter of the Button widget in Tkinter.
Example:
import tkinter as tk
from tkinter import PhotoImage

#  What happens when the image button gets clicked
def on_image_button_click():
    label.config(text="Image Button Clicked!")

#  Create the main app window
root = tk.Tk()
root.title("Tkinter Image Button Example")

#  Display the result in a label
label = tk.Label(root, text="", font=("georgia", 20, "bold"))
label.pack()

#  Load the image
image = PhotoImage(file="HOME.png")

#  Create the image button
image_button = tk.Button(root, image=image, command=on_image_button_click, bg="yellow", activebackground="red")
image_button.pack()

#  Ready for some Tkinter magic!
root.mainloop()
In this example, we’re making an image button using the PhotoImage class. We load the image from a file called "HOME.png". When you click on the image button, it will call on_image_button_click() function.
Output:
Tkinter Button Methods
Tkinter buttons come with some nifty methods that you can use to make them even more dynamic:
invoke() : When you use the invoke() method. The button’s action gets triggered automatically as if someone clicked on it. This can be handy if you want to automate tasks in your program without any manual clicking.
flash() : This one is all about catching the user’s attention. When you call flash(), the button quickly alternates between its active background color and its regular background color, making it stand out momentarily. This can be useful for drawing attention to important actions or alerts in your app.
It’s important to note that if the button is disabled, the flash() command won’t work.
Example:
from tkinter import *
# Create the main window
root = Tk()
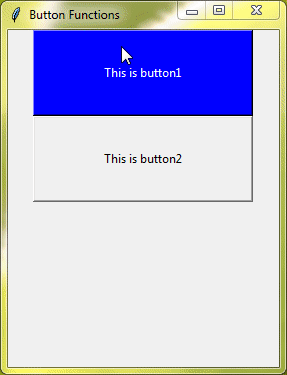
root.title("Button Functions")
# Initialize a counter for label creation
i = 0
# Function to create labels and called by btn1
def makelabel():
global i
i += 1
label = Label(root, text=f'New Label {i}')
label.pack()
# Function to trigger button flash, and function invoke of btn1
def flash_btn1_and_invoke():
btn1.flash()
btn1.invoke()
# Create btn1 to call makelabel function
btn1 = Button(root, text="This is button1", height=5, width=30, activebackground='red', background='blue', fg="white", command=makelabel)
btn1.pack()
# Create btn2 to call flash_btn1_and_invoke function
btn2 = Button(root, text="This is button2", height=5, width=30, command=flash_btn1_and_invoke)
btn2.pack()
# Start the GUI event loop
root.mainloop()Output:
Binding Events with Tkinter Buttons
With event binding, you can make your buttons respond to clicks, key presses, and other actions. We’ll use the bind() method to do this.
Here’s a simple example of binding the left mouse button click event to a function:
Example:
import tkinter as tk

#  What happens when the button gets clicked
def on_button_click(event):
    label.config(text=f"Mouse Clicked at, {event.x}, {event.y}")

#  Create the main app window
root = tk.Tk()
root.title("Tkinter Button Event Binding Example")

#  Show the result in a label
label = tk.Label(root, text="", font=('Arial', 20, 'bold'))
label.pack(pady=10)

#  Create a button
button = tk.Button(root, text="Click me!", font=('Arial', 20, 'bold'))

#  Bind the left mouse button click event to the function
button.bind("<Button-1>", on_button_click)
button.pack()

#  Let the Tkinter event party begin!
root.mainloop()
Output:
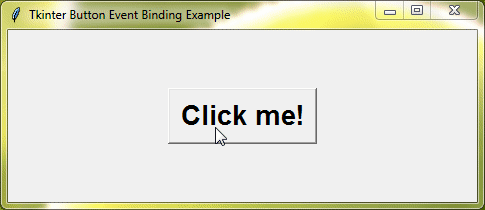
In this example, we’ve set up a function called on_button_click that gets activated when you click the left mouse button on the button. The function also tells you where you clicked on the button.
Conclusion
Great job! You’ve finished the tutorial and now you know how to make your own custom Tkinter buttons. You can make them do cool stuff like flashing and responding when clicked. Buttons make your apps easy to use, so keep using them to make your projects even better.