ttk Notebook
The ttk Notebook widget is designed to hold multiple “panes” or pages within a single window, each accessible through tabs. You can think of it as similar to the tabs in a web browser, where each tab displays a unique set of content.
This widget is perfect for organizing related content, such as :
- Settings Pages: Tabs can separate settings into categories like “General,” “Security,” and “Display.”
- Document or Data Viewers: You can switch between different sections of content.
- Analysis Tools: Tabs can separate charts or reports, keeping the layout clean and organized.
Setting Up ttk Notebook
Here’s how to set up a simple ttk Notebook widget:
Example:
import tkinter as tk
from tkinter import ttk

# Create the main window
root = tk.Tk()
root.title("My ttk Notebook Example")
root.geometry("400x300")

# Create the notebook
notebook = ttk.Notebook(root)
notebook.pack(expand=True, fill='both')  # Makes it resize with the window

root.mainloop()
Output:

Creating and Adding Tabs in ttk Notebook
Now that we’ve set up the ttk Notebook widget, let’s add some tabs to display different sections in the app. Each tab is like a page in the notebook, where you can display unique content.
To add a tab, we use the notebook.add() method. This method takes two main arguments:
- window: This is the child widget, like a frame, where you’ll place the content for each tab.
- options: Options like the tab’s title or label.
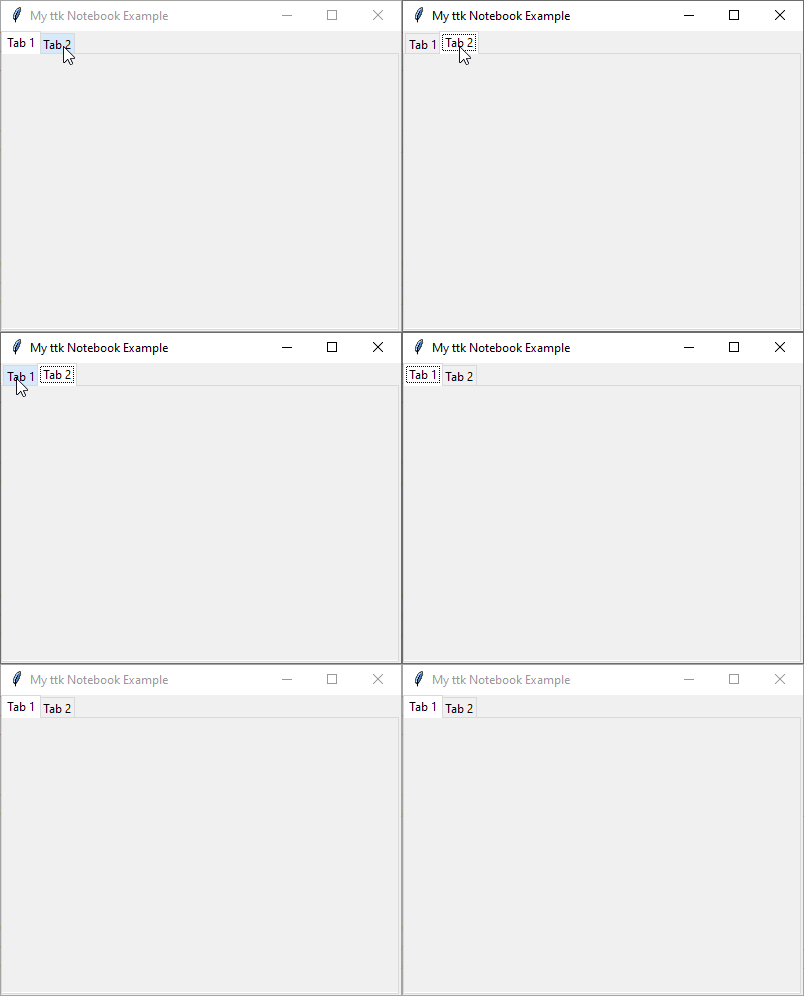
Here’s an example of how to create two tabs:
Example:
import tkinter as tk
from tkinter import ttk

# Create the main window
root = tk.Tk()
root.title("My ttk Notebook Example")
root.geometry("400x300")

# Create the notebook
notebook = ttk.Notebook(root)
notebook.pack(expand=True, fill='both')

# Create frames to hold content for each tab
tab1 = ttk.Frame(notebook)
tab2 = ttk.Frame(notebook)

# Add these frames as tabs in the notebook
notebook.add(tab1, text="Tab 1")  # Adding Tab 1 with title
notebook.add(tab2, text="Tab 2")  # Adding Tab 2 with title

root.mainloop()
Output:
Using Tab Identifiers
Sometimes you’ll need to identify a tab to change its content or configuration. There are three common ways to identify tabs:
- Position Index: Use an integer (starting from
0for the first tab) to specify a tab by its position. - Widget Reference: You can refer to the widget (e.g.,
tab1,tab2) used as the tab’s content to configure it. - Text Label: If you know the title of the tab, you can search for it by text, though this is less common and may require a loop to find the exact tab.
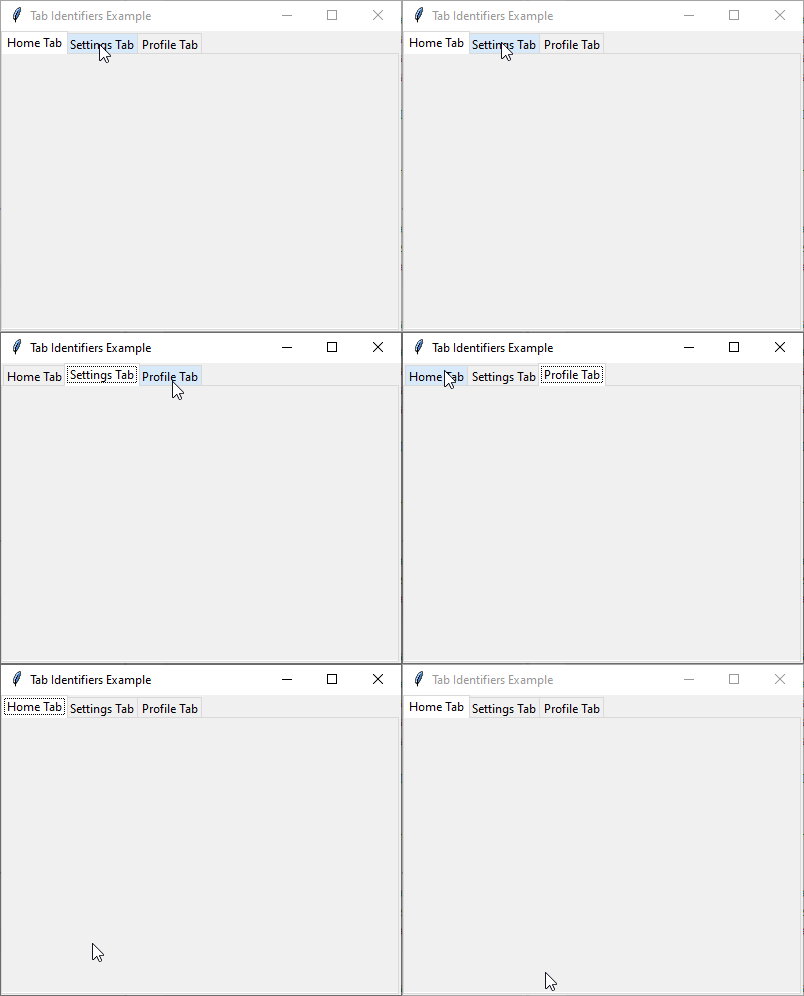
Here’s an example demonstrating these ways.
Example:
import tkinter as tk
from tkinter import ttk

# Create the main window
root = tk.Tk()
root.title("Tab Identifiers Example")
root.geometry("400x300")

# Initialize the ttk Notebook widget
notebook = ttk.Notebook(root)
notebook.pack(expand=True, fill='both')

# Create frames for each tab's content
tab1 = ttk.Frame(notebook)
tab2 = ttk.Frame(notebook)
tab3 = ttk.Frame(notebook)

# Add frames as tabs in the notebook with initial titles
notebook.add(tab1, text="Tab 1")
notebook.add(tab2, text="Tab 2")
notebook.add(tab3, text="Tab 3")

# === Identifying Tabs by Different Methods ===

# 1. Using Position Index
# Update the title of the first tab (position index 0)
notebook.tab(0, text="Home Tab")

# 2. Using Widget Reference
# Update the title of the second tab using the widget reference `tab2`
notebook.tab(tab2, text="Settings Tab")

# 3. Using Text Label
# Finding and updating a tab by looping through each to match the label
for i in range(notebook.index("end")):  # 'end' gets the count of all tabs
    if notebook.tab(i, "text") == "Tab 3":  # Looking for tab with "Tab 3" title
        notebook.tab(i, text="Profile Tab")

# Run the application
root.mainloop()
Output:
Customizing ttk Notebook
Customization helps create a more user-friendly experience, so now let’s customize the appearance and behavior of our ttk Notebook to make it even better.
Cursor and Takefocus
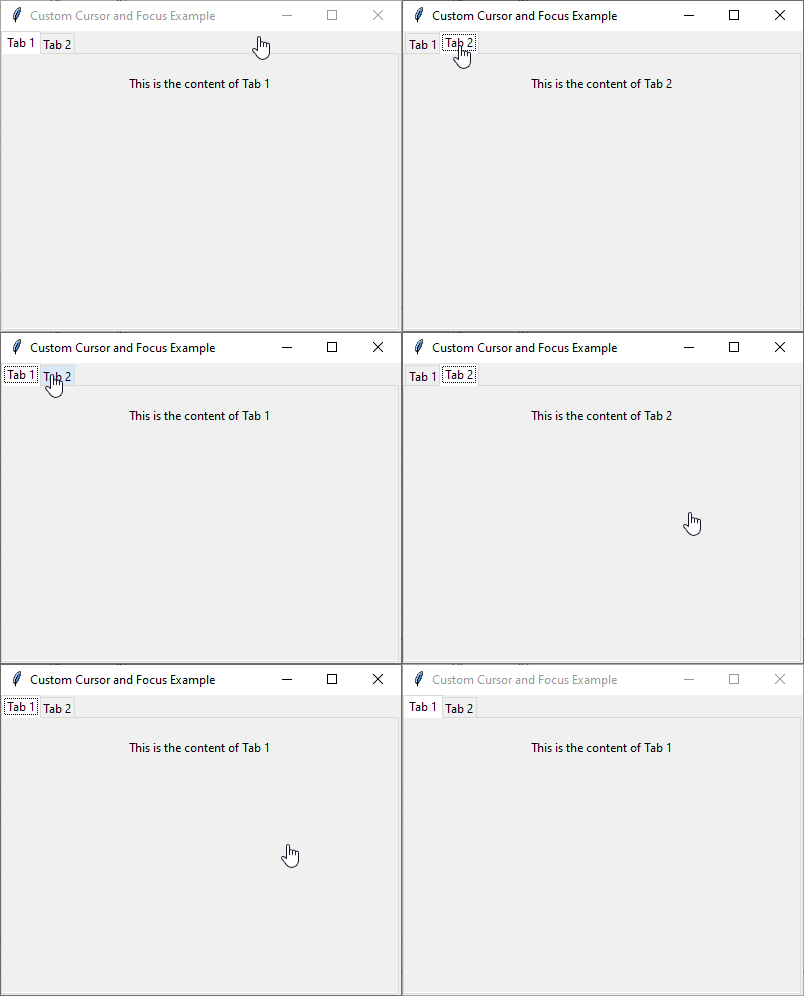
The cursor property changes the mouse pointer’s appearance when hovering over the tabs while setting the takefocus to True allows users to navigate through the tabs using the keyboard. Here’s an example to demonstrate these options.
Example:
import tkinter as tk
from tkinter import ttk

# Create the main application window
root = tk.Tk()
root.title("Custom Cursor and Focus Example")
root.geometry("400x300")

# Initialize the notebook widget
notebook = ttk.Notebook(root)
notebook.pack(expand=True, fill='both')

# Create frames for tabs
tab1 = ttk.Frame(notebook)
tab2 = ttk.Frame(notebook)

# Add tabs to the notebook
notebook.add(tab1, text="Tab 1")
notebook.add(tab2, text="Tab 2")

# Configure cursor and focus
notebook.configure(cursor="hand2")  # Change cursor to hand shape
notebook.configure(takefocus=True)  # Allow keyboard navigation

# Add content to the tabs
label1 = ttk.Label(tab1, text="This is the content of Tab 1")
label1.pack(pady=20)

label2 = ttk.Label(tab2, text="This is the content of Tab 2")
label2.pack(pady=20)

# Run the application
root.mainloop()
Output:
Height, Width, and Padding
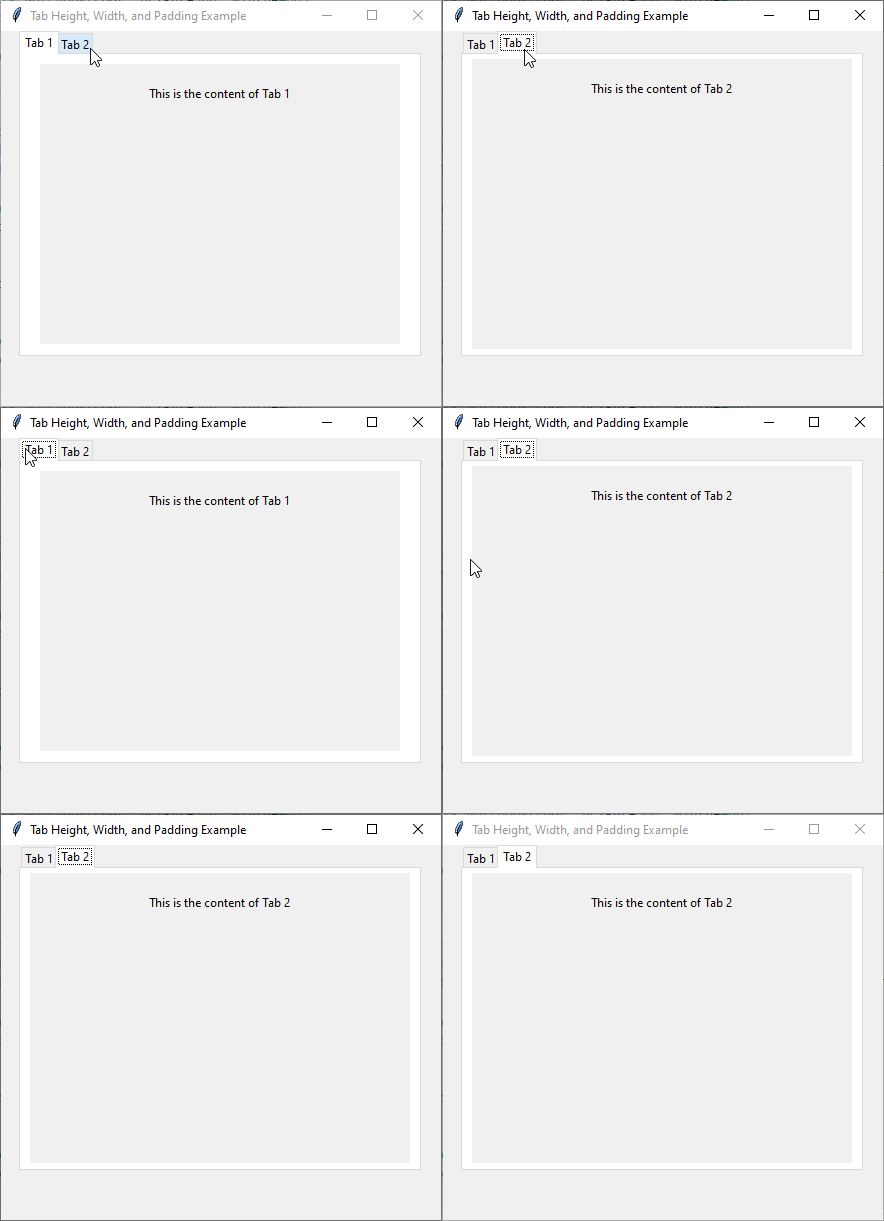
You can also change the fixed size and spacing of the tabs for a better layout by using the height, width and padding options. Here’s a simple example:
Example:
import tkinter as tk
from tkinter import ttk

# Create the main application window
root = tk.Tk()
root.title("Tab Height, Width, and Padding Example")
root.geometry("500x400")

# Initialize the notebook widget with specific height and width
notebook = ttk.Notebook(root, height=300, width=400)
notebook.pack()

# Create frames for tabs
tab1 = ttk.Frame(notebook)
tab2 = ttk.Frame(notebook)

# Add tabs to the notebook with padding
notebook.add(tab1, text="Tab 1", padding=(20, 10))  # Adds padding to Tab 1
notebook.add(tab2, text="Tab 2", padding=(10, 5))  # Adds padding to Tab 2

# Add content to the tabs
label1 = ttk.Label(tab1, text="This is the content of Tab 1")
label1.pack(pady=20)

label2 = ttk.Label(tab2, text="This is the content of Tab 2")
label2.pack(pady=20)

# Run the application
root.mainloop()
Output:
Advanced Tab Options
Ok, now it’s time to explore some advanced options for customizing each tab in our ttk Notebook.
Text and Images
As you know we can use text option to add labels to each tab. But do you know that we can also display images on the Notebook tabs. First, load an image using PhotoImage and then add it to the tab, see the below example.
And one more thing, you can also specify how the text and image should be arranged using the compound option, like showing the image on top or beside the text.
Example:
import tkinter as tk
from tkinter import ttk

# Create the main application window
root = tk.Tk()
root.title("ttk Notebook with Text and Images")
root.geometry("400x300")

# Create the ttk Notebook widget
notebook = ttk.Notebook(root)
notebook.pack(expand=True, fill='both')

# Load images (make sure to replace with your own image paths)
image1 = tk.PhotoImage(file="pencil-1.png")  # Replace with your image path
image2 = tk.PhotoImage(file="eraser-1.png")  # Replace with your image path

# Create frames for each tab
tab1 = ttk.Frame(notebook)
tab2 = ttk.Frame(notebook)

# Add tabs with text and images
notebook.add(tab1, text="Pencil", image=image1, compound="top")  # Image above text
notebook.add(tab2, text="Eraser", image=image2, compound="top")  # Image above text

# Add content to each tab
label1 = ttk.Label(tab1, text="You are using Pencil")
label1.pack(pady=10)

label2 = ttk.Label(tab2, text="Erase your Mistakes")
label2.pack(pady=10)

# Start the Tkinter main loop
root.mainloop()
Output:
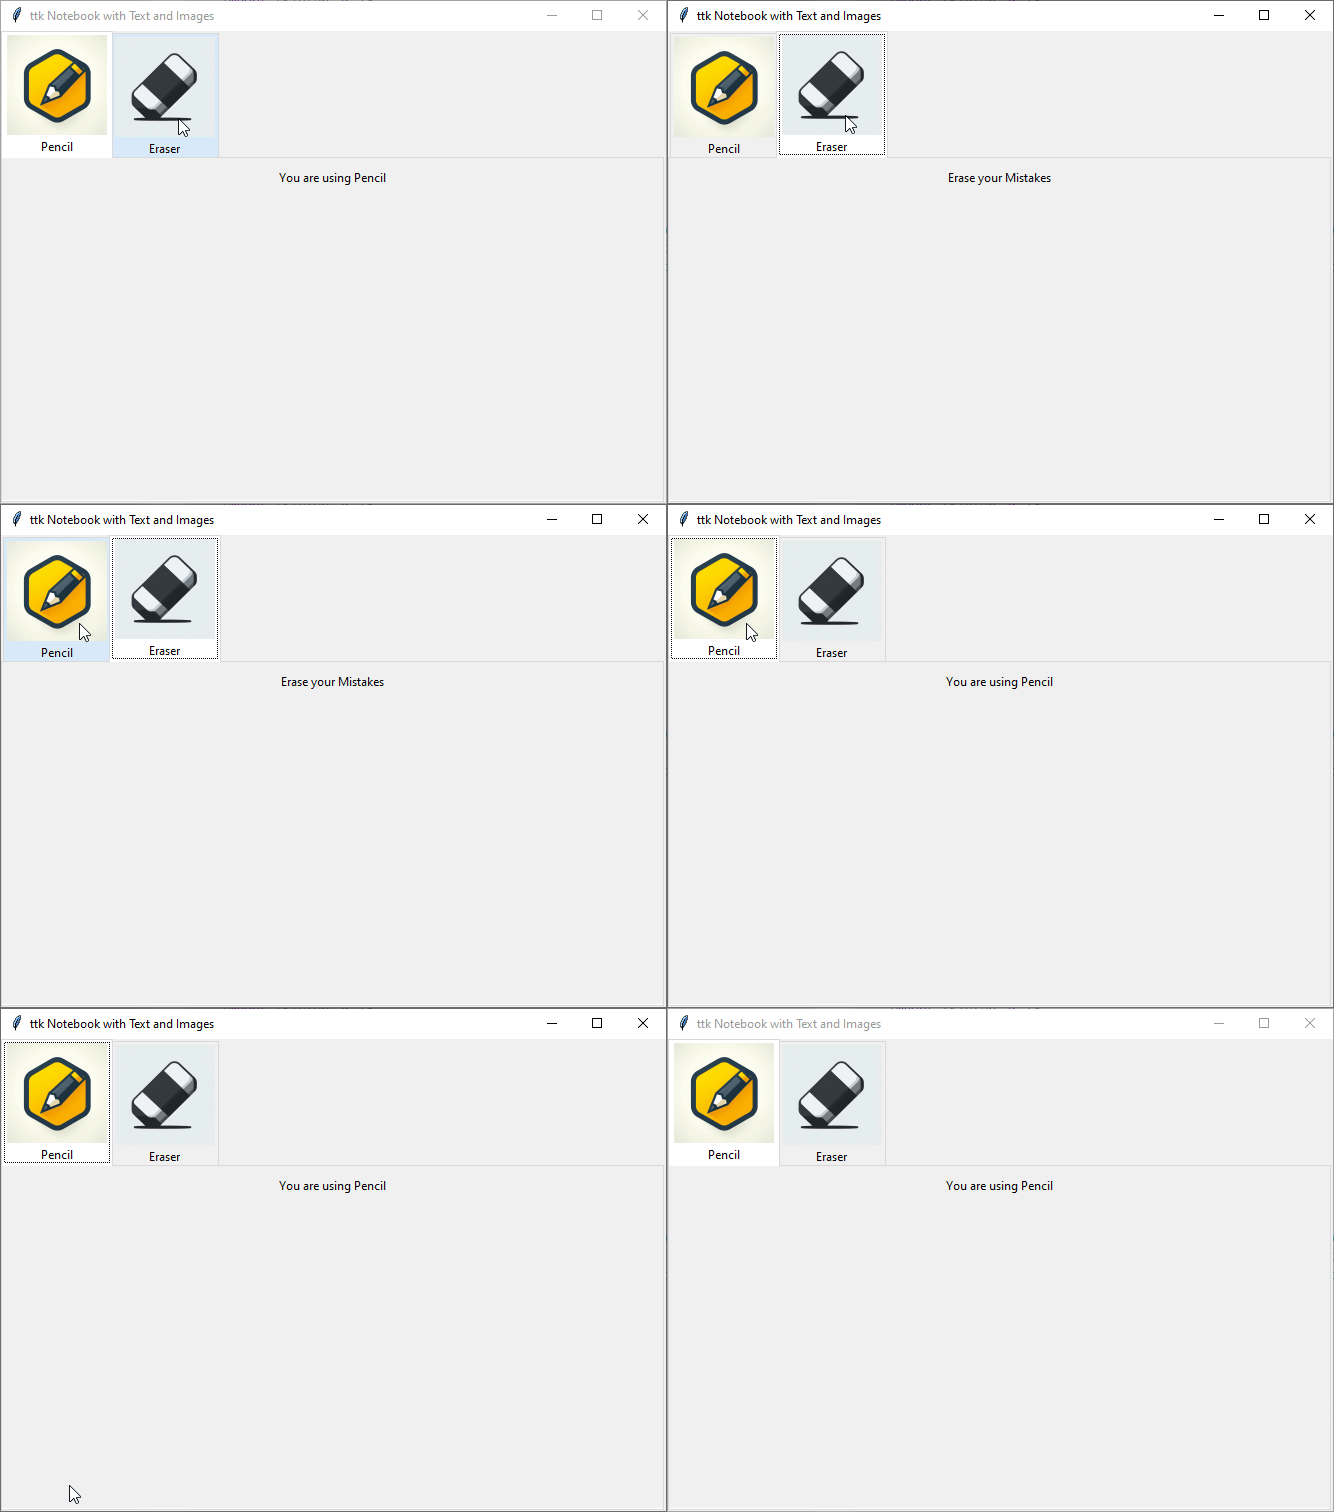
State and Underline
The state option helps you to manage a tab’s interactive states. You can set a tab to be normal (active) or disabled (inactive), which prevents users from clicking on it.
And with the underline option, you can provide keyboard access hints by underlining specific characters in the tab text. Here’s a simple example:
Example:
import tkinter as tk
from tkinter import ttk

# Create the main application window
root = tk.Tk()
root.title("Tab Height, Width, and Padding Example")
root.geometry("500x400")

# Initialize the notebook widget with specific height and width
notebook = ttk.Notebook(root, height=300, width=400)
notebook.pack()

# Create frames for tabs
tab1 = ttk.Frame(notebook)
tab2 = ttk.Frame(notebook)

# Add tabs to the notebook with padding
notebook.add(tab1, text="Tab 1", padding=(20, 10))  # Adds padding to Tab 1
notebook.add(tab2, text="Tab 2", padding=(10, 5))  # Adds padding to Tab 2

# Add content to the tabs
label1 = ttk.Label(tab1, text="This is the content of Tab 1")
label1.pack(pady=20)

label2 = ttk.Label(tab2, text="This is the content of Tab 2")
label2.pack(pady=20)

# Run the application
root.mainloop()
Output:

Methods for Managing Tabs in ttk Notebook
With ttk Notebook, you can dynamically add, remove, hide, and reorder tabs. These features are useful if your application needs to update its layout based on user actions or other conditions.
Adding and Removing Tabs
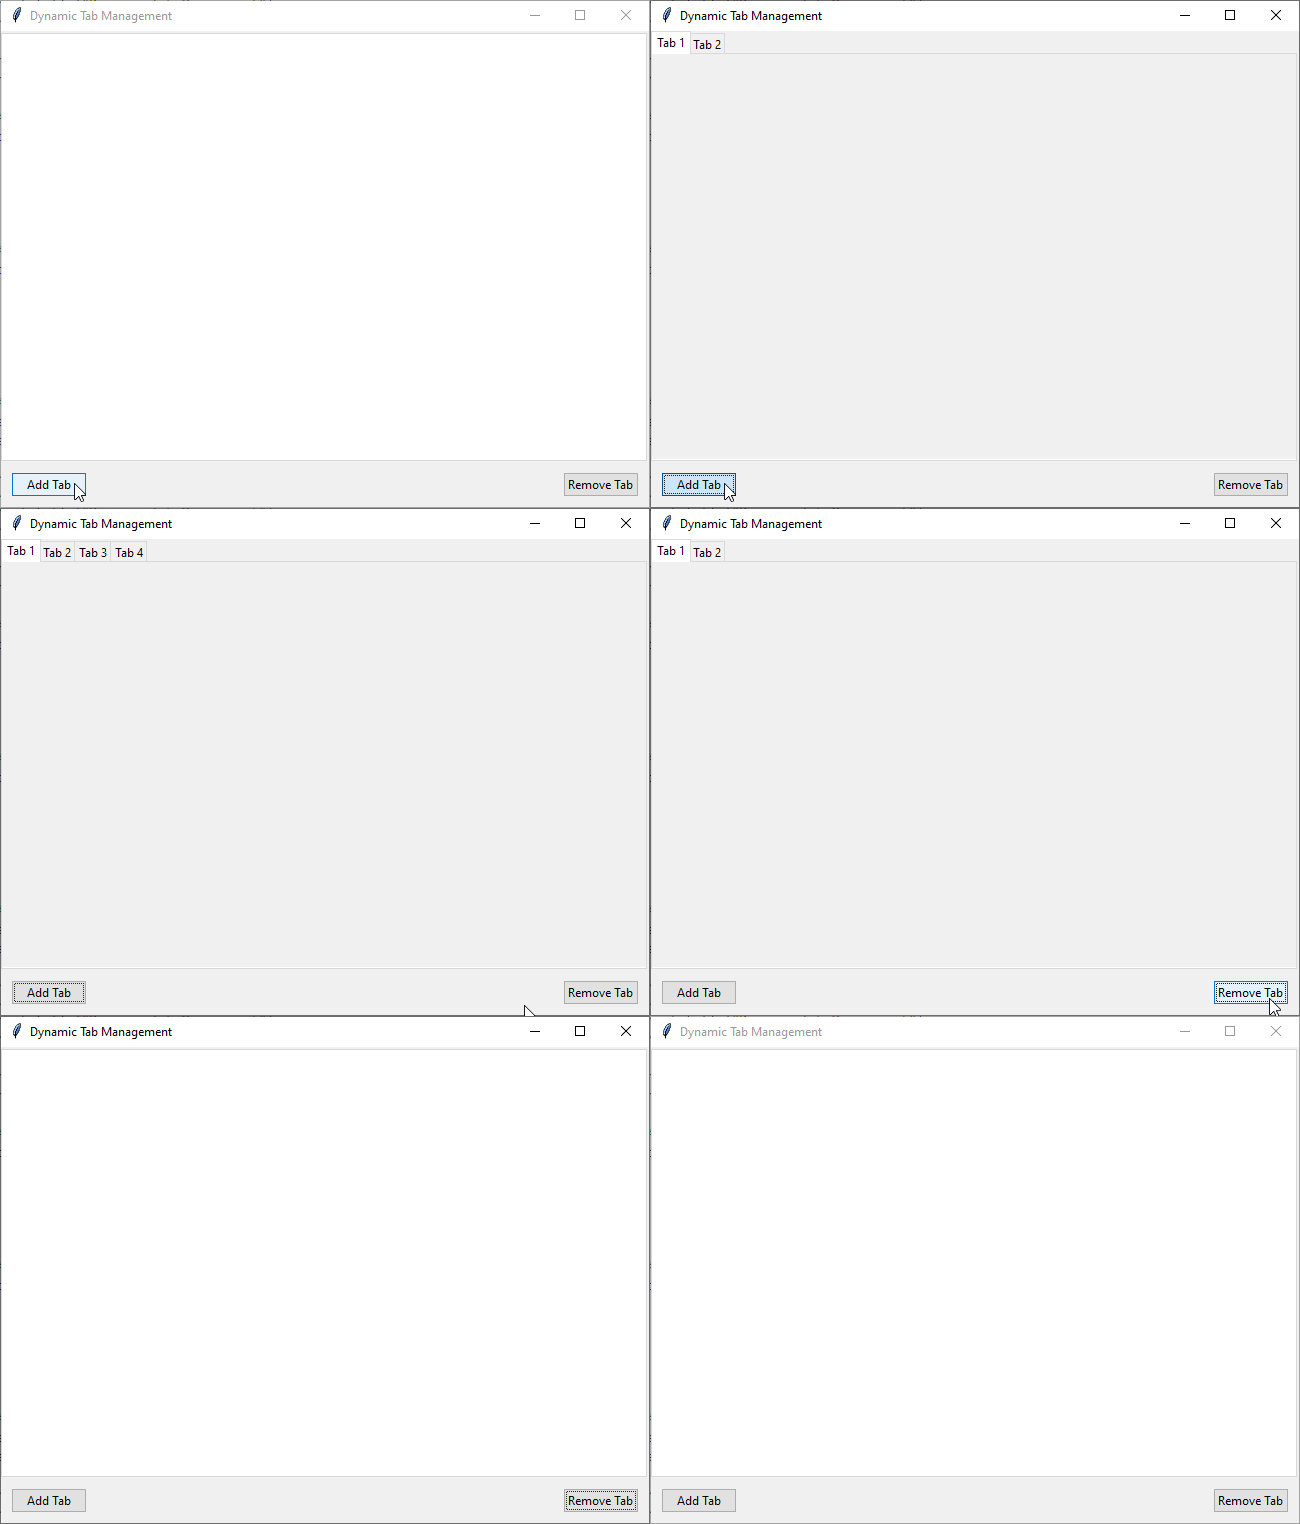
To add a tab, you use the add() method. This places the new tab at the end by default. You can add any child widget as a tab (like a frame).
For removing a tab completely, you should use the forget() method. This permanently deletes the tab from the notebook.
Now see this simple example:
Example:
import tkinter as tk
from tkinter import ttk

# Create the main window and ttk Notebook
root = tk.Tk()
root.title("Dynamic Tab Management")
root.geometry("500x400")

notebook = ttk.Notebook(root)
notebook.pack(expand=True, fill="both")

# Function to add a new tab
def add_tab():
    # Count current tabs and create a new tab label based on count
    tab_count = len(notebook.tabs())
    new_tab = ttk.Frame(notebook)  # Create a new frame as a tab
    notebook.add(new_tab, text=f"Tab {tab_count + 1}")  # Add the tab with a title

# Function to remove the last tab
def remove_tab():
    # Get the list of tabs
    tabs = notebook.tabs()
    if tabs:
        # Remove the last tab if there is at least one tab
        notebook.forget(tabs[-1])

# Add buttons to add and remove tabs
add_button = ttk.Button(root, text="Add Tab", command=add_tab)
add_button.pack(side="left", padx=10, pady=10)

remove_button = ttk.Button(root, text="Remove Tab", command=remove_tab)
remove_button.pack(side="right", padx=10, pady=10)

root.mainloop()
Output:
Inserting Tabs at Specific Positions
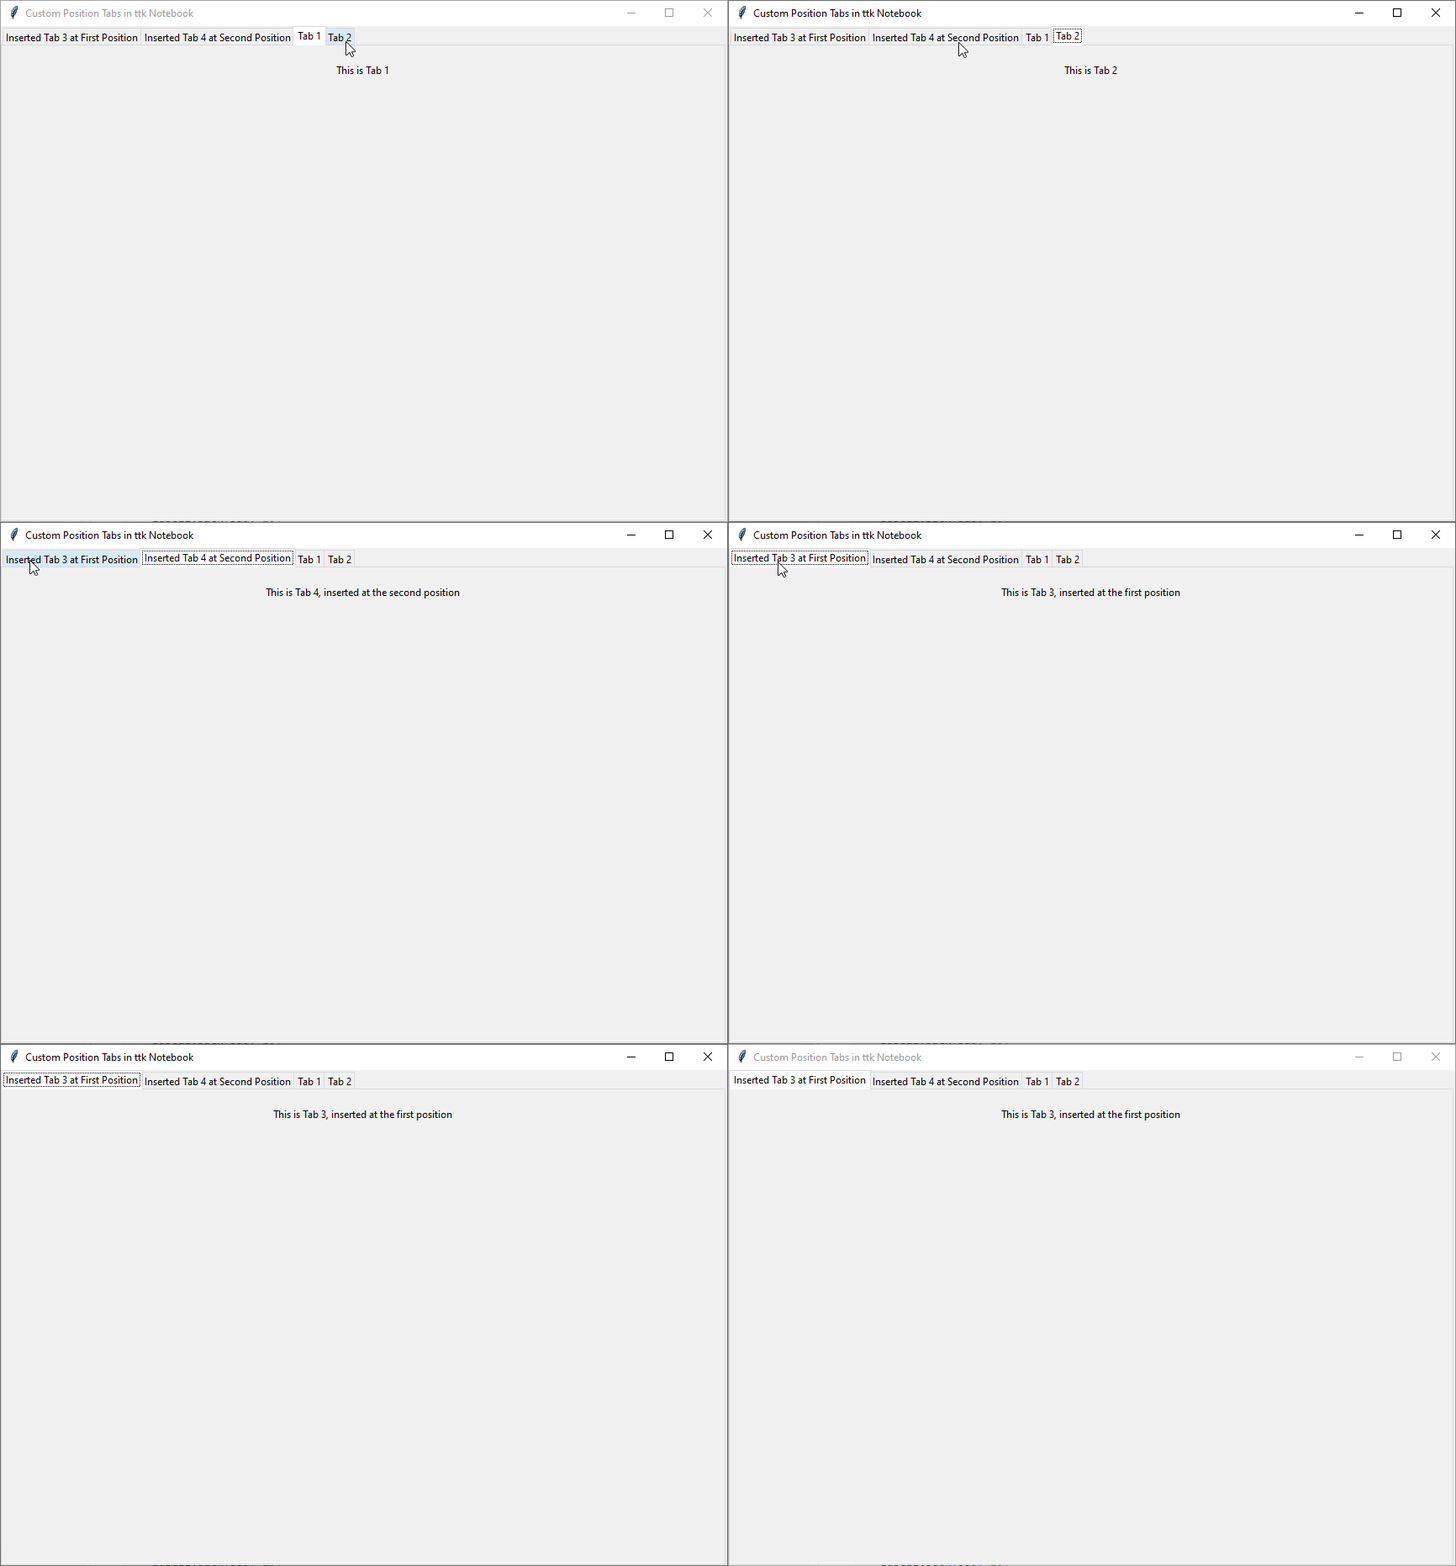
If you want to add a tab in a specific position, use insert(pos, subwindow, options) method, where:
- pos: Specifies the position index for the new tab.
- subwindow: The widget that will serve as the tab content.
- options: Additional options like
textfor the tab label.
This will let you control where the new tab appears. Here’s a simple example to demonstrate this:
Example:
import tkinter as tk
from tkinter import ttk

# Create the main window
root = tk.Tk()
root.title("Custom Position Tabs in ttk Notebook")
root.geometry("400x300")

# Create the ttk Notebook widget
notebook = ttk.Notebook(root)
notebook.pack(expand=True, fill="both")

# Create frames for each tab
tab1 = ttk.Frame(notebook)
tab2 = ttk.Frame(notebook)
tab3 = ttk.Frame(notebook)
tab4 = ttk.Frame(notebook)

# Add the first two tabs in the default order
notebook.add(tab1, text="Tab 1")
notebook.add(tab2, text="Tab 2")

# Insert Tab 3 at the first position (index 0)
notebook.insert(0, tab3, text="Inserted Tab 3 at First Position")

# Insert Tab 4 at the second position (index 1)
notebook.insert(1, tab4, text="Inserted Tab 4 at Second Position")

# Add content to the tabs for demonstration
label1 = ttk.Label(tab1, text="This is Tab 1")
label1.pack(pady=20)

label2 = ttk.Label(tab2, text="This is Tab 2")
label2.pack(pady=20)

label3 = ttk.Label(tab3, text="This is Tab 3, inserted at the first position")
label3.pack(pady=20)

label4 = ttk.Label(tab4, text="This is Tab 4, inserted at the second position")
label4.pack(pady=20)

# Run the application
root.mainloop()
Output:
Hiding and Revealing Tabs
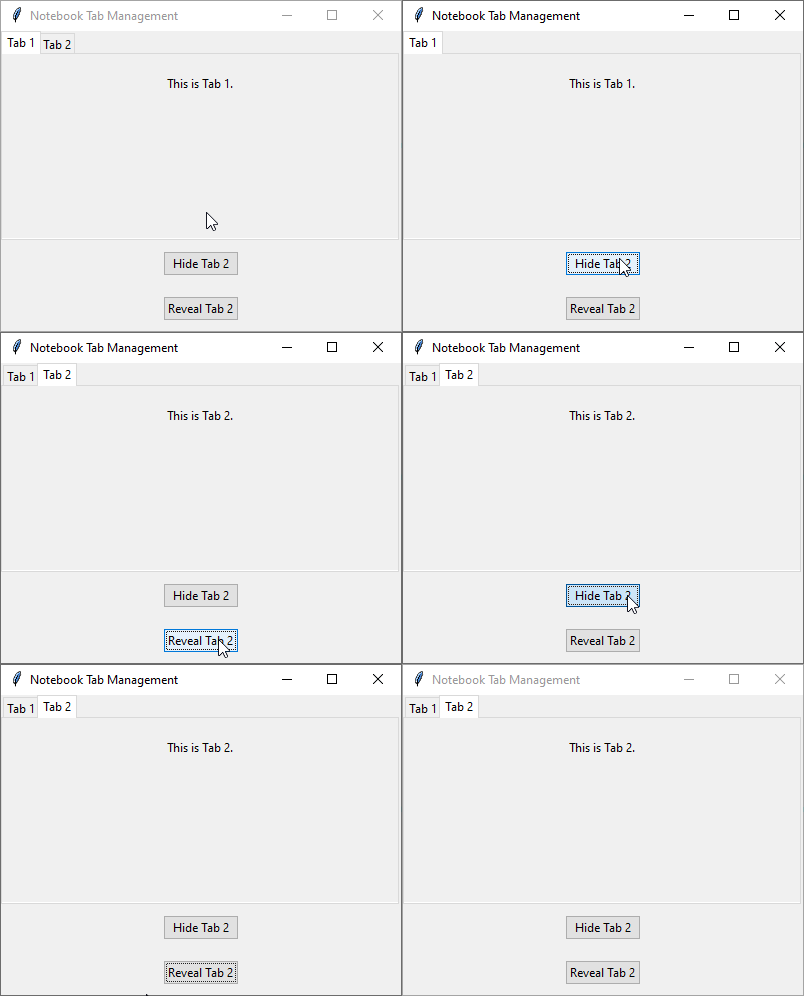
Now let’s say you want to temporarily hide a tab without removing it, you can use the hide() method for that. The tab remains in the notebook but is not visible to the user. This is useful for tabs that need to be conditionally shown.
To bring back a hidden tab, use the select() method, which makes the tab visible and switches focus to it.
Example:
import tkinter as tk
from tkinter import ttk

root = tk.Tk()
root.title("Notebook Tab Management")
root.geometry("400x300")

notebook = ttk.Notebook(root)
notebook.pack(expand=True, fill='both')

# Create frames for each tab
tab1 = ttk.Frame(notebook)
tab2 = ttk.Frame(notebook)

# Add the tabs to the notebook
notebook.add(tab1, text="Tab 1")
notebook.add(tab2, text="Tab 2")

# Add content to Tab 1
label1 = ttk.Label(tab1, text="This is Tab 1.")
label1.pack(pady=20)

# Add content to Tab 2
label2 = ttk.Label(tab2, text="This is Tab 2.")
label2.pack(pady=20)

# Function to hide Tab 2
def hide_tab():
    notebook.hide(tab2)  # Hides Tab 2

# Function to reveal Tab 2
def reveal_tab():
    notebook.select(tab2)             # Selects and displays Tab 2

# Buttons to hide and reveal Tab 2
hide_button = ttk.Button(root, text="Hide Tab 2", command=hide_tab)
hide_button.pack(pady=10)

reveal_button = ttk.Button(root, text="Reveal Tab 2", command=reveal_tab)
reveal_button.pack(pady=10)

root.mainloop()
Output:
Ttk Notebook Virtual Event
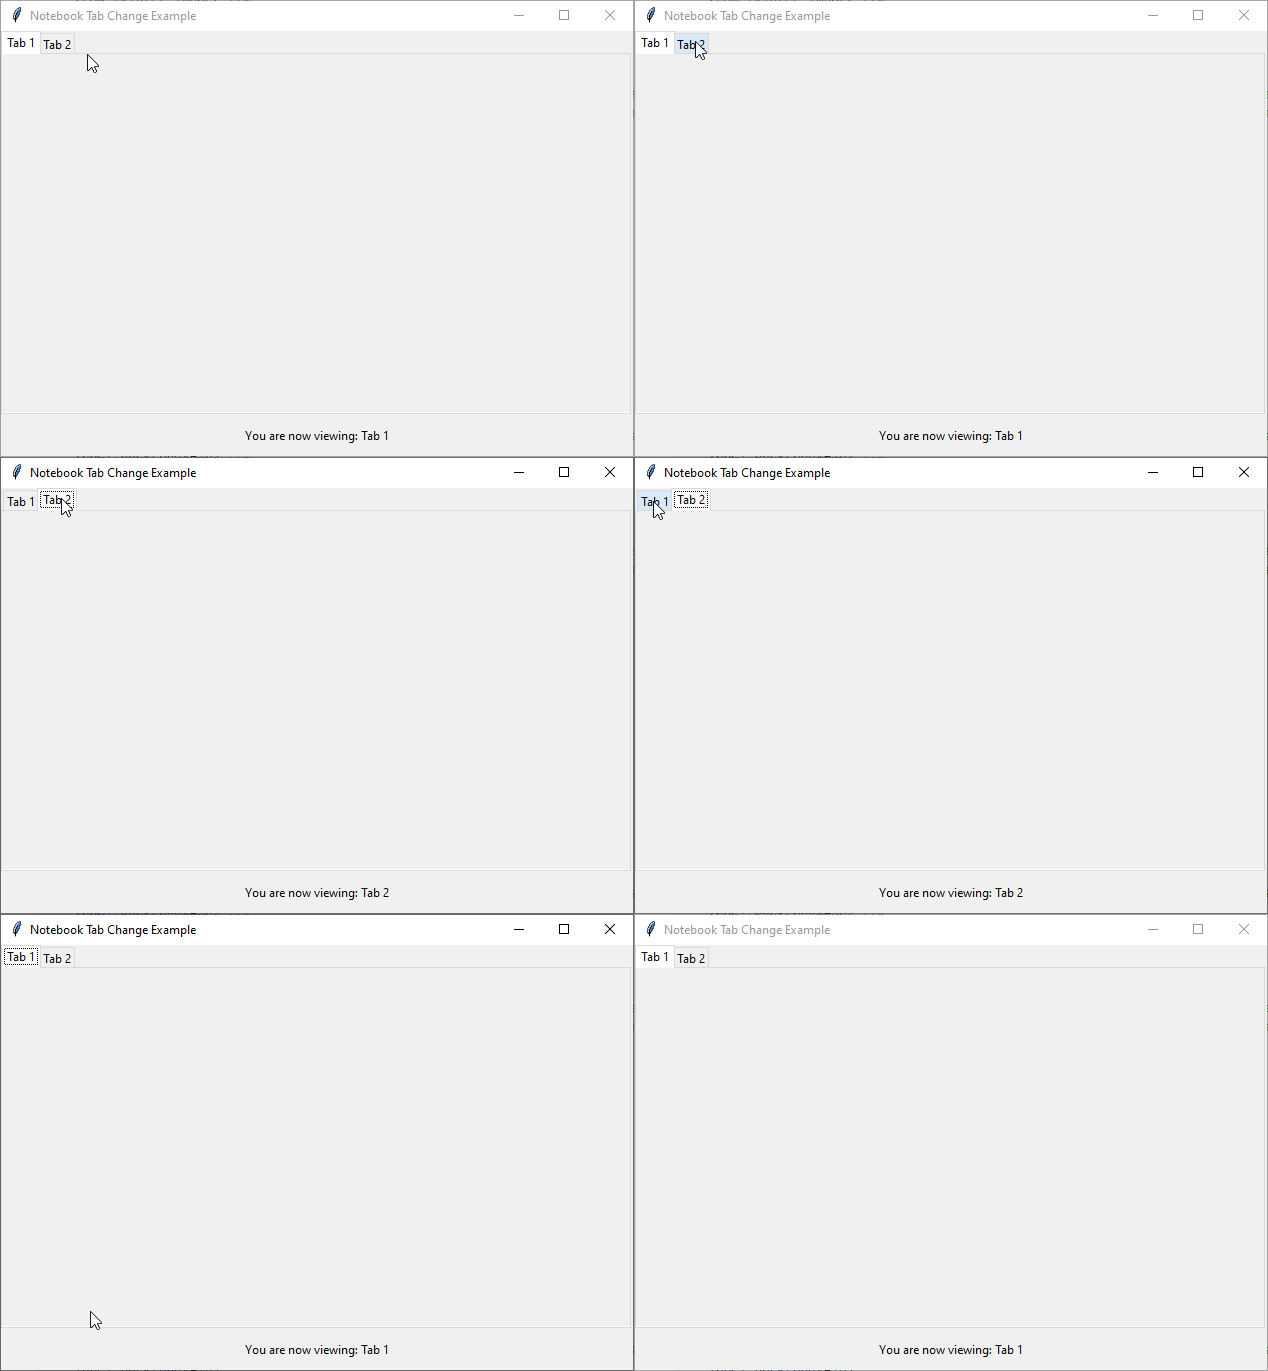
When a user clicks on a different tab of a Notebook, its specific event <<NotebookTabChanged>> is triggered. You can bind a function to this event, meaning the function will automatically run every time the tab changes.
This event can be useful if you need to perform specific actions based on the active tab, like updating content, changing settings, or logging activity. Here’s a simple example:
Example:
import tkinter as tk
from tkinter import ttk

# Function to handle tab changes
def on_tab_change(event):
    current_tab_index = notebook.index("current")  # Get the current tab index
    current_tab_name = notebook.tab(current_tab_index, "text")  # Get the current tab name
    label.config(text=f"You are now viewing: {current_tab_name}")  # Update the label

# Create the main window
root = tk.Tk()
root.title("Notebook Tab Change Example")

# Create the notebook
notebook = ttk.Notebook(root)
notebook.pack(expand=True, fill='both')

# Create tabs
tab1 = ttk.Frame(notebook)
tab2 = ttk.Frame(notebook)
notebook.add(tab1, text="Tab 1")
notebook.add(tab2, text="Tab 2")

# Create a label to display the current tab
label = tk.Label(root, text="You are now viewing: Tab 1")
label.pack(pady=10)

# Bind the tab change event
notebook.bind("<<NotebookTabChanged>>", on_tab_change)

root.mainloop()
Output:
Style the ttk Notebook
When your application is easy to use and looks good, it leads to higher satisfaction and better usability. So now we are going to learn how to style the ttk Notebook.
But as you know, before diving into the styling options, it’s important to understand the class names associated with the notebook and its tabs.
| TNotebook | This is the main class for the notebook widget. |
| TNotebook.Tab | This class name is for individual tabs within the notebook. It controls how each tab looks and behaves. |
We will use these class names with the ttk Style() to style the ttk Notebook and its tabs.
When customizing styles, you may add a custom name before these class names (like MyCustom.TNotebook) to differentiate between the default styles and your custom styles.
By doing this, you can apply unique settings without affecting other notebooks in your application.
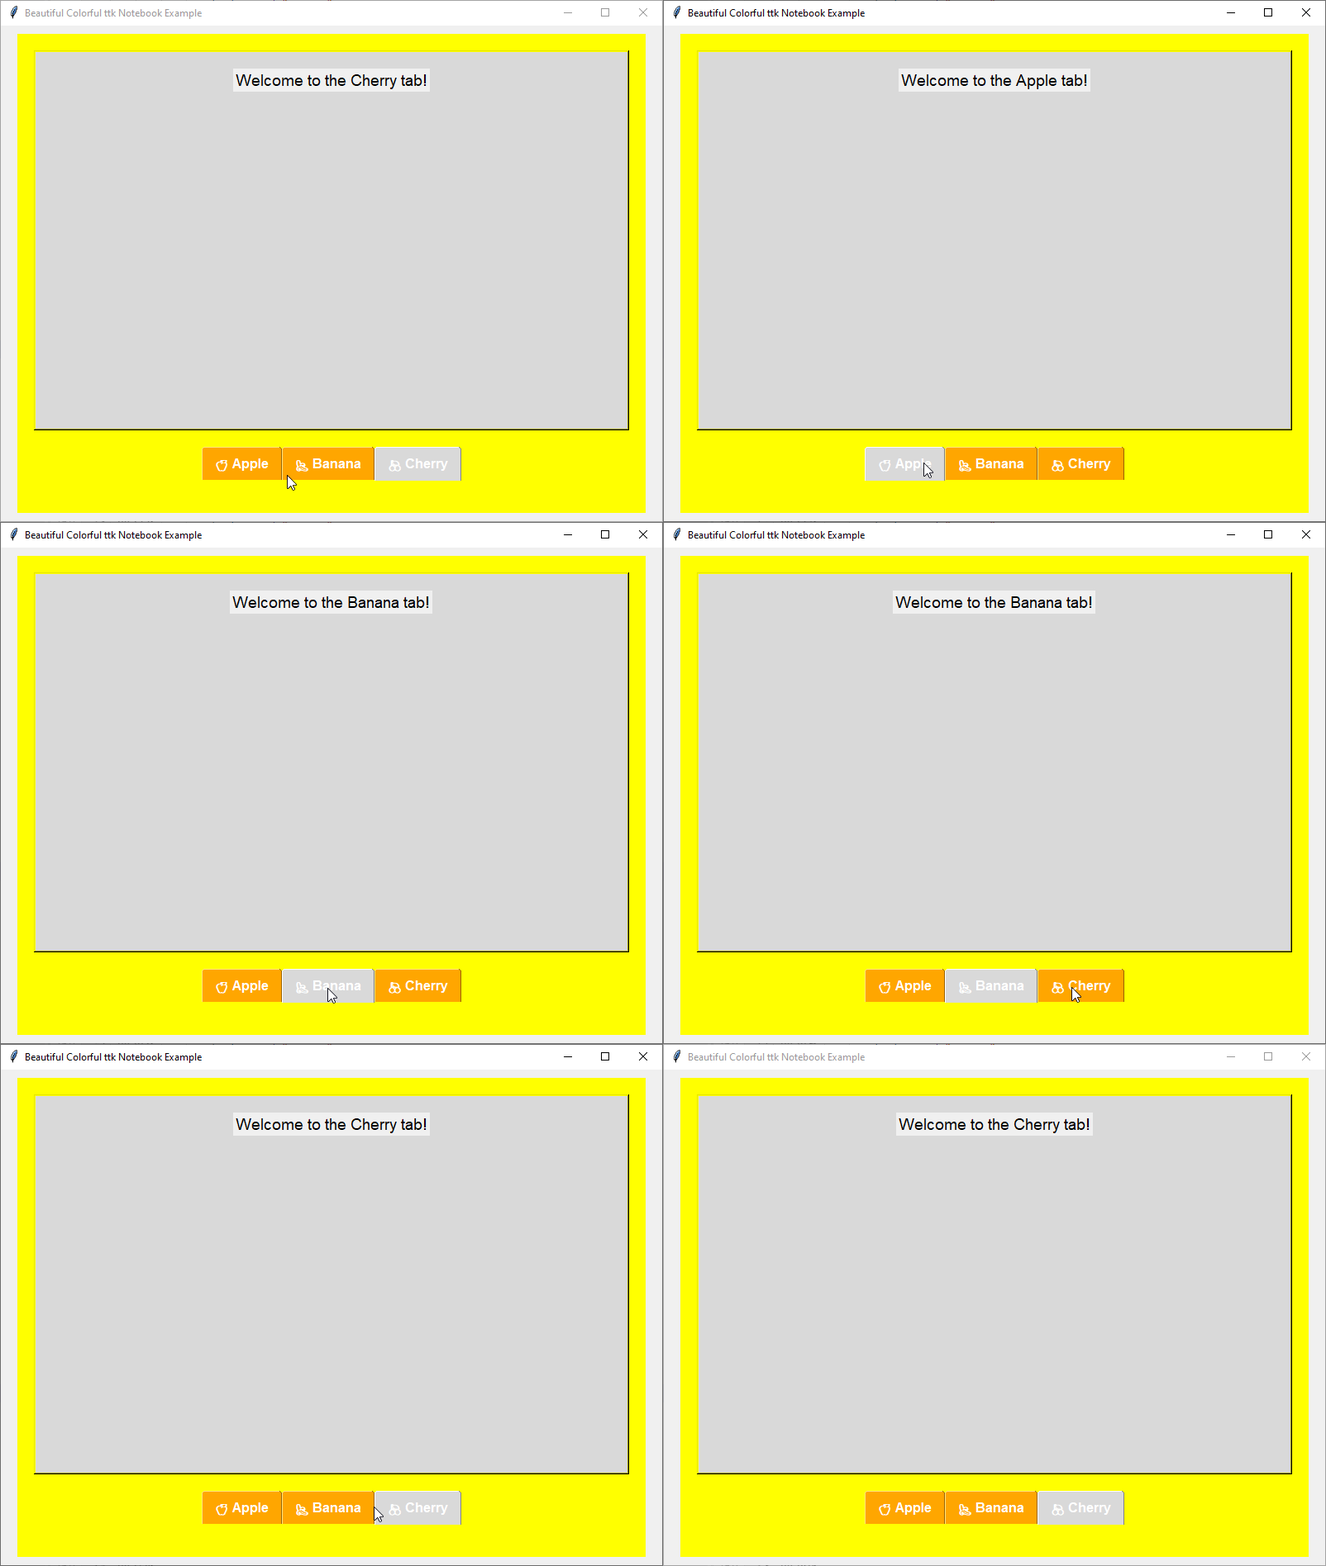
Example:
import tkinter as tk
from tkinter import ttk

# Create the main application window
root = tk.Tk()
root.title("Beautiful Colorful ttk Notebook Example")
root.geometry("800x600")

style = ttk.Style()
style.theme_use("classic")

# Configure TNotebook
style.configure("FruitNotebook.TNotebook",
                background="yellow",
                borderwidth=2,
                tabposition='s',  # Positioning tabs at the bottom
                tabmargins=20, padding=20)

# Configure TNotebook.Tab
style.configure("FruitNotebook.TNotebook.Tab",
                background="orange",
                foreground="white",
                padding=(15, 10),
                font=("Helvetica", 12, "bold"))

# Create a Notebook widget
notebook = ttk.Notebook(root, style="FruitNotebook.TNotebook")
notebook.pack(pady=10, padx=20, expand=True, fill='both')

# Create frames for tabs
frame1 = ttk.Frame(notebook, width=400, height=280)
frame2 = ttk.Frame(notebook, width=400, height=280)
frame3 = ttk.Frame(notebook, width=400, height=280)

# Add frames as tabs
notebook.add(frame1, text='🍏 Apple')
notebook.add(frame2, text='🍌 Banana')
notebook.add(frame3, text='🍒 Cherry')

# Add some content to the tabs
label1 = tk.Label(frame1, text="Welcome to the Apple tab!", font=("Helvetica", 14))
label1.pack(pady=20)

label2 = tk.Label(frame2, text="Welcome to the Banana tab!", font=("Helvetica", 14))
label2.pack(pady=20)

label3 = tk.Label(frame3, text="Welcome to the Cherry tab!", font=("Helvetica", 14))
label3.pack(pady=20)

# Start the main loop
root.mainloop()
Output:
Styling Options
Here’s a table summarizing the styling options for TNotebook and TNotebook.Tab. Some styling options are only applicable to specific themes, so keep that in mind.
TNotebook Styling Options :
| Options | Description |
|---|---|
| background | Background color of the notebook. |
| bordercolor | Color of the notebook’s border. |
| darkcolor | Color for adding depth and visibility. |
| foreground | Text and icon colors in the notebook. |
| lightcolor | Color for highlights or subtle effects. |
| padding | Space around the elements within the notebook. |
| tabmargins | Spacing between tabs and frames. |
| tabposition | Position of the tabs. The values should be n, s, e, and w. |
TNotebook.Tab Styling Options :
| Options | Description |
|---|---|
| background | Background color of individual tabs. |
| bordercolor | Color of the tab’s border. |
| compound | Combines text and images on tabs. |
| foreground | Color of the text on individual tabs. |
| font | Font style for the tab labels. |
| padding | Space within tabs to enhance aesthetics. |
| expand | Defines how much a tab expands when selected. The value should be an integer like 2, 6,10. |
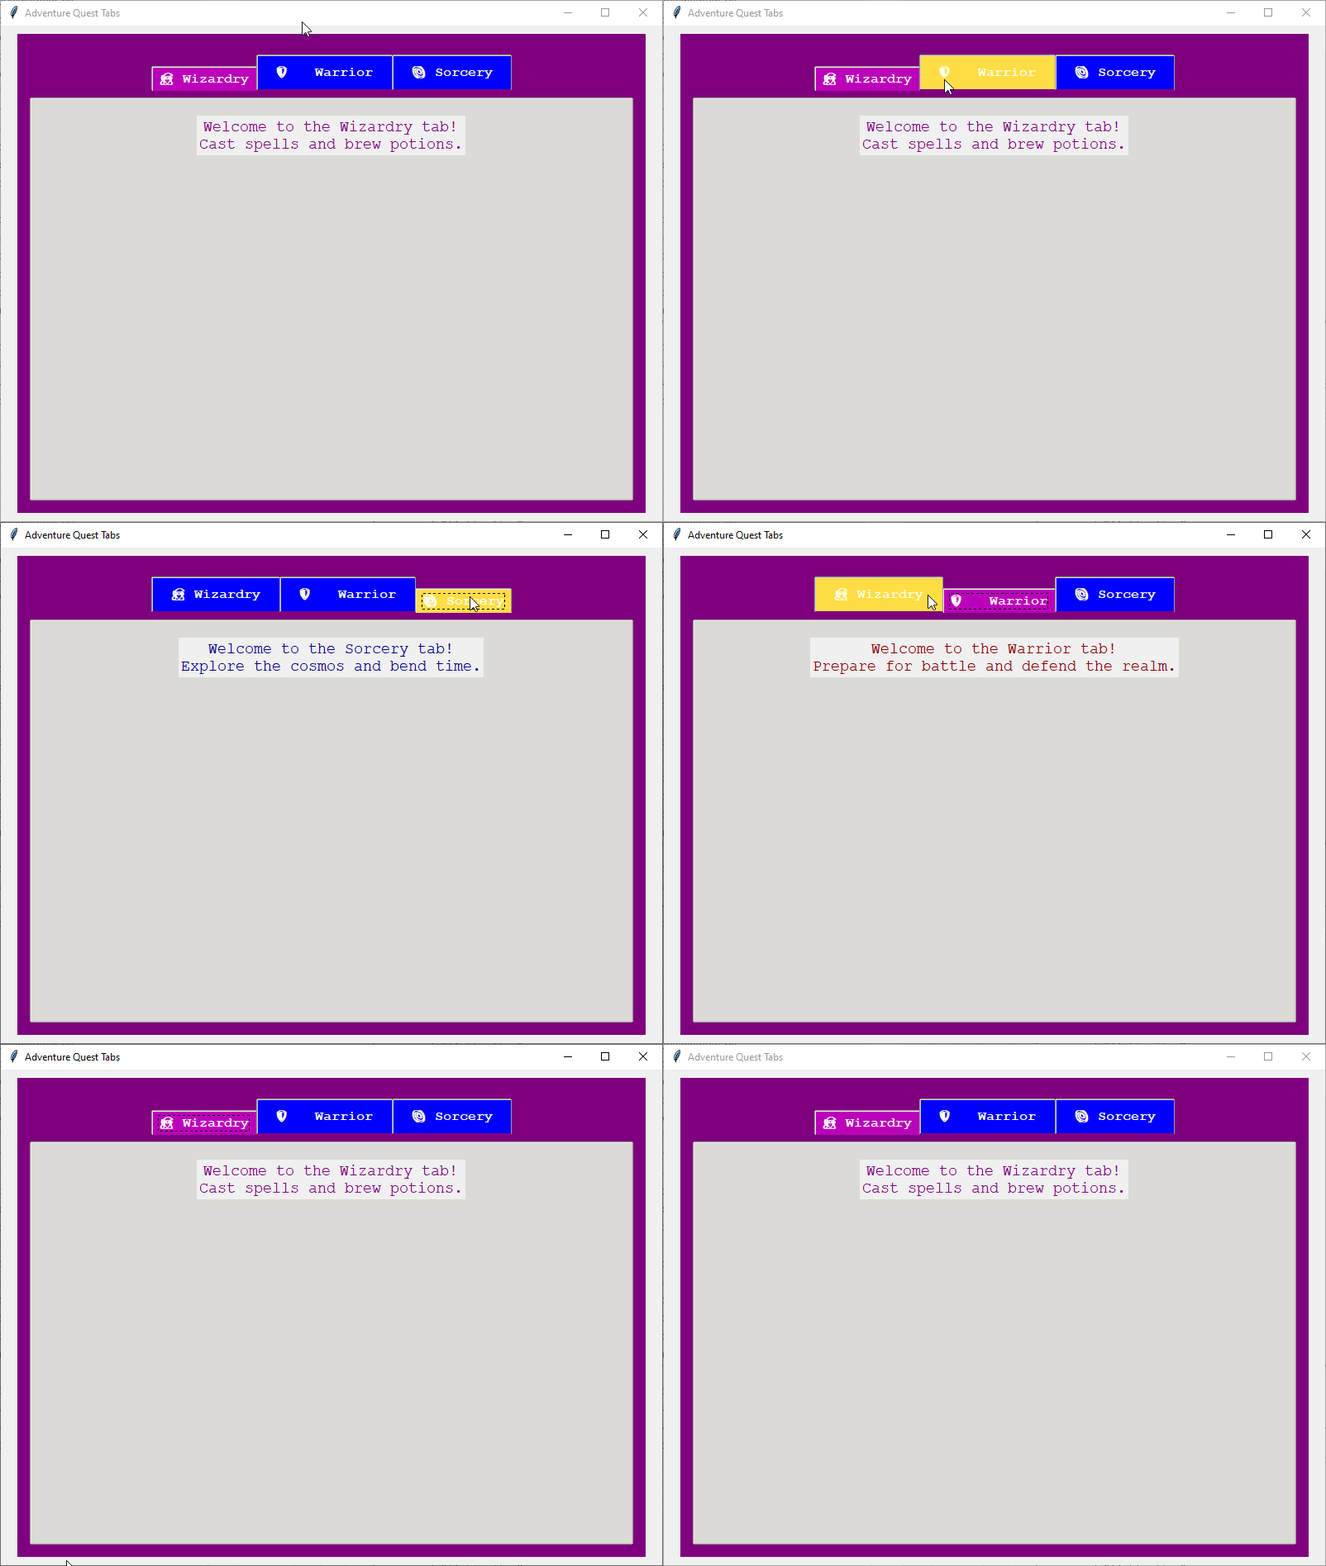
Style with Dynamic States
You can also style the ttk Notebook and its tabs for different states:
| Active | This state represents when the notebook or tab is currently active. |
| Disabled | In this state, the notebook or tab is not available for interaction. |
| Selected | The selected state shows which tab is currently in use. |
Example:
import tkinter as tk
from tkinter import ttk

# Create the main application window
root = tk.Tk()
root.title("Adventure Quest Tabs")
root.geometry("800x600")

# Set a theme and create a new Style for the ttk notebook
style = ttk.Style()
style.theme_use("clam")

# Configure TNotebook with a custom "MagicNotebook" style
style.configure("MagicNotebook.TNotebook",
                background="purple",
                borderwidth=3,
                tabposition='n',  # Positioning tabs at the top
                tabmargins=10,
                padding=15)

# Configure dynamic states for TNotebook.Tab with a "MagicNotebook" style
style.map("MagicNotebook.TNotebook.Tab",
          background=[("active", "#FFDD44"),  # Golden for active tab
                      ("selected", "#BB00BB")],  # Purple for selected
          foreground=[("selected", "white")])

# Configure static styling for TNotebook.Tab
style.configure("MagicNotebook.TNotebook.Tab",
                background="blue",
                foreground="lightyellow",
                padding=(20, 10),
                font=("Courier", 12, "bold"))

# Create the Notebook widget
notebook = ttk.Notebook(root, style="MagicNotebook.TNotebook")
notebook.pack(pady=10, padx=20, expand=True, fill='both')

# Create frames for each adventure-themed tab
frame1 = ttk.Frame(notebook, width=400, height=280)
frame2 = ttk.Frame(notebook, width=400, height=280)
frame3 = ttk.Frame(notebook, width=400, height=280)

# Add frames as tabs with colorful icons and text
notebook.add(frame1, text='🧙 Wizardry')
notebook.add(frame2, text='🛡️ Warrior')
notebook.add(frame3, text='🌌 Sorcery')

# Adding content to each tab to match the theme
label1 = tk.Label(frame1, text="Welcome to the Wizardry tab!\nCast spells and brew potions.", font=("Courier", 14), fg="purple")
label1.pack(pady=20)

label2 = tk.Label(frame2, text="Welcome to the Warrior tab!\nPrepare for battle and defend the realm.", font=("Courier", 14), fg="darkred")
label2.pack(pady=20)

label3 = tk.Label(frame3, text="Welcome to the Sorcery tab!\nExplore the cosmos and bend time.", font=("Courier", 14), fg="darkblue")
label3.pack(pady=20)

# Start the main loop
root.mainloop()
Output:
