Tkinter Listbox
Hey there, lovely readers! Welcome to this exciting Tkinter Listbox Tutorial.
Today, we’re going to learn about the Tkinter Listbox widget. By this tutorial’s end, you’ll use it like a pro! So grab your learning spirit, and let’s get started!
What exactly is a Listbox in Tkinter?
Think of it as a container that holds a list of items, such as text strings or numbers. Users can scroll through the list and make selections based on their preferences or requirements.
The Tkinter Listbox widget provides a simple yet powerful way to present information in a structured format, making it ideal for a wide range of applications, from simple to more complex GUIs.
Create Your First Listbox
Let’s get started with creating your very first Listbox!
Here’s how to do it:
Code:
from tkinter import *

# Create the root window
root = Tk()
root.title("My First Listbox")

# Create the listbox
listbox = Listbox(root)
listbox.pack()

# Add items to the listbox
listbox.insert(END, "Item 1")
listbox.insert(END, "Item 2")
listbox.insert(END, "Item 3")

# Start the GUI event loop
root.mainloop()
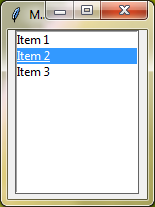
Here, we begin by importing the tkinter library and creating the root window using Tk()Listbox(root)insert()END argument ensures that the new items are added to the end of the Listbox.
Output:
Tkinter Listbox Options for Style and Control
First, let’s discuss the most commonly used Tkinter Listbox options.
Height and Width:
You can change how many items you see at once in the Listbox by adjusting its height and width. This helps control how much space the Listbox takes up on your screen.
State:
The state option lets you control whether the Listbox is active or not. You can set it to 'normal' for regular use, 'disabled' to make it unclickable, or 'readonly' to allow viewing but not editing.
Activestyle:
Ever noticed how Listbox items can change when you hover over them? With activestyle, you can choose how they react. Pick from 'none' for no change, 'underline' to underline the item on hover, or 'dotbox' to enclose it in a dotted box.
Listvariable:
Instead of adding items one by one, you can link a listvariable directly to the Listbox. This means any changes to your list will automatically update in the Listbox, making it easier to manage your data.
Example: Simple Listbox
from tkinter import *

root=Tk()
root.grid_anchor(anchor='center')

listvar=StringVar()
listvar.set(['tiger','lion','panther','cheetah'])

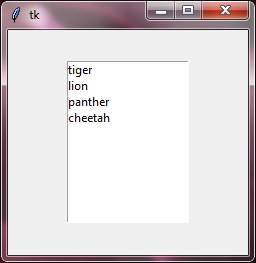
listbox=Listbox(root, height=10, width=20, listvariable=listvar)
listbox.grid()

root.mainloop()
Output:
Additional Standard Options Available for Use With The Tkinter Listbox:
backgroundborderwidthcursordisabledforegroundfontforegroundhighlightbackgroundhighlightcolorhightlightthicknessjustifyreliefselectbackgroundselectborderwidthselectforegroundtakefocusxscrollcommandyscrollcommand
For a deeper understanding of these options, explore the Tkinter Standard Options.
Creating a Stylish Listbox with Tkinter
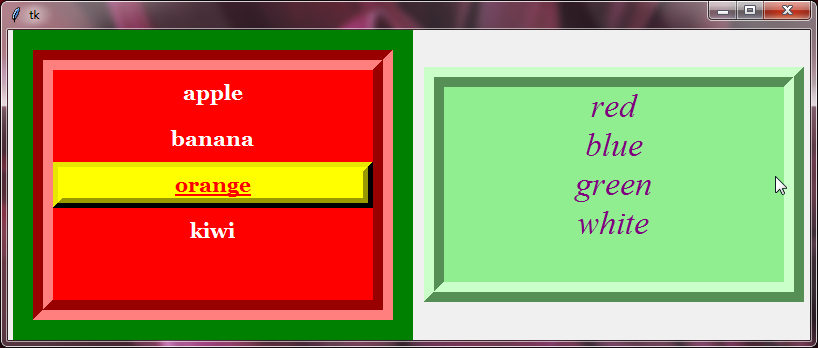
Want to make your plain listbox look cooler? Just tweak some settings! Try out different colors, fonts, and styles to make your listbox match your app. Whether you’re making a simple to-do list or showing important stuff, a fancy listbox will grab people’s attention!
Example:
from tkinter import *

root=Tk()
root.grid_anchor(anchor='center')

list1var=StringVar()
list1var.set(['apple','banana','orange','kiwi'])
listbox1=Listbox(root, height=5, width=20, listvariable=list1var, font="georgia 16 bold", justify="center", background="red", foreground="white", selectbackground="yellow", selectforeground="red", selectborderwidth=10, border=20, relief="groove", highlightbackground="orange", highlightthickness=20, highlightcolor="green")
listbox1.grid(row=0, column=0, padx=5)

list2var=StringVar()
list2var.set(['red','blue','green','white'])
listbox2=Listbox(root, height=5, width=20, listvariable=list2var, font="times 25 italic", justify="center", state="disabled", background="lightgreen", disabledforeground="purple",  border=20, relief="ridge")
listbox2.grid(row=0, column=1, padx=5)

root.mainloop()
Output:
Exploring Listbox’s selectmode!
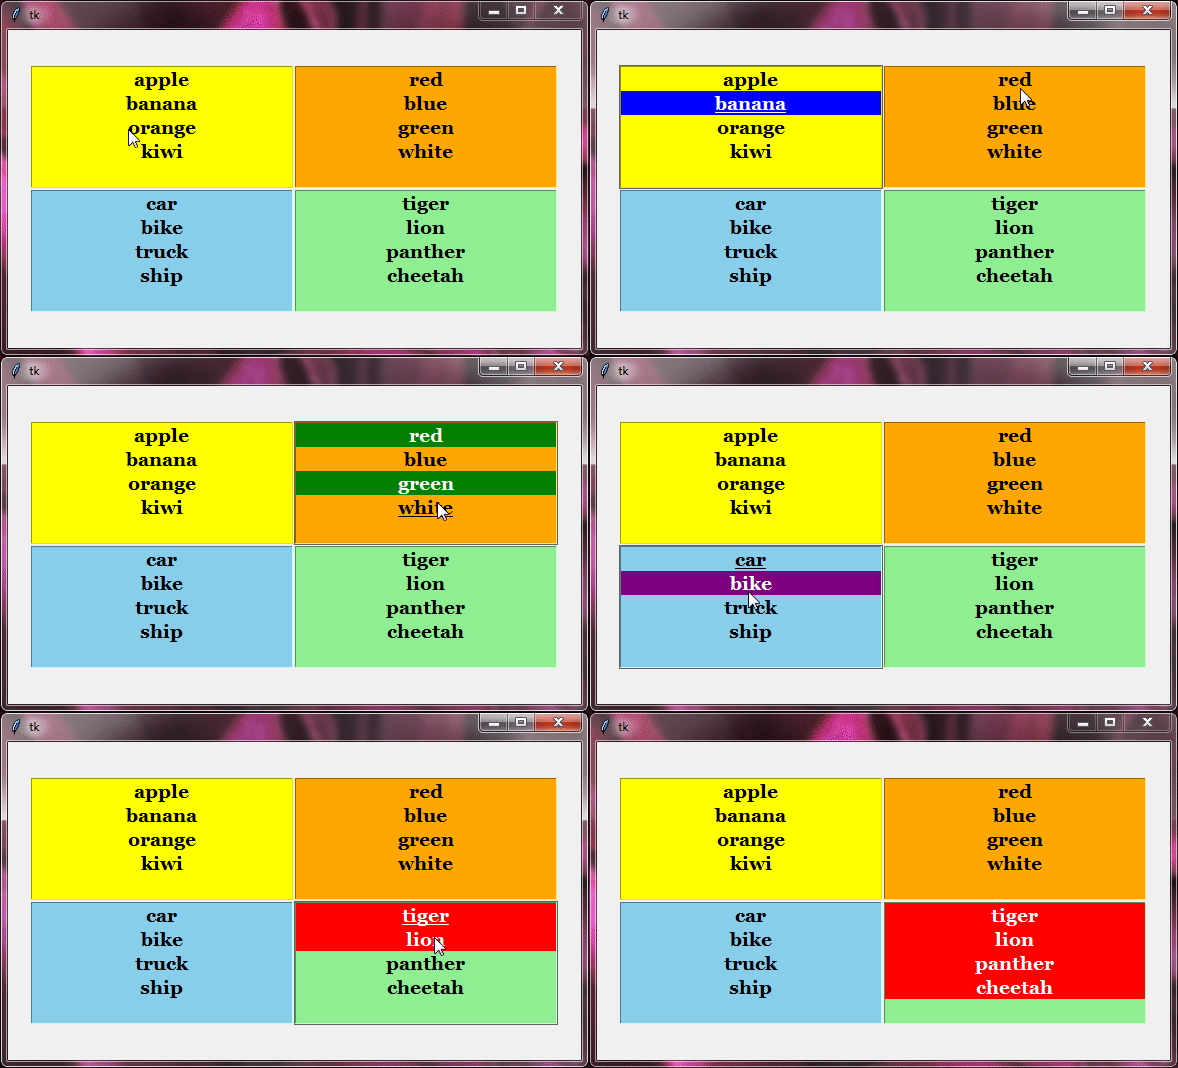
Let’s uncover how you can pick items in a Listbox using the selectmode option. There are four different ways to do it:
SINGLE: With this mode, you can pick only one item at a time in the Listbox. If you pick a new item, the one you picked before will be unselected.
BROWSE: In browse mode, you can still only pick one item at a time. But when you click and drag the mouse to scroll through the list, the item under the mouse will be picked automatically.
MULTIPLE: With multiple mode, you can pick several items in the Listbox by clicking on them one by one. Each click toggles the selection on or off.
EXTENDED: Extended mode lets you pick multiple items by clicking and dragging or using keyboard shortcuts. Holding down the Shift key while clicking extends the selection from the previously chosen item to the one you click on. Holding down the Control (Ctrl) key lets you pick multiple items individually without changing the current selection.
Example:
from tkinter import *

root=Tk()
root.grid_anchor(anchor='center')

list1var=StringVar()
list1var.set(['apple','banana','orange','kiwi'])
listbox1=Listbox(root, height=5, width=20, listvariable=list1var, selectmode='single', font="georgia 14 bold", justify="center", background="yellow", selectbackground='blue')
listbox1.grid(row=0, column=0)

list2var=StringVar()
list2var.set(['red','blue','green','white'])
listbox2=Listbox(root, height=5, width=20, listvariable=list2var, selectmode='multiple', font="georgia 14 bold", justify="center", background="orange", selectbackground='green')
listbox2.grid(row=0, column=1)

list3var=StringVar()
list3var.set(['car','bike','truck','ship'])
listbox3=Listbox(root, height=5, width=20, listvariable=list3var, selectmode='browse', font="georgia 14 bold", justify="center", background="skyblue", selectbackground='purple')
listbox3.grid(row=1, column=0)

list4var=StringVar()
list4var.set(['tiger','lion','panther','cheetah'])
listbox4=Listbox(root, height=5, width=20, listvariable=list4var, selectmode='extended', font="georgia 14 bold", justify="center", background="lightgreen", selectbackground='red')
listbox4.grid(row=1, column=1)

root.mainloop()
Output:
Add Items to Tkinter Listbox
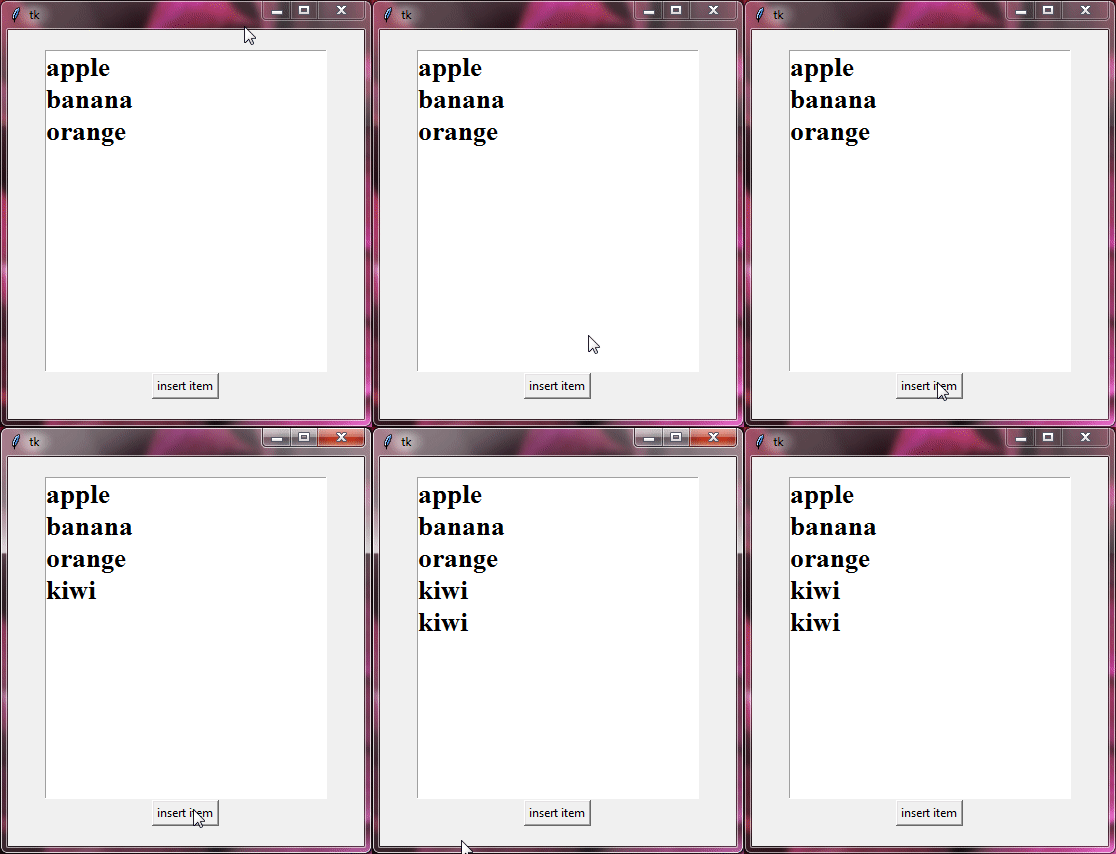
Using the insert() method, you can add new items to the Listbox at particular positions.
Example:
from tkinter import *

root=Tk()
root.grid_anchor(anchor='center')

def insert_item():
    listbox.insert('end','kiwi')

listvar=StringVar()
listvar.set(['apple','banana','orange'])

listbox=Listbox(root, height=10, width=20, listvariable=listvar, font="times 20 bold")
listbox.grid()

insert_itm_btn=Button(root, text='insert item', command=insert_item)
insert_itm_btn.grid()

root.mainloop()
In the code above, we use the insert()0 means the item will be added at the beginning, and 'end' means the item will be added at the end of the listbox.
Output:
Deleting Items from Your Listbox
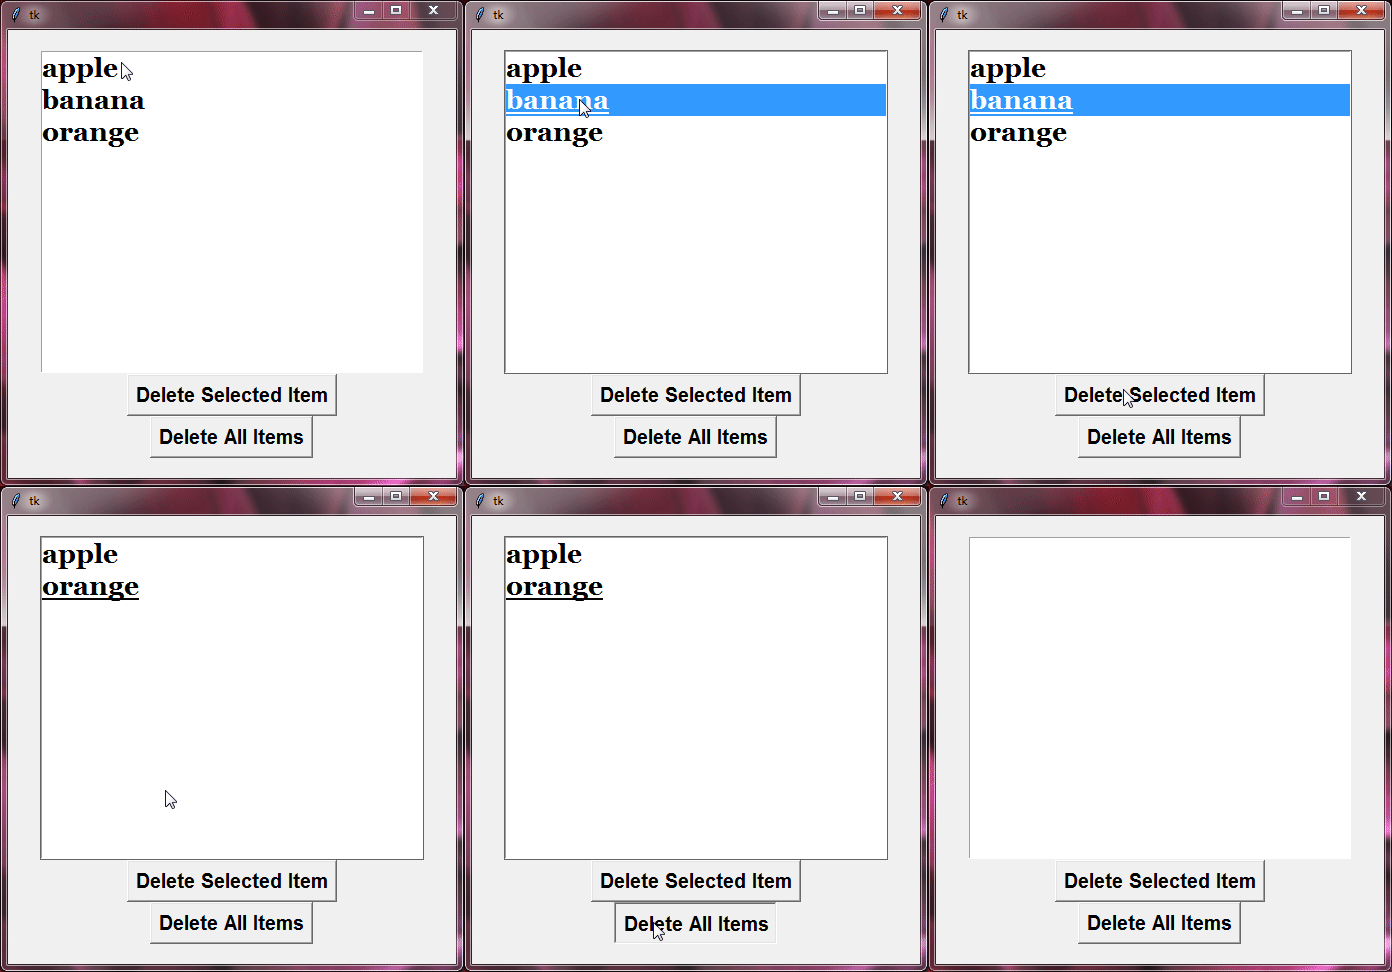
Did you make a slip-up or realize you don’t need something on your list anymore? No problem! You can simply get rid of it from your listbox using the delete() method.
Example:
from tkinter import *

root=Tk()
root.grid_anchor(anchor='center')

def delete_selected_item():
    listbox.delete('active')

def delete_all_items():
    listbox.delete(0,'end')

listvar=StringVar()
listvar.set(['apple','banana','orange'])

listbox=Listbox(root, height=10, width=20, listvariable=listvar, font="georgia 20 bold")
listbox.grid()

delete_itm_btn=Button(root, text='Delete Selected Item', command=delete_selected_item, font="arial 15 bold")
delete_itm_btn.grid()

delete_itms_btn=Button(root, text='Delete All Items', command=delete_all_items, font="arial 15 bold")
delete_itms_btn.grid()

root.mainloop()
In the code above, we use the delete()
Output:
Getting Selected Items
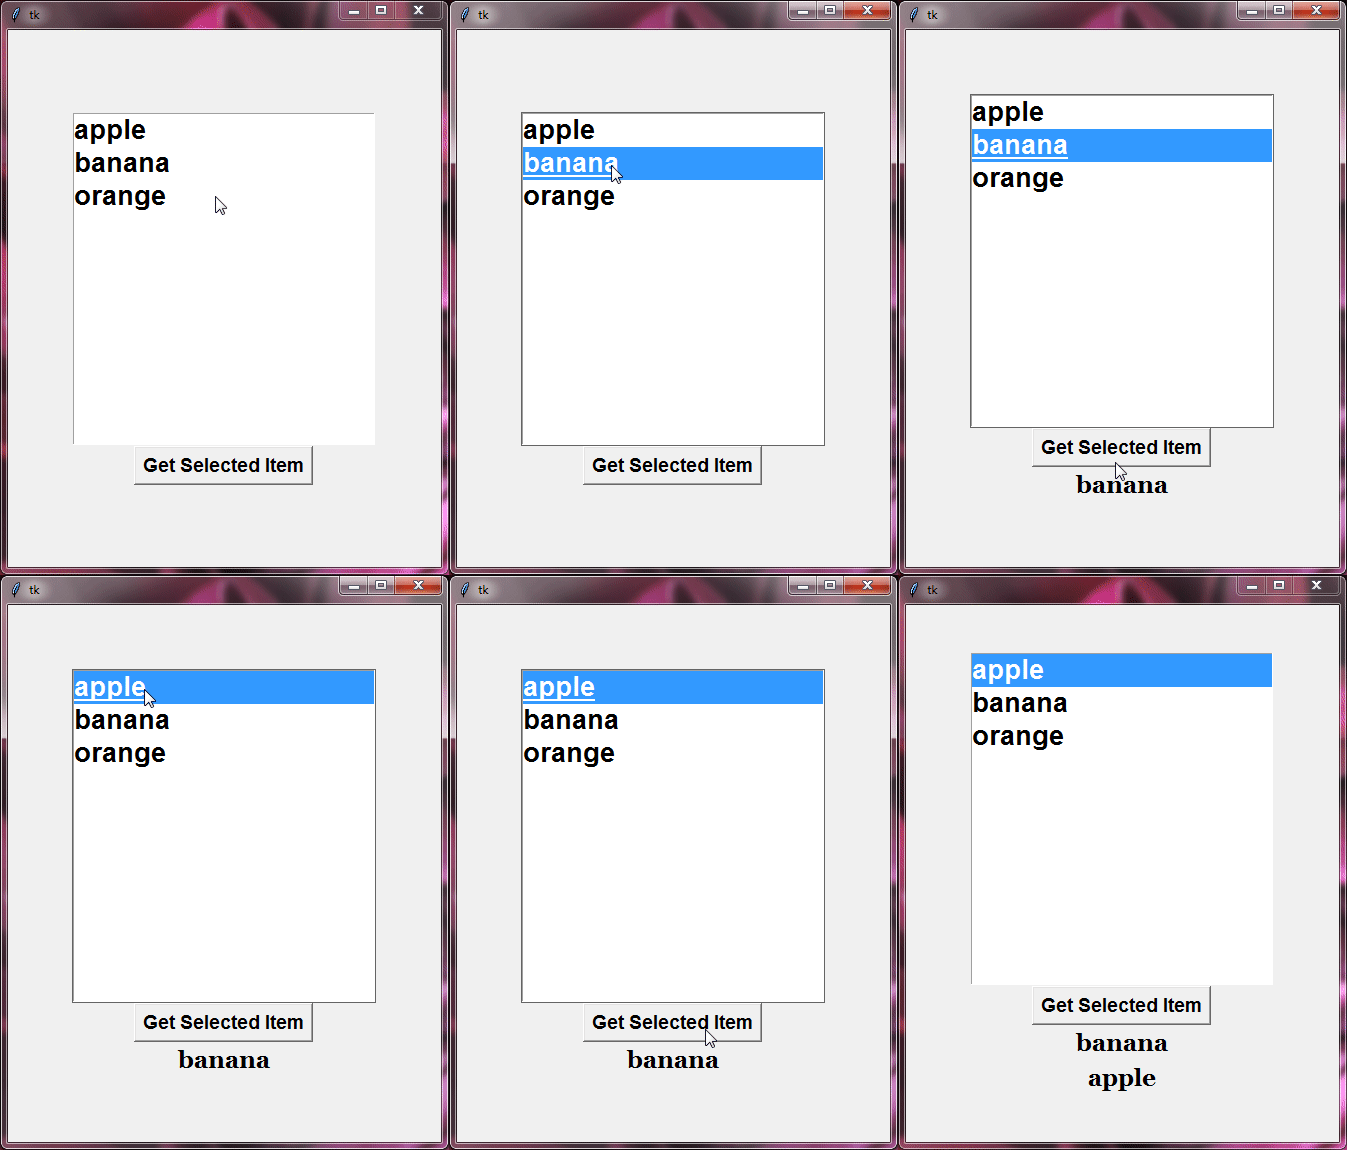
Let’s uncover how to access the chosen item! Using the get() method, you can grab the content of the item you’ve selected.
Example:
from tkinter import *

root=Tk()
root.grid_anchor(anchor='center')

# this function is showing the use of get method of listbox widget
def get_item():
    getval=listbox.get('active')
    label=Label(root, text=str(getval), font="georgia 18 bold")
    label.grid()

# listvar is the variable which is linked to the listbox
listvar=StringVar()
listvar.set(['apple','banana','orange'])

listbox=Listbox(root, height=10, width=20, listvariable=listvar, font="arial 20 bold")
listbox.grid()

# this button is used to invoke get_item function
get_itm_btn=Button(root, text='Get Selected Item', command=get_item, font="arial 14 bold")
get_itm_btn.grid()

root.mainloop()
Output:
Tkinter Listbox Indexes: Understanding Where Things Are!
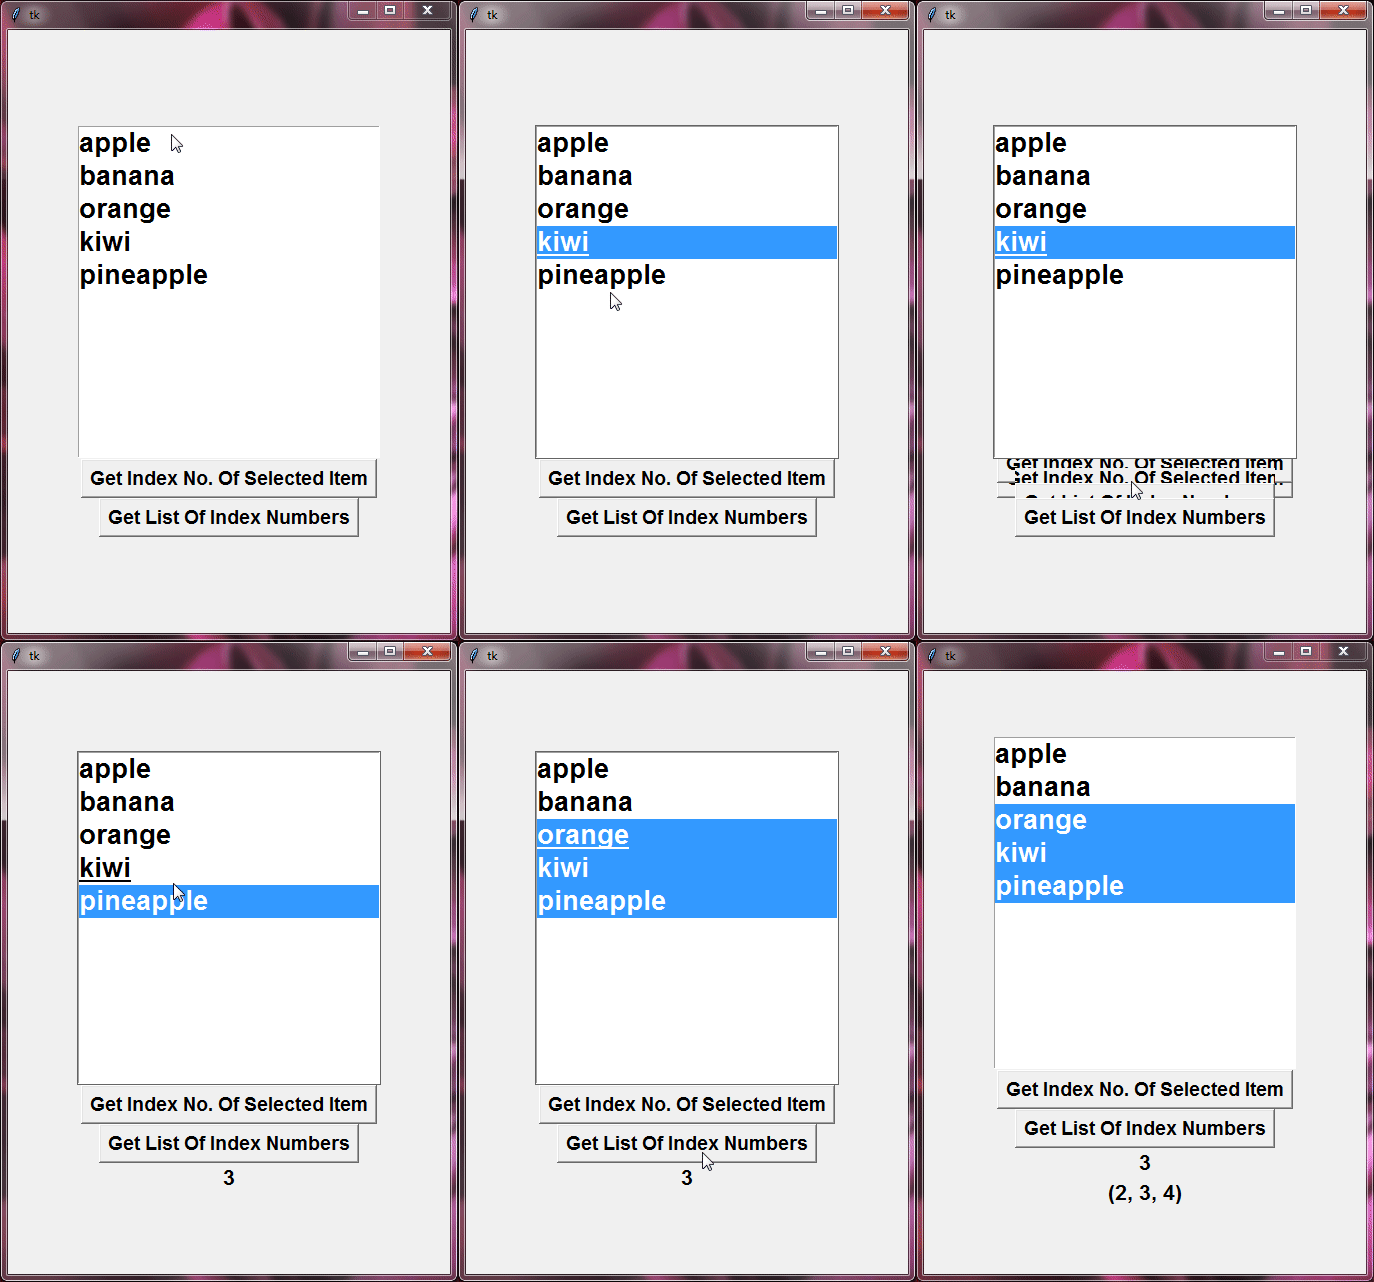
Think of it like searching for hidden treasures! The index() method tells you where a specific item is located in the Listbox. It could be at the start, end, or a certain position in the list.
On the other hand, the curselection() method is like finding all the treasures at once. It shows you the positions of all the items currently selected in the Listbox.
Example:
from tkinter import *

root=Tk()
root.grid_anchor(anchor='center')

# this function is showing the use of index method of listbox widget
def get_index():
    getval=listbox.index('active')
    label=Label(root, text=str(getval), font="arial 16 bold")
    label.grid()

# this function is showing the use of curselection method of listbox widget
def get_list():
    getval=listbox.curselection()
    label=Label(root, text=str(getval), font="arial 16 bold")
    label.grid()

# listvar is the variable which is linked to the listbox
listvar=StringVar()
listvar.set(['apple', 'banana', 'orange', 'kiwi', 'pineapple'])

listbox=Listbox(root, height=10, width=20, listvariable=listvar, font="arial 20 bold", selectmode="extended")
listbox.grid()

# this button is used to invoke get_index function
get_itm_index_btn=Button(root, text='Get Index No. Of Selected Item', command=get_index, font="arial 14 bold")
get_itm_index_btn.grid()

# this button is used to invoke get_list function
get_list_of_index=Button(root, text='Get List Of Index Numbers', command=get_list, font="arial 14 bold")
get_list_of_index.grid()

root.mainloop()
Output:
Customize Listbox Items
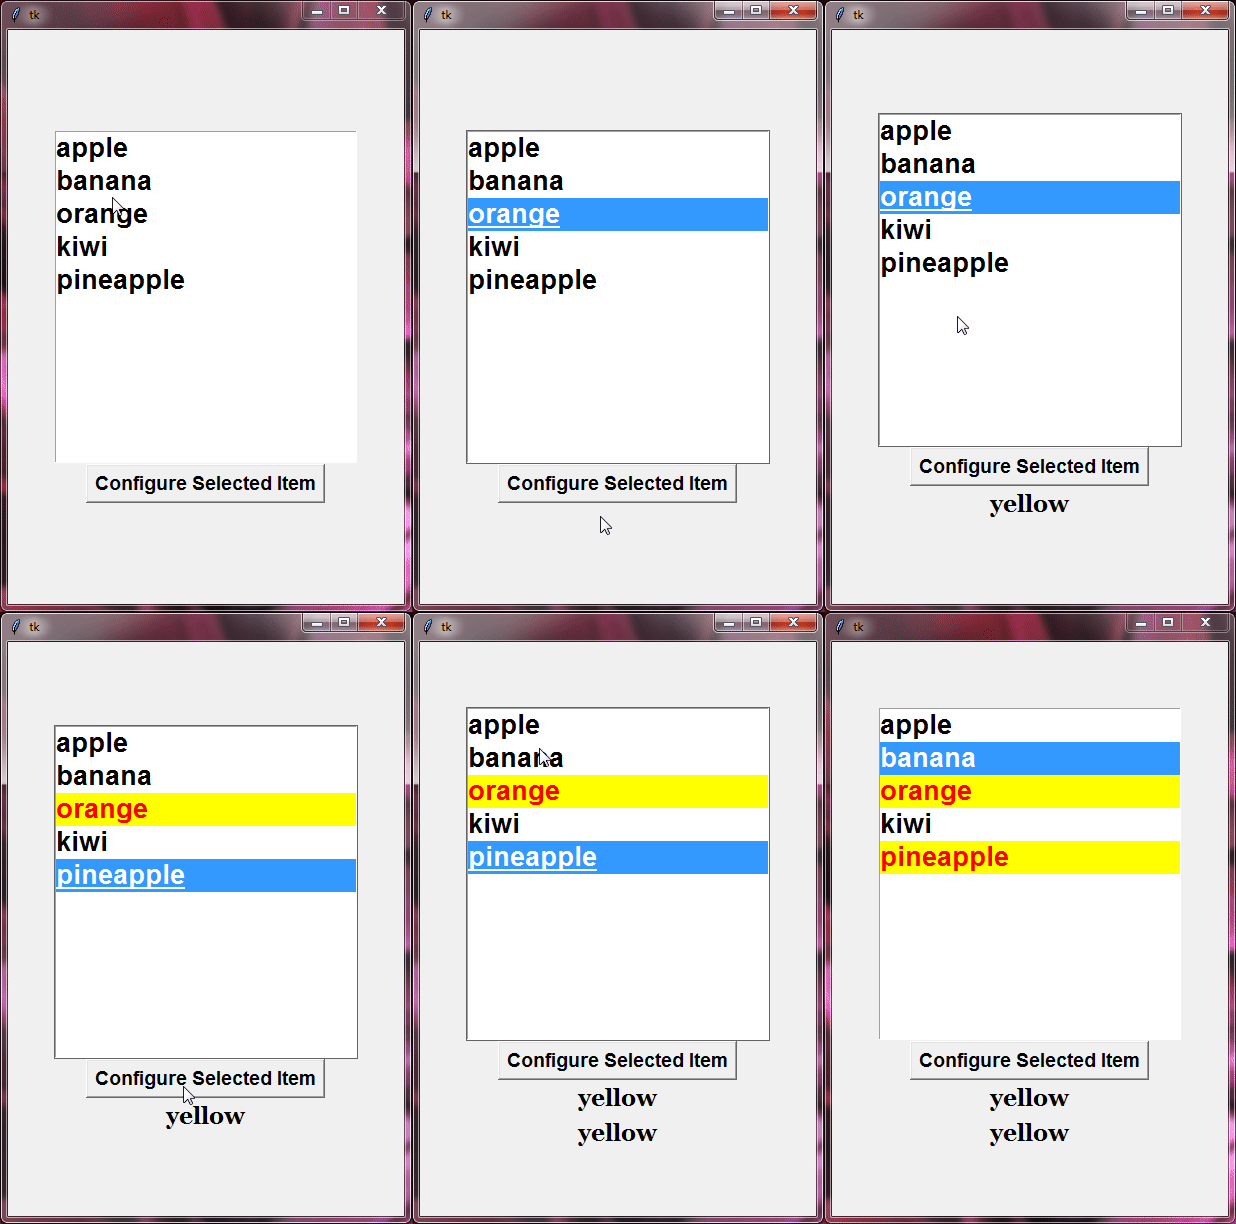
Let’s make each item in our listbox stand out by using the itemconfigure() method. This method allows us to customize individual items in the listbox, almost like giving each one its unique style. We just need to know two things: which item we’re changing (its index) and what changes we want to make (the options). You can tweak options such as the color of the text, the background color, or even the font for specific items.
Now, if we’re curious about how a particular item looks, we can use the itemcget() method. It’s like being detectives searching for clues about an item’s appearance. Again, we need to know two things: which item we’re investigating (its index) and which aspect of its appearance we want to know about (the option).
Example:
from tkinter import *

root=Tk()
root.grid_anchor(anchor='center')

# this function is showing the use of itemconfigure and itemcget method of listbox widget
def config_item():
    listbox.itemconfigure('active', background='yellow', foreground="red")
    getval=listbox.itemcget('active', option='background')
    label=Label(root, text=str(getval), font="georgia 18 bold")
    label.grid()

# listvar is the variable which is linked to the listbox
listvar=StringVar()
listvar.set(['apple', 'banana', 'orange', 'kiwi', 'pineapple'])

listbox=Listbox(root, height=10, width=20, listvariable=listvar, font="arial 20 bold")
listbox.grid()

# this button is used to invoke config_item function
config_itm_btn=Button(root, text='Configure Selected Item', command=config_item, font="arial 14 bold")
config_itm_btn.grid()

root.mainloop()
Output:
Checking Selection Inclusion
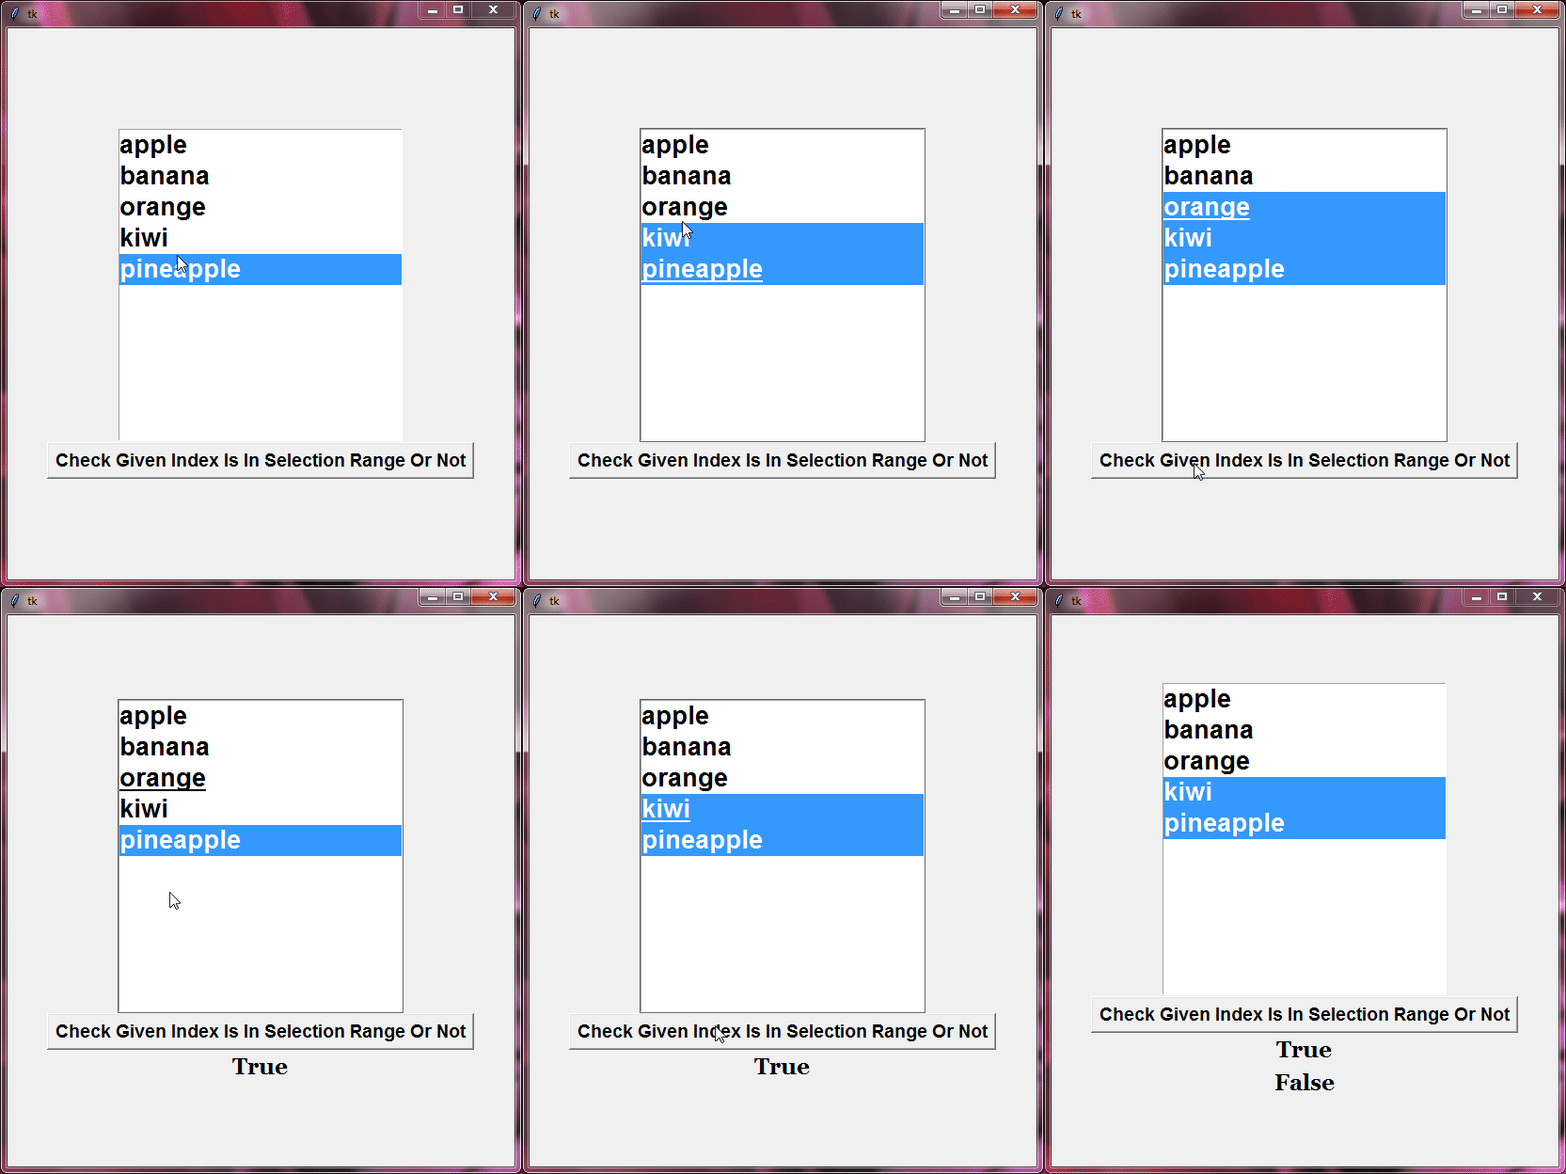
With the selection_includes() method, you can find out if a certain index is part of the selected items in your listbox.
Example:
from tkinter import *

root=Tk()
root.grid_anchor(anchor='center')

# this function is showing the use of selection_includes method of listbox widget
def check_index():
    getval=listbox.selection_includes('2')
    label=Label(root, text=str(getval), font="georgia 18 bold")
    label.grid()

# listvar is the variable which is linked to the listbox
listvar=StringVar()
listvar.set(['apple', 'banana', 'orange', 'kiwi', 'pineapple'])

listbox=Listbox(root, height=10, width=20, listvariable=listvar, font="arial 20 bold", selectmode="extended")
listbox.grid()

# this button is used to invoke check_index function
check_index_btn=Button(root, text='Check Given Index Is In Selection Range Or Not', command=check_index, font="arial 14 bold")
check_index_btn.grid()

root.mainloop()
Output:
Setting and Clearing Selection
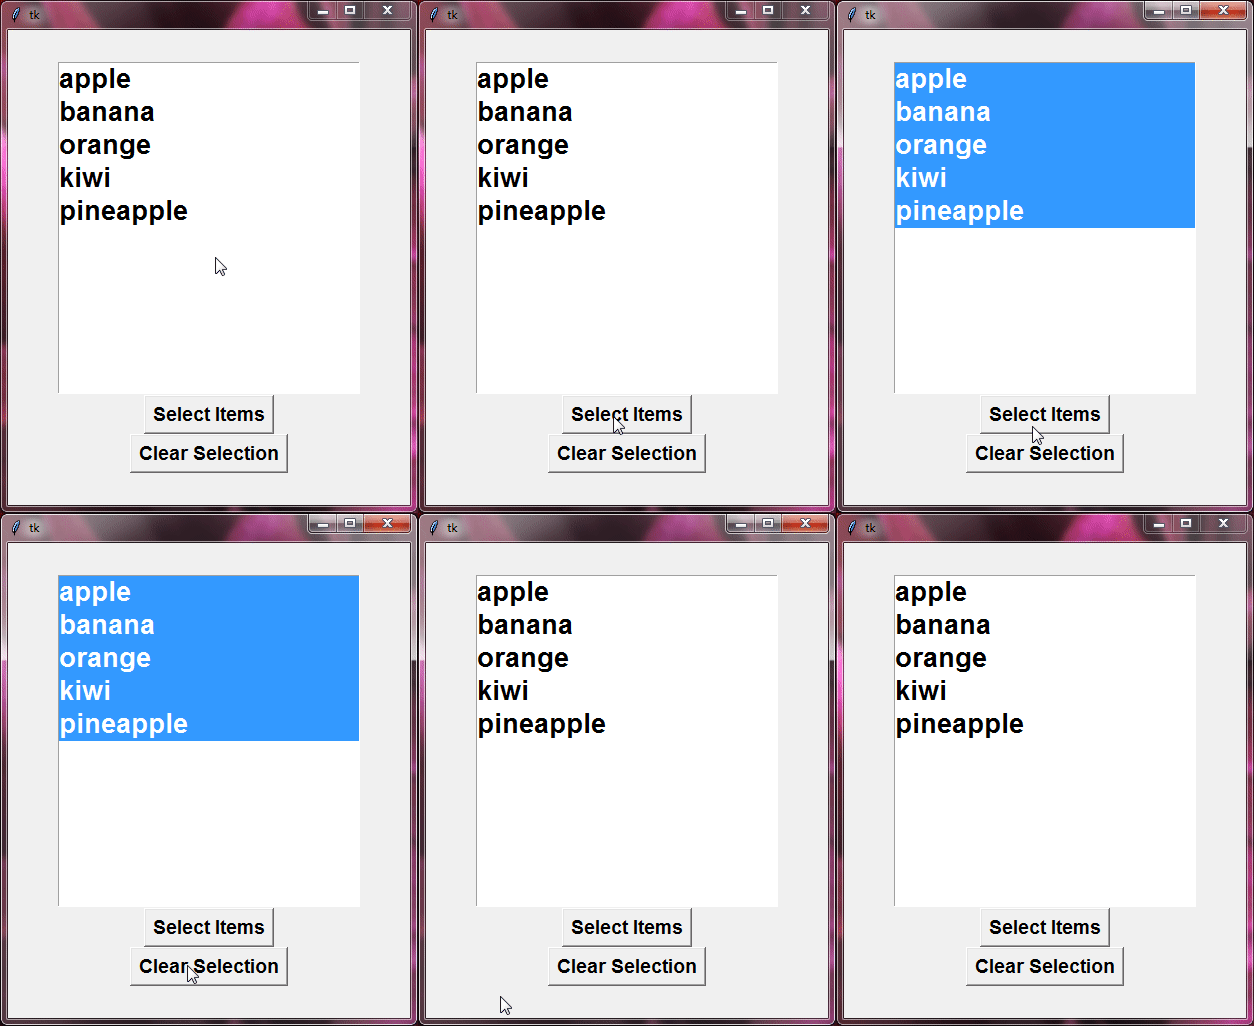
Let’s talk about selecting items in our listbox! With selection_set(), you can pick items manually, and with selection_clear(), you can unselect all the items you’ve picked.
Example:
from tkinter import *

root=Tk()
root.grid_anchor(anchor='center')

# this function is showing the use of selection_set method of listbox widget
def select_items():
    listbox.selection_set(0,'end')

# this function is showing the use of selection_clear method of listbox widget
def clear_selection():
    listbox.selection_clear(0,'end')

# listvar is the variable which is linked to the listbox
listvar=StringVar()
listvar.set(['apple', 'banana', 'orange', 'kiwi', 'pineapple'])

listbox=Listbox(root, height=10, width=20, listvariable=listvar, font="arial 20 bold", selectmode="extended")
listbox.grid()

# this button is used to invoke select_items function
select_items_btn=Button(root, text='Select Items', command=select_items, font="arial 14 bold")
select_items_btn.grid()

# this button is used to invoke clear_selection function
clear_selection_btn=Button(root, text='Clear Selection', command=clear_selection, font="arial 14 bold")
clear_selection_btn.grid()

root.mainloop()
Output:
Binding Events with Tkinter Listbox
By binding events to the listbox, you can make things happen when specific events take place, such as clicking on an item or pressing a key. Let’s dive in and learn how to do it:
from tkinter import *

def on_item_click(event):
    selected_item = listbox.get(listbox.curselection())
    label = Label(root, text=f"Selected item : {selected_item}", font="arial 20 bold")
    label.pack()

# Create the root window
root = Tk()
root.title("Event Binding with Listbox")

# Create the listbox
listbox = tk.Listbox(root)
listbox.pack()

# Add items to the listbox
listbox.insert(END, "Item 1")
listbox.insert(END, "Item 2")
listbox.insert(END, "Item 3")

# Bind the event to the listbox
listbox.bind("<<ListboxSelect>>", on_item_click)

# Start the GUI event loop
root.mainloop()
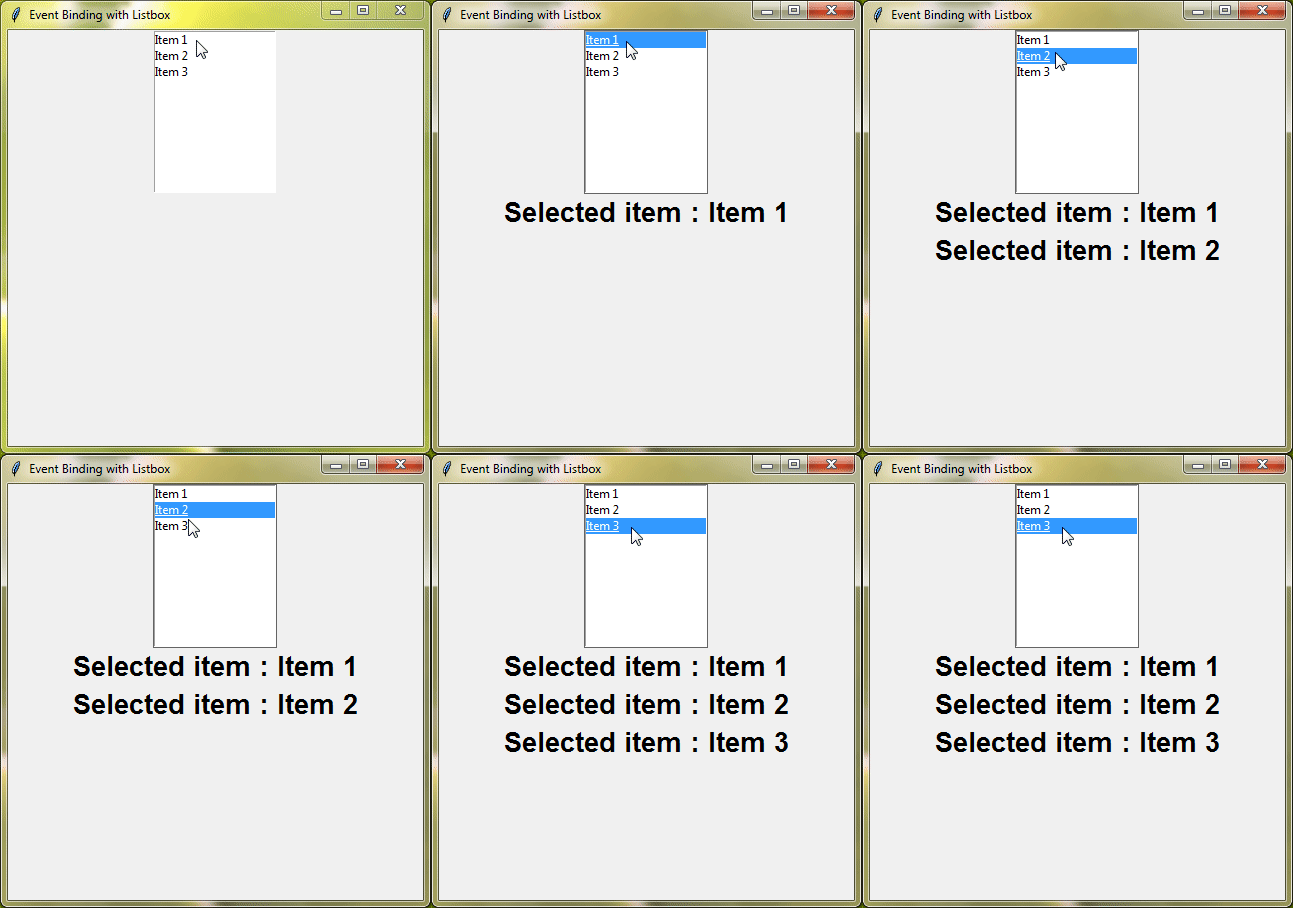
In the code, we make a function called on_item_click(). This function does stuff when you click on something in the Listbox. When you click on an item, it triggers the "<<ListboxSelect>>" event, and our function jumps into action because we connected it using the bind() method.
So, when you click on something, our function grabs what you clicked on using the get() method. Then, it shows what you clicked on in a message. Simple as that! Now, whenever you click on something in the Listbox, it tells you what you picked.
Output:
Conclusion
Well done on becoming a Tkinter Listbox pro!
You’ve learned how to make them, customize them, add or remove items, and even make them interactive by responding to events.
Now, go ahead, create your cool GUIs, and keep exploring Tkinter. The more you practice, the better you’ll get! I hope you had fun on this journey with us, and remember to stay cheerful as you continue coding in Python.

I needs to spend some time learning much more or understanding more.